Accessibility Tookit – Tool for Accessibility in the TeachCenter
Activate and use the Accessibility Toolkit
What is the Accessibility Toolkit and where can I find it?
The Accessibility Toolkit is a tool for improving accessibility in TeachCenter. It supports teachers in checking their courses for accessibility and in identifying potential problems.
Pleas note: The Accessibility Toolkit can only evaluate the TeachCenter course including the texts, labels and quiz questions, but does not analyse contents of files, TUbe videos etc.!
You can find a short version of the toolkit in the right side bar/block drawer of your course. Click on the arrow on the right to open the side bar with the activated blocks.
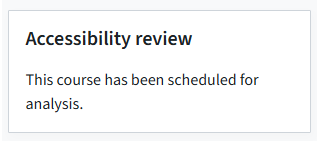
If this is not enabled in your course, please contact the TC support.
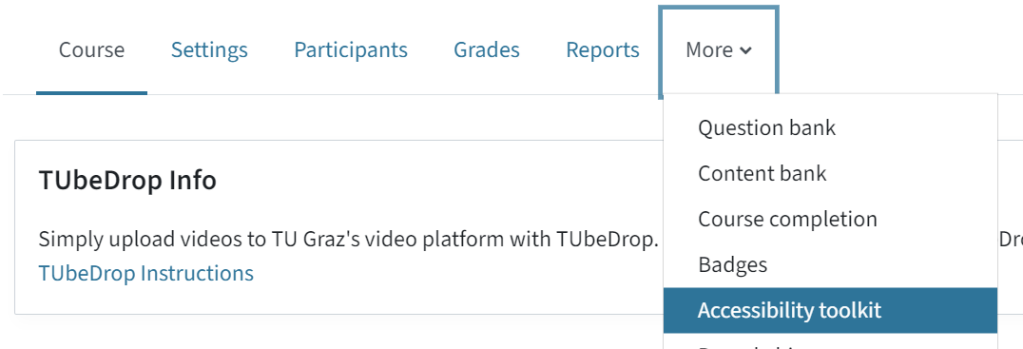
The detailed version of the toolkit with all its features can be found in the main menu > More > Accessibility toolkit.
Submitting for analysis
If you want to activate the accessibility analysis of your course, click on Submit for analysis in the block in the right sidebar.
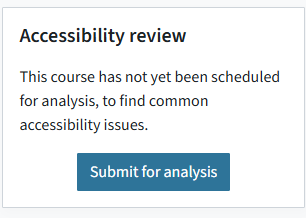
If this block is not yet activated in your course, please contact the TC support. Alternatively, you can also activate the analysis via the main menu > More > Accessibility Toolkit and click on Submit for analysis there.
Alternatively, you can also activate the analysis by going to the main menu, More – Tools for accessibility and there clicking Submit for analysis.
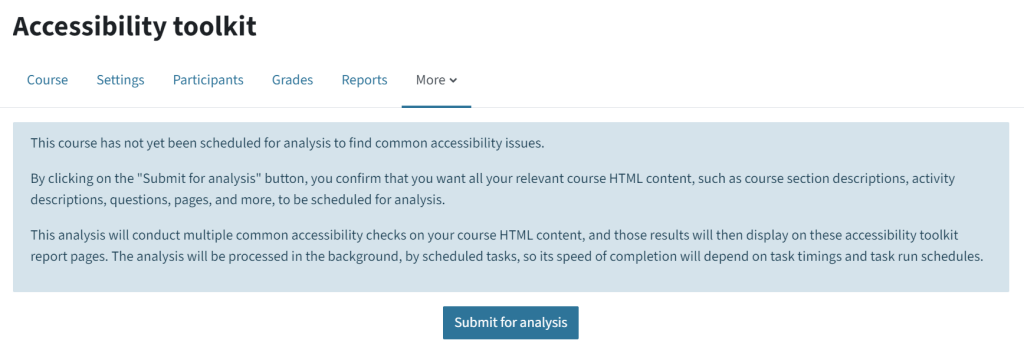
Your TeachCenter course will be analysed against a set of common accessibility guidelines in six categories (images, layout, links, media, tables, text). The Accessibility Toolkit then generates reports on any accessibility issues.
Once the analysis has been activated for the course, all updates, adaptations and additions within the course will be automatically analysed.
Viewing results
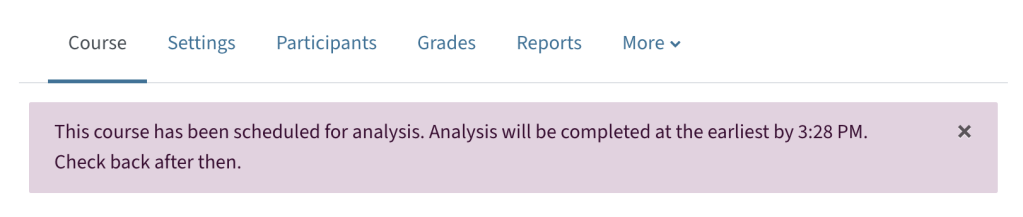
After a few minutes (depending on the size of your course) you will see a summary of the results in the block in the right sidebar. There you can see how many error messages there are per type (images, layout, links, media, tables, text).
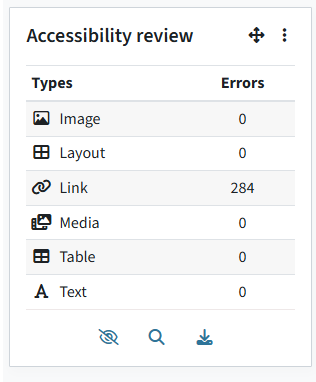
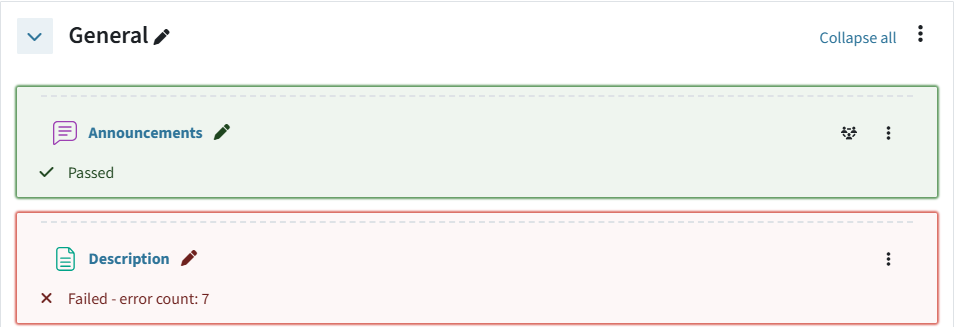
Using the button with the eye you can activate a view that shows directly at the activities in the course with colours and symbols which activities passed the test and where errors occurred.
The button with the download icon (third button) will download a PDF with the accessibility summary report on your course.
The statistics button (second button) takes you to a detailed evaluation where the individual errors are described in more detail. With this detailed view you can also go directly to the activities that caused error messages and correct them.
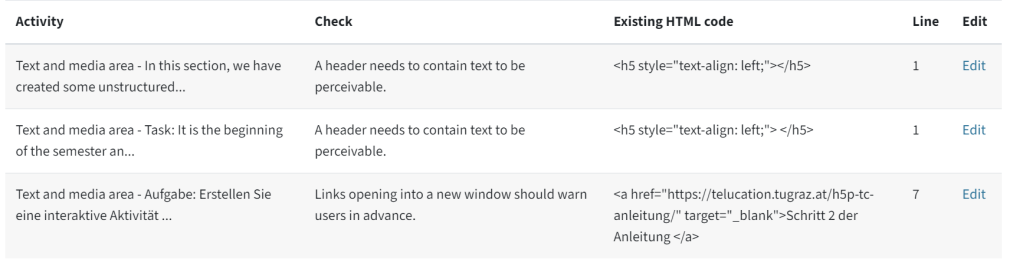
Note: You can also access this detailed evaluation via the main menu > More > Accessibility toolkit.
In this detailed evaluation you can switch between different menus:
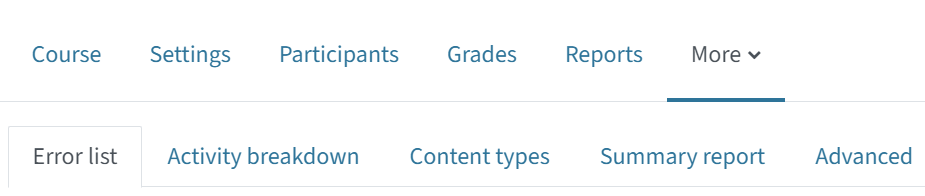
- Error list with direct links to the activities where errors have been detected and description of the errors
- Activity breakdown shows which activities are the most likely to cause accessibility issues
- Content types shows the number of errors per content type
- Summary report is a report consisting of the information from the first three categories.
Correcting errors
In the block in the right sidebar, click on the second button (statistics button) or navigate to the error list via the main menu (More > Accessibility toolkit).
There you will see a breakdown of the errors found as a table. On the right side of the table, you will find a link to the activity or element in order to correct the error directly (opens in the same window!).
Below you will find a selection of the most common error messages and possible solutions, sorted by content type.
Possible errors and solutions by content type
Links
- Error message: Link text should be descriptive and provide context about its destination. Solution: Link meaningful terms that indicate where the link leads to. Avoid linking words such as „here“. Explanation: People who use screen reader, for example, can export a list of links. Words such as „here“ do not indicate which page they will be redirected to.
- Error message: Links opening into a new window should warn users in advance. Solution: Include a note in the text that the link will open in a new window. Explanation: It can be confusing for visually impaired people when a link opens in a new window as they will have to search for the page.
- Error message: A link must contain text to be perceptible. Solution: In a label there is a link in HTML mode, but it is not linked with any text and therefore not displayed. Switch to HMTL mode of the editor and add the text or delete the link. Explanation: For people who use a screen reader, for example, it might be indicated that there is a link available, even though there is no link. People might think that information is not accessible to them.
Text
- Error message: Bold (b) elements should not be used; „strong“ should be used instead. Solution: In the text editor, switch to HTML mode (button with angle brackets) and substitute <b> elements for <strong>.
- Error message: Italic (i) elements should not be used; „em“ should be used instead. Solution: In the text editor, switch to HTML mode (button with angle brackets) and substitute <i> elements for <em>. Explanation: Screen readers ignore formatting like bold or italic, but these are often used to emphasise important information. Therefore, the elements „strong“ and „em“ should be used instead as they can also be read out aloud by screen readers.
Layout
- Error message: No headers make content less structured and harder to read. Solution: Use heading formats in longer texts. Use the defaults formats in the editor or add headings tags like <h3> in HTML mode. Avoid making headings only bold or underlined, as this will not mark them as headings. Explanation: Headings format can be recognised by assistive technology. Otherwise, visually impaired people do not know where headings are in a text. Headings can also be used by assistive technologies for navigation so that people can navigate to specific parts of a text. Structured text is also generally easier for people to read than long continuous texts.
- Error message: A header needs to contain text to be perceivable. Solution: In the editor, switch to HTML mode (angle brackets) and look for the empty element, e.g., <h3></h3>. Delete this element or add a heading text. Explanation: Heading formats can be recognised by assistive technologies. If a heading tag is empty, one might think that important information is missing.
- Error message: Headers following after H3 headers (the editor large header option) should not break the page heading hierarchy. Solution: Switch to the HTML editor (button with angle brackets) and check the correct sequence of heading formats, namely <h1>, <h2>, <h3>, <h4> etc. For example, an <h5> element should not follow a <h3> heading. Explanation: Headings can be used to navigate a text. If the sequence of heading formats is not correct, navigation is confusing for visually impaired people who use assistive technology, or it might seem that part of the text is missing.
- Error message: The colour contrast between text and background is too low. Solution: Navigate to the text and media area and use the editor to color the text differently, or switch to HTML mode and define a different background colour. Explanation: If there is little contrast between the text and background, the text is difficult to read – especially for people with visual impairment or disabilities.
Images
- Error message: The alternative text ‚alt‘ for images should always be present for image elements, unless the images are purely decorative or have no meaning. Solution: Navigate to the text and media area via the link. Double-click the image and add an alternative text that describes the image. Explanation: People wo cannot perceive the images or can only perceive them to a limited extent (e.g., due to visual impairment) are dependent on an alternative text that describes the image.
- Error message: The alternative text ‚alt‘ for images should not be longer than the 125 characters allowed. Solution: Navigate to the label via the link. Double-click the image and shorten the alternative text. Explanation: Too long alternative text cannot be read by certain assistive technology. The 125 characters comply with an accessibility standard.
Tables
- Error message: Tables ideally should not be missing headers. Solution: Switch to the HTML mode of the editor and add a header to your table (external site) . Explanation: If a table contains row or columns headers, they must be marked as such. Tables are problematic for people who use screen readers, for example, as they cannot be grasped as a whole and can only be read out aloud line by line. If no headers are defined, it is not clear that a line or row contains titles.
- Error message: Tables should not have any connected cells. Solution: Create a table without connected cells or provide the information in a different way in case someone cannot perceive the table. Explanation: Because tables are only perceived line by line by people using screen readers, for example, connected cells might be confusing as they are not clearly assigned to a row/column.
- Error message: In tables, row or column ’scopes‘ (to assign rows and columns to each cell) should be declared. Solution: For each table header it should be specified (in HTML mode) what the header refers to (row, column etc.). You can find further explanations on W3schools (external site) . Explanation: Scopes indicate whether the heading refers to the column or row so that the context is easier to grasp for people using screen readers.
Media
The category Media would contain results of a video analysis. Since the TU Graz TeachCenter is not designed as a video platform, a direct upload of videos would cause problems. We therefore ask you to provide videos not directly via the TeachCenter but to use TU Graz TUbe (external site) , the video platform of TU Graz, instead.
To upload videos to TUbe you can use TUbeDrop. To have TUbeDrop activated in your TeachCenter course, please fill in the TUbe Services Form (external site) .
A step-by-step guide to TUbeDrop can be found on TELucation.
Help & contact
If something does not work as described, get in touch – we will look into it.
- tc@tugraz.at
- barrierefrei-studieren@tugraz.at
- Tips for accessibility in images (external site)
- Tips for accessible course layout (external site)
- Tips für accessibility in links (external site)
- Tips for accessible media (external site)
- Tips for accessible tables (external site)
- Tips for accessible texts (external site)