Webex for teachers
Before the first use
Create a Webex account
- To activate your access to Webex, navigate to the Webex sign-up page (external site) .
- When creating an account, the data of the TU Graz user directory will be used. Due to licensing reasons, the e-mail address ending with @tugraz.at, as indicated in your TUGRAZonline business card, is ALWAYS used.
- We also recommend installing the desktop app (external site) . Once the app is installed, meetings started via the browser are automatically opened with the app.
Holding a video conference via Webex
Planning the meeting and inviting students
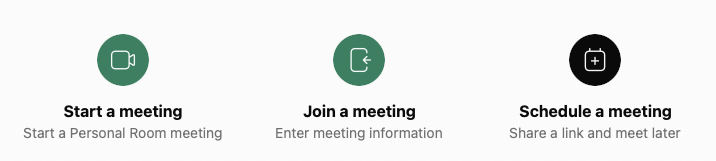
The easiest way to start a meeting is to open your Personal Room. To do this, open the desktop app or the TU Graz Webex page (external site) and click the calendar symbol in the menu on the left to go to the meeting options; click Start a Meeting.
If you use your personal room, the link is the following: https://tugraz.webex.com/meet/max.muster (replace max.muster with the first part of your TUGRAZonline address).
Alternatively, you can schedule an appointment:
- To do this, open the TU Graz Webex page, (external site) open the meeting tab ob the left and click Schedule.
- Enter the necessary information (at least the time and topic of the meeting and a password).
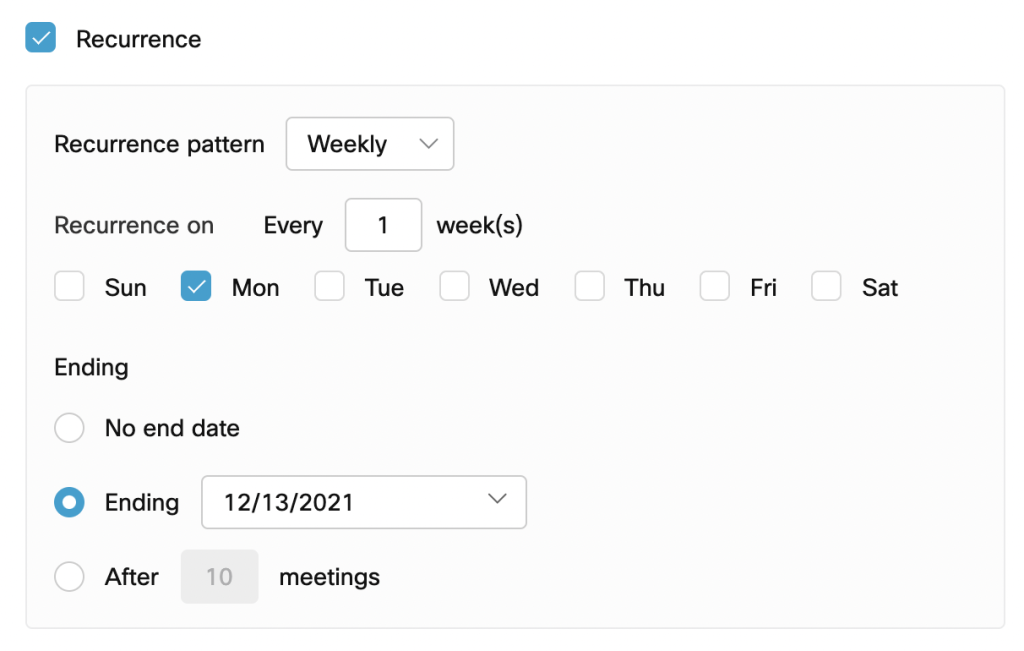
- Recurrence: Tick recurrence to create a recurring meeting series.
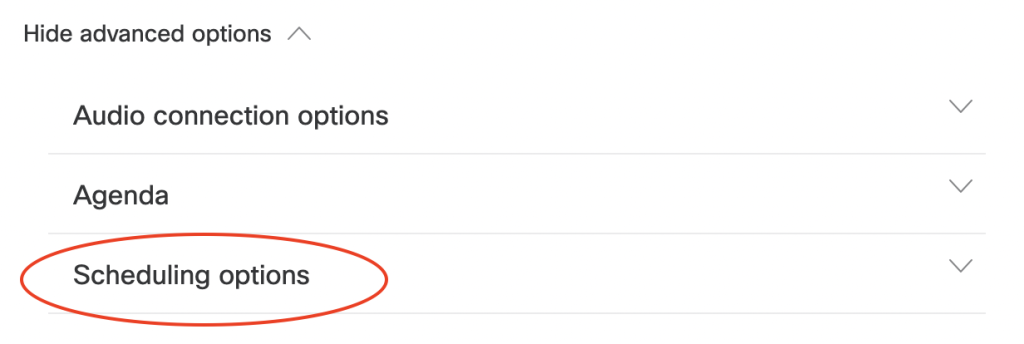
For more settings that may be helpful for teaching with Webex, see Show advanced options > Scheduling options.
- Cohosts: By default, meetings can have cohosts who have the same rights as you as the host, for example, when multiple teachers are hosting a course.
- Automatic recording: Tick this box to automatically record the meeting.
- Breakout sessions: Tick this box to be able to use breakout rooms later for group works. However, the breakout sessions can also be activated later.
- Unlocked meetings: Define whether participants can join the meeting directly or must first wait for you in the lobby, a kind of waiting room.
- Automatic lock: Define how many minutes a meeting should be locked after its start. Locked meetings can no longer be entered. This setting is suitable, for example, for submission meetings where you do not want to be disturbed by people arriving too late.
- Meeting options: Define which functions should be available for participants. For example, you can disable chat for everyone here.
- Attendee privileges: Define what participants are allowed to see. For example, you can hide the participant list or disable screen sharing for participants here.
Inform your students about the online course via email or the TeachCenter. Don’t forget to communicate the link to the Webex room or your personal room as well as the time.
Start a Meeting / Open your Personal Room
At the appropriate time, open your Personal Room or the link to the scheduled meeting.
You will see a preview:
- Re-select the video and audio source here if necessary.
- Click Test speaker and microphone to perform an echo test.
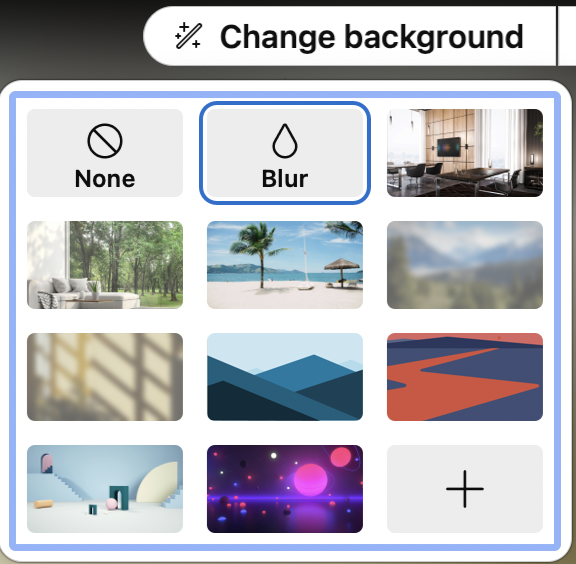
- In the upper right corner you can select a virtual background or mirror your own view.
- Turn on the microphone and, if desired, the camera and click Start Meeting again.

Wait for the students to enter the room or let the students in from the lobby if this waiting room has been activated (See „Unlocked meetings“ in the previous section).
- Wait for the students to enter the room or have students enter from the lobby if the waiting room has been activated (see „Unlocked meetings“ in the previous section).
For better connection quality, ask students to turn off their cameras. Use LAN instead of WLAN and avoid VPNs to ensure a better connection
Chat
During a meeting, you can open the chat window by clicking on the speech bubble at the bottom right.
- Select Send to everyone, to write in the general chat, or Send to > a specific person, to send a private message to that person.
- While you have shared your screen, you can show the chat via the bar at the top. To do this, hold the mouse at the top edge of the screen for a few seconds until the menu appears.
Select Send to > Everyone to write into the general chat or Send to > a specific person to send a private message to that person.
While sharing your screen, you can show the chat via the bar at the top. To do this, move the mouse to the top of the screen and stay there for a few seconds until the menu appears.
To save the chat, click File > Save As > Chat in the menu bar at the top.
Sharing your screen
Share content (e.g. presentation slides or your screen) by using the Share button. Click Share and select the program you want to share, or your entire screen.

The menu bar will then be expandable in the shared program or window if you move the mouse to the top of the screen and stay there.
- This way you can read the chat, mute yourself etc. during screen sharing.
- Participants still only see the shared program and not, for example, your chat!
- By clicking on Annotate, you can add annotations, text, shapes etc. An additional menu bar with tools opens.
- By clicking Assign, you can give participants the right to insert annotations, text, shapes etc. as well.
- Click Stop Sharing in the menu bar at the top of the shared window to stop sharing.

Sharing files
In the Share menu you will also see the Share File option. Sharing files is especially useful for editing files together with students.
The biggest differences to screen sharing are:
- The file will be displayed for you directly in Webex.
- Participants automatically have the right to annotate the file and can also take a screenshot of the screen via the menu bar.
Whiteboard
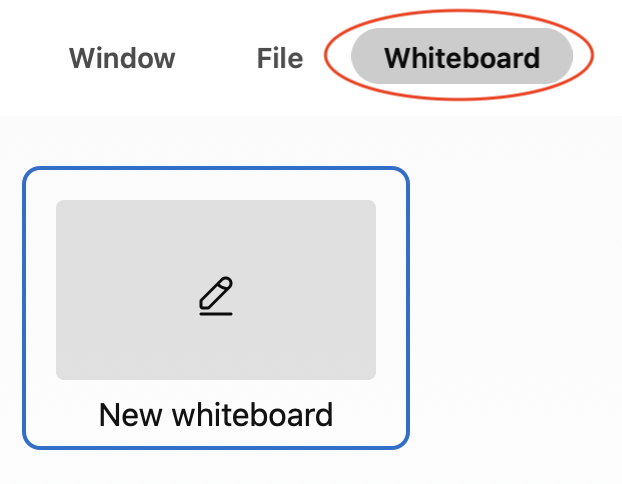
Click Share > New Whiteboard to open a new whiteboard that everyone can edit. You can also rename the whiteboard at the top center.
Use the tools from the menu bar on the left to insert text, shapes etc.

To save the whiteboard, you can click Capture Screen To Clipboard at the very bottom of the menu bar. This will create a screenshot of the whiteboard, which can then be saved.
To close the whiteboard, click the X in the top center.
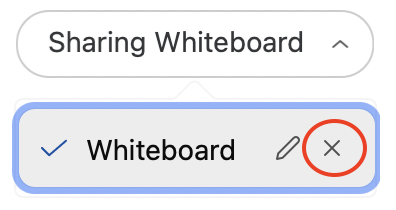
You will then also be asked if you want to save the whiteboard (as a PDF).
Polls
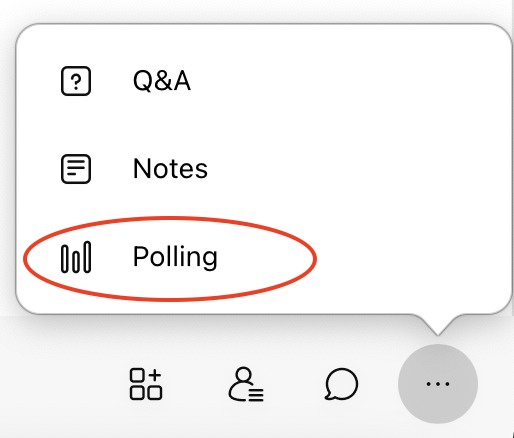
To create a poll, click the three dots > Polling at the very bottom right.
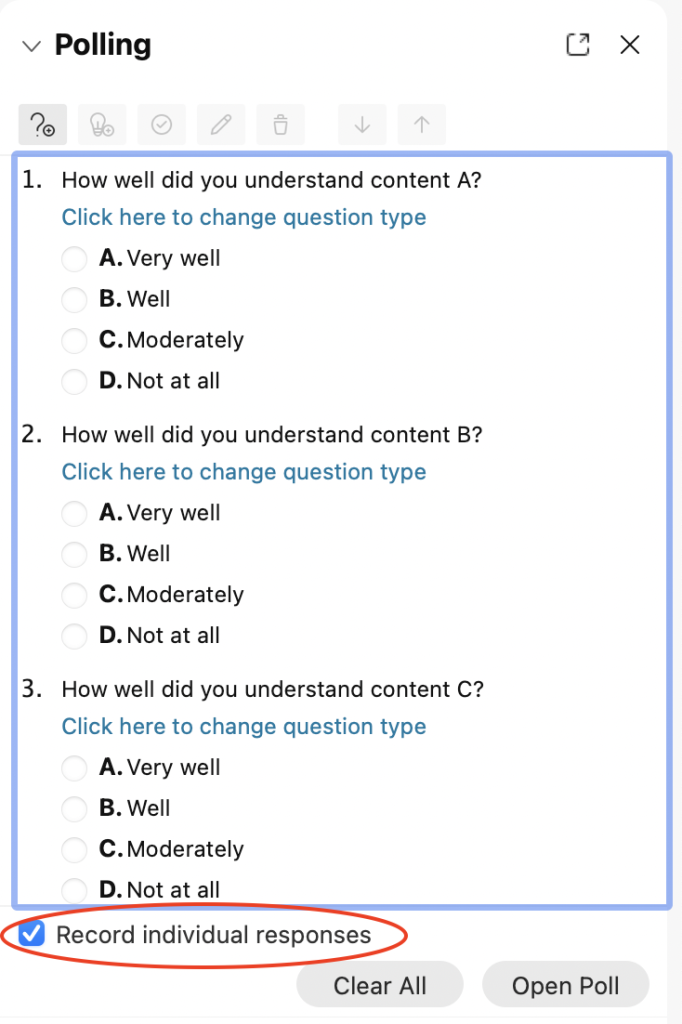
You can now add questions and answers via the menu bar (question mark or light bulb button).
Three question types are available:
- Single Choice (Single Answer)
- Multiple Choice (Multiple Answers)
- Short Answer
Tick Record individual responses if you want to record the results of individual participants (not anonymously).
Polls in Webex can also be prepared and saved (click the download button) and later imported again (click the folder button).
To start the poll, click Open Poll. You can also activate a time limit for the poll by clicking on the gear.
Close the survey by clicking Close Poll.
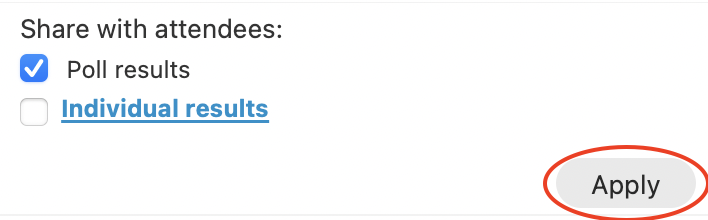
You can now share the overall results or individual responses (if activated). To do this, click Apply.
Raising hand
If you move the mouse over your own name in the list of participants, a new Raise hand button will appear. By clicking on it, you can virtually raise your hand. In the list of participants, you can see who is currently „raising their hand“.
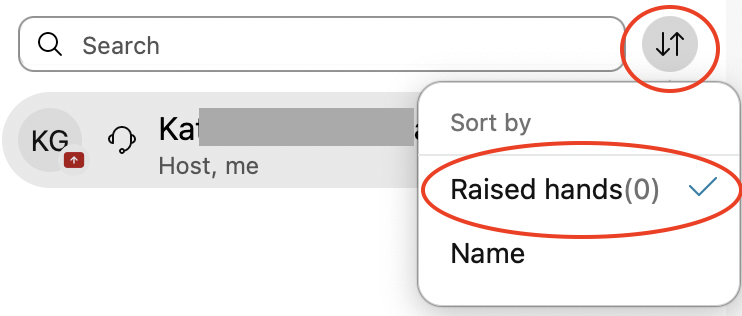
The list of participants can also be sorted so that all students with raised hands are displayed at the top. To do this, click the icon to the right of the search field and select Raised hands.
Taking notes
During a meeting, notes can be taken in the right-hand participant area at the bottom – either each person individually or a note taker can be appointed. Their notes are then visible to all. These notes can be saved at the end of the meeting.
If you want to designate a single person as notes taker for the meeting, you need to do the following:
- First, click on Meeting in the menu bar > Options.
- When the Meeting Options dialog box appears, the General tab are selected by default.
- Under Notes select the note-taking options > Single notes taker
In order for everyone to see the current notes, the person writing them must click Publish.
To save the notes (as .txt), click File > Save As > Notes in the menu bar at the top.
Recording meetings
Start the meeting as usual and klick on the Recording button in the menu bar.
Now you have two options:
- Do you want to share the recording later via a link? In this case, select Record in cloud. You will then find the recording on the Webex homepage (external site) under Recordings. Please note: Video files can take up to 24 hours to process. Recordings in the cloud are deleted after 30 days.
- Do you want to save the recording locally and upload it later to TUbe? In this case, select Recording on computer. You must then select a location in which the the recording will be stored on your computer.
Click Record to start recording.
- Click Record, to start the recording.
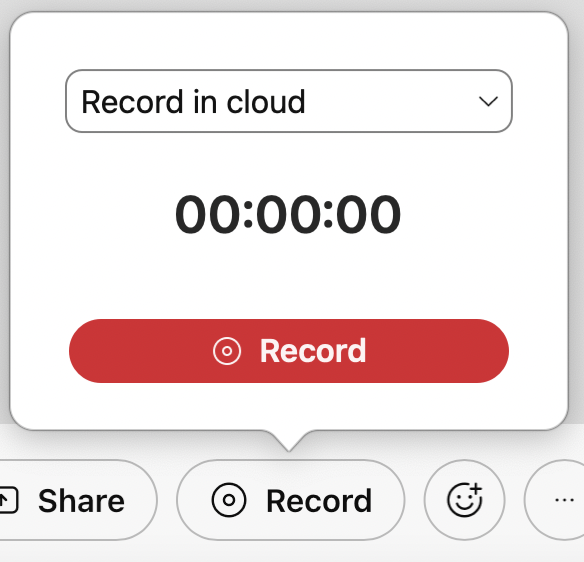
Click Pause or Stop when you are done.
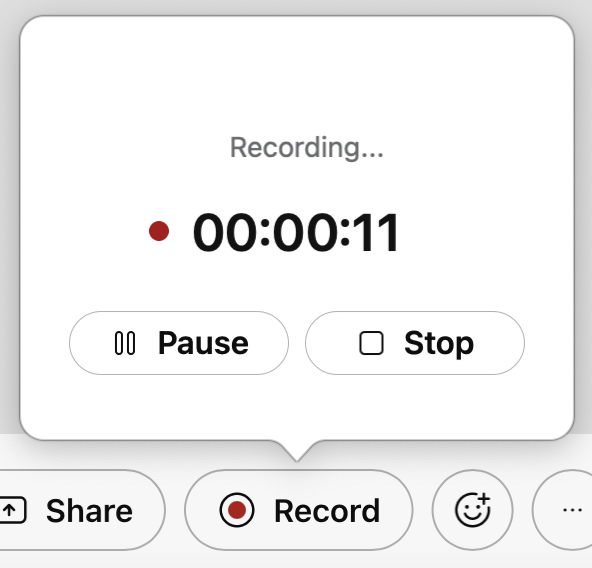
- Also click Pause or Stop, when you are done.
With the „TUbeDrop“ feature in your TeachCenter course, you can upload the recording to TUbe and make it available to your students.
- Please fill in the TUbe Services form (external site) to have TUbeDrop activated in your TeachCenter course. If there is no TC course for your course yet, a new course will be automatically created for you.
- To upload the videos on TUbe, follow the instructions in the TUbeDrop guide.
Ending or leaving meeting
To end the meeting for everyone, click the red X in the menu bar and click End Meeting.
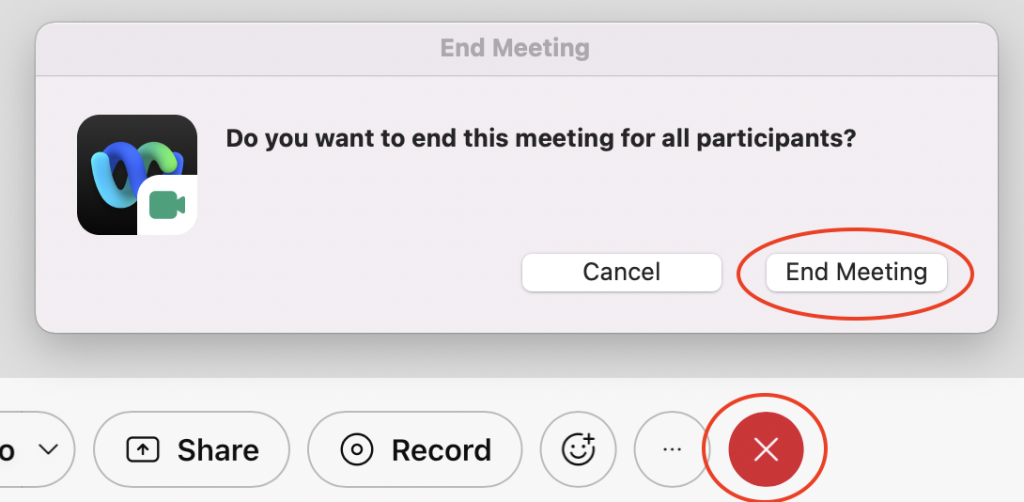
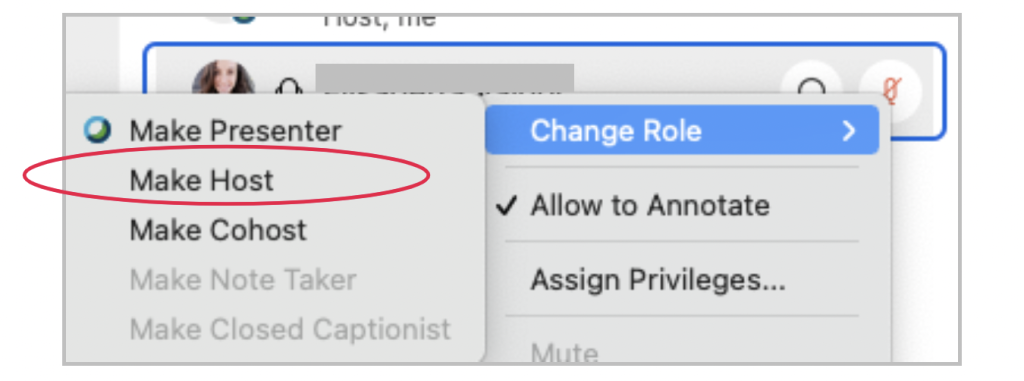
To only leave a meeting, transfer the role of the host to someone else first (right-click on the new host > Change Role > Make Host). Then click on the red X and Leave Meeting.
Using Breakout Rooms
Creating breakout sessions
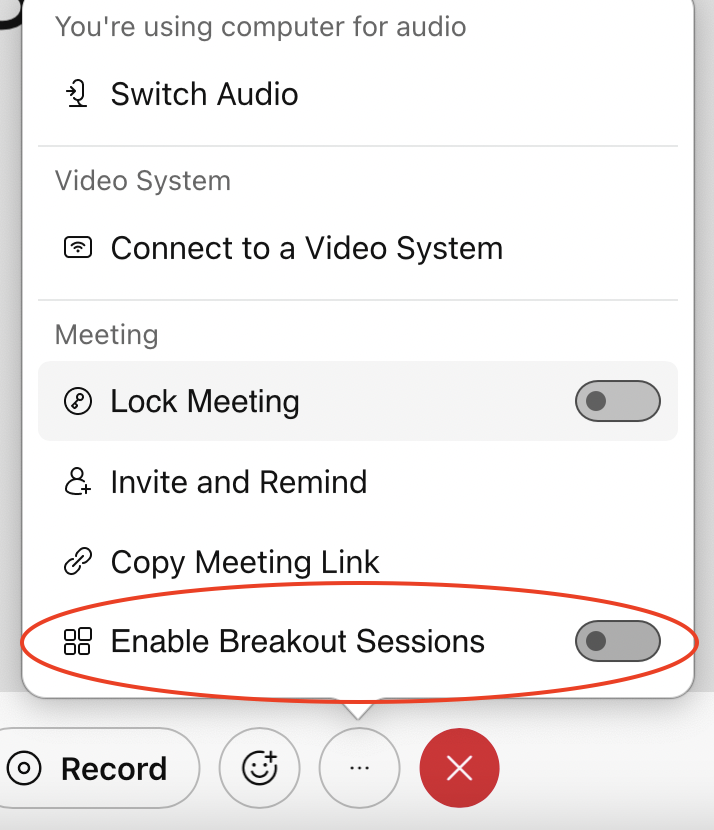
If you do not see the button Breakout sessions in the bottom bar yet, open the menu (three dots). Move the slider next to „Enable Breakout Sessions“ so that it turns blue. The new Breakout sessions button appears in the menu bar.
Click on this new button Breakout sessions.
Select, whether participants are
- automatically or manually assigned to breakout rooms, or allowed to assign themselves.
- how many breakout sessions are to be created.
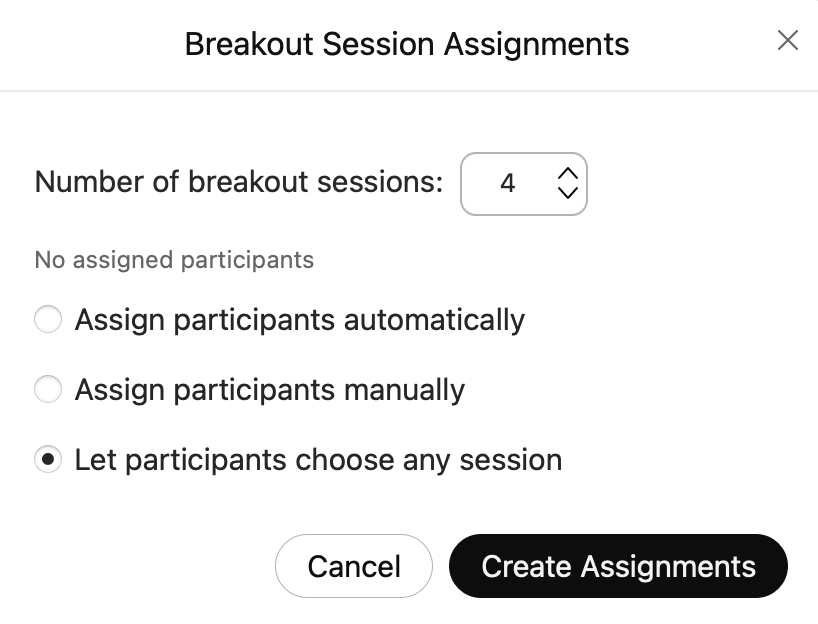
After clicking Create Assignments, you can rename the rooms and assign participants manually.
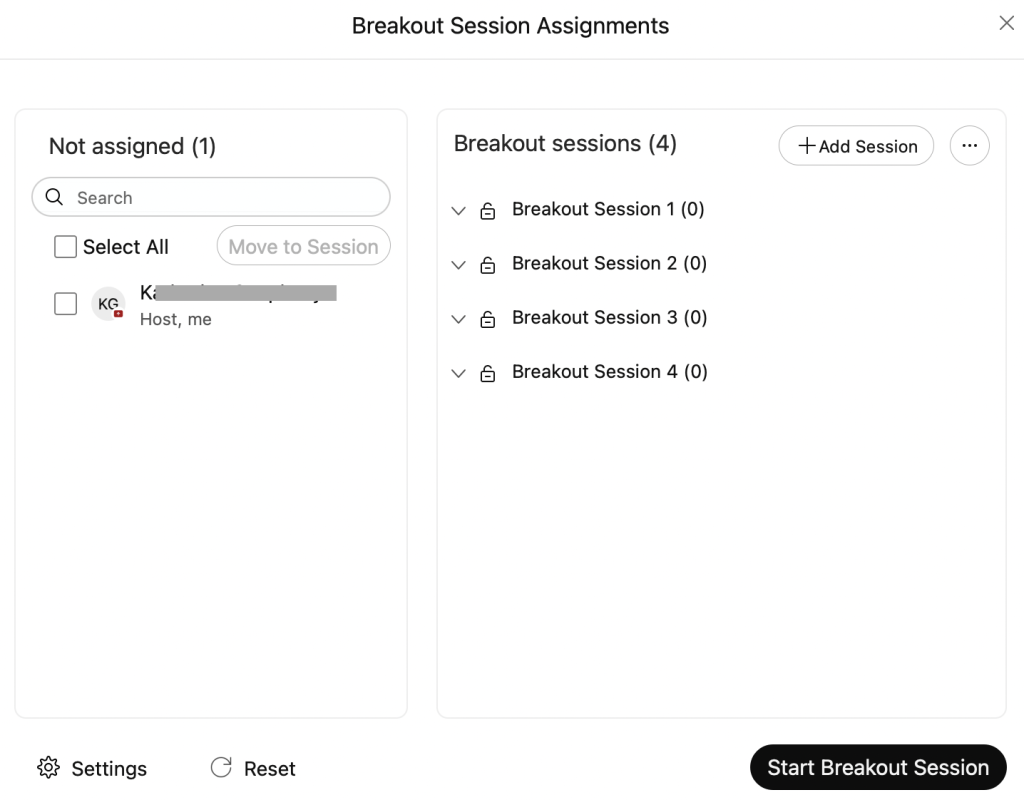
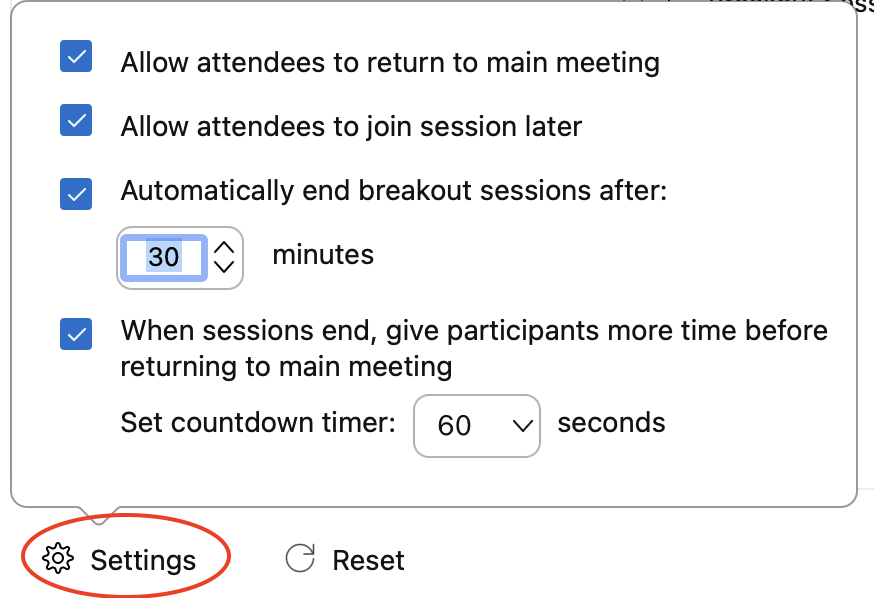
By clicking on Settings, you can change further settings:
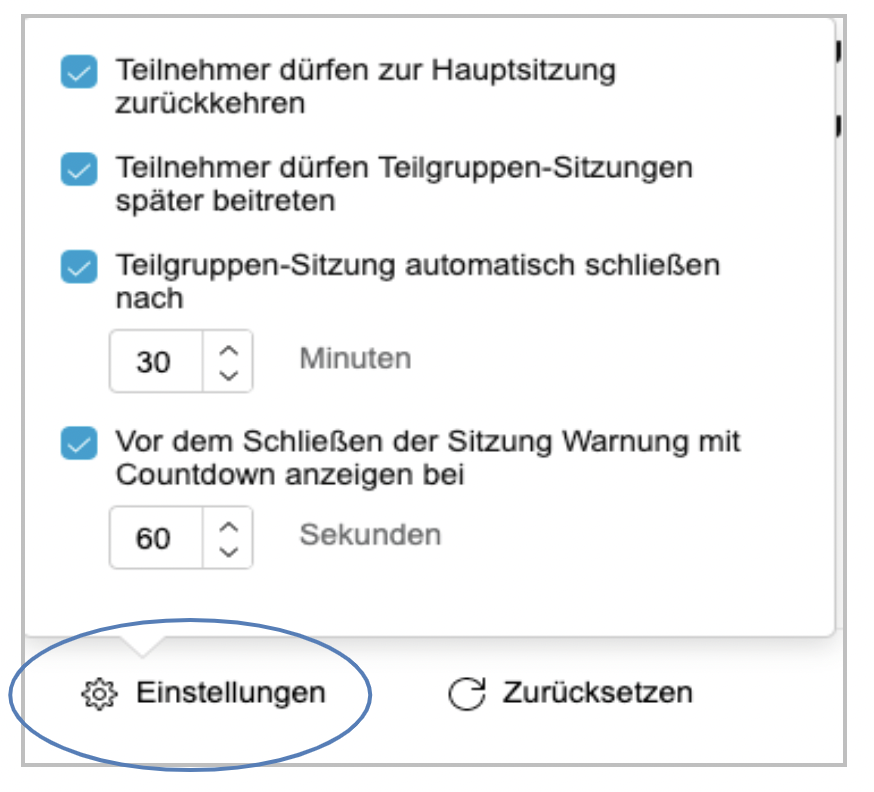
- duration of the breakout sessions
- whether participants are allowed to join the breakout session later
- whether participants are allowed to return to the main meeting independently
Joining a breakout session
Participants are automatically moved to breakout rooms when you assign them.
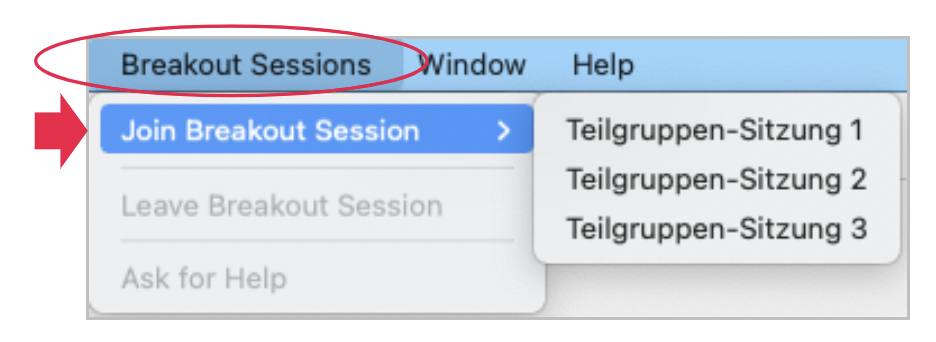
If participants are allowed to choose their own breakout room, they must click on Breakout Sessions > Join Breakout Session in the menu bar at the top and select the desired room.
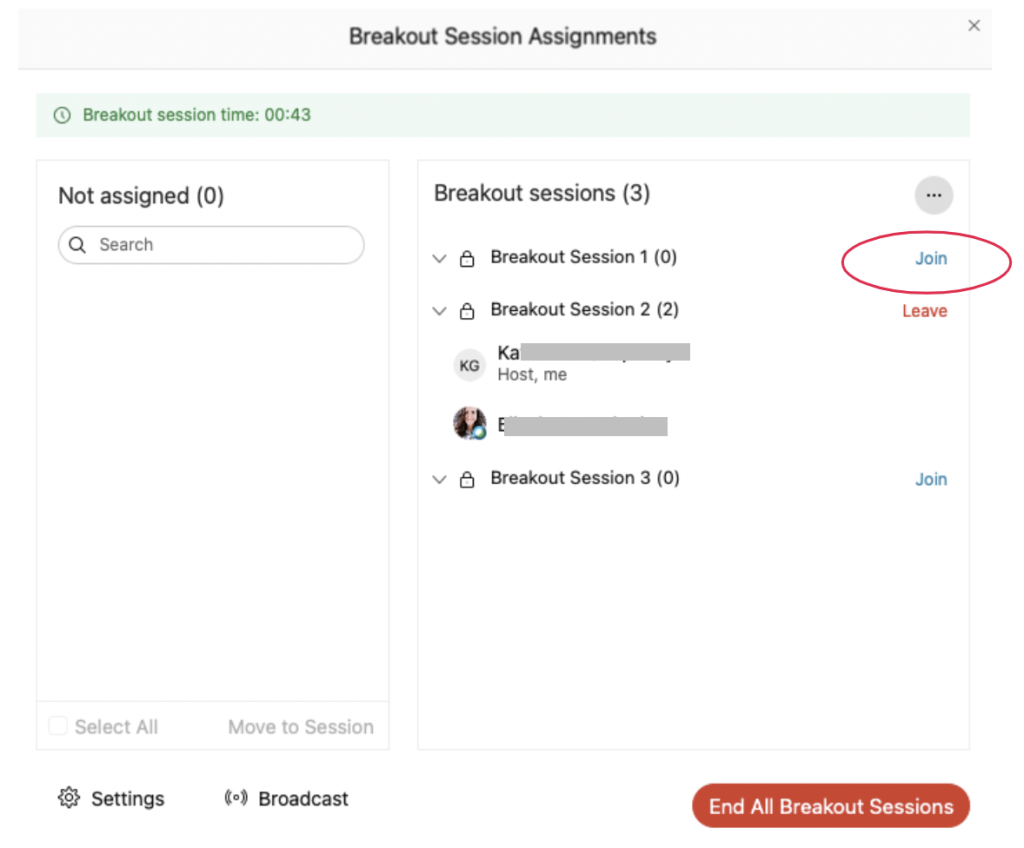
As a host, you always have an overview of the open breakout sessions and their participants in the menu on the right. You can join these sessions either there or via the Breakout sessions menu.
Settings and managing participants during a meeting
Moving participants to the lobby
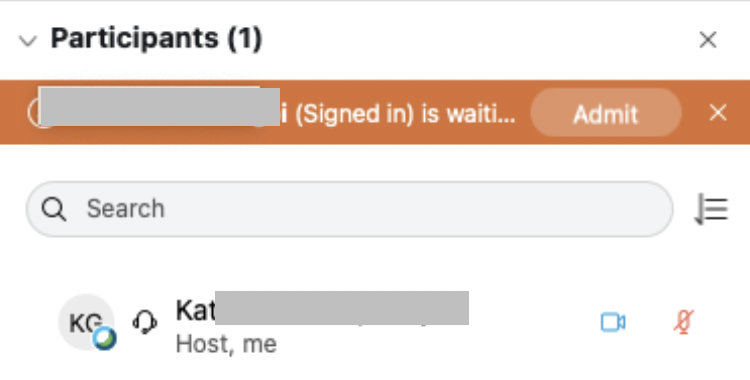
In the list of participants, right-click on the person and select Move to Lobby, for example for oral exams while teachers are consulting about the grade.
Above the list of participants you will see who currently is in the lobby. By clicking Admit, you can bring the person back into the meeting.
Changing participant privileges during a meeting
If you forgot a setting when scheduling the meeting, most settings can still be retreived or changed during the meeting.
- Meeting Info: In the top right corner you can retrieve the Meeting Info (meeting link, password etc.) at any time.
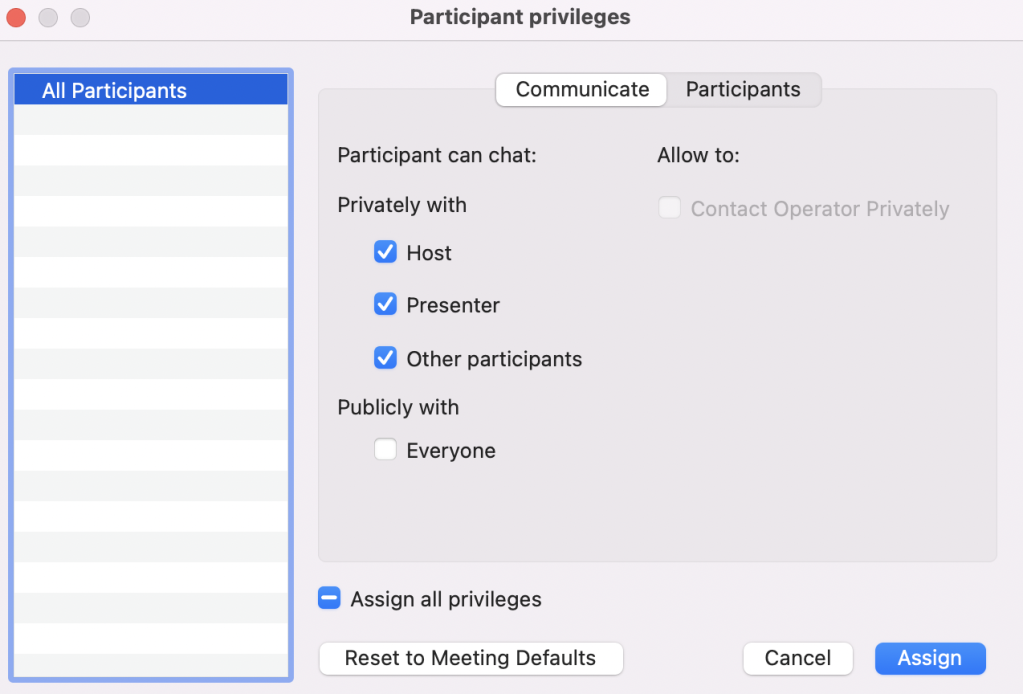
- Participant privileges: You can adjust the participant privileges during the meeting via the menu bar at the top > Participant > Assign Privileges.
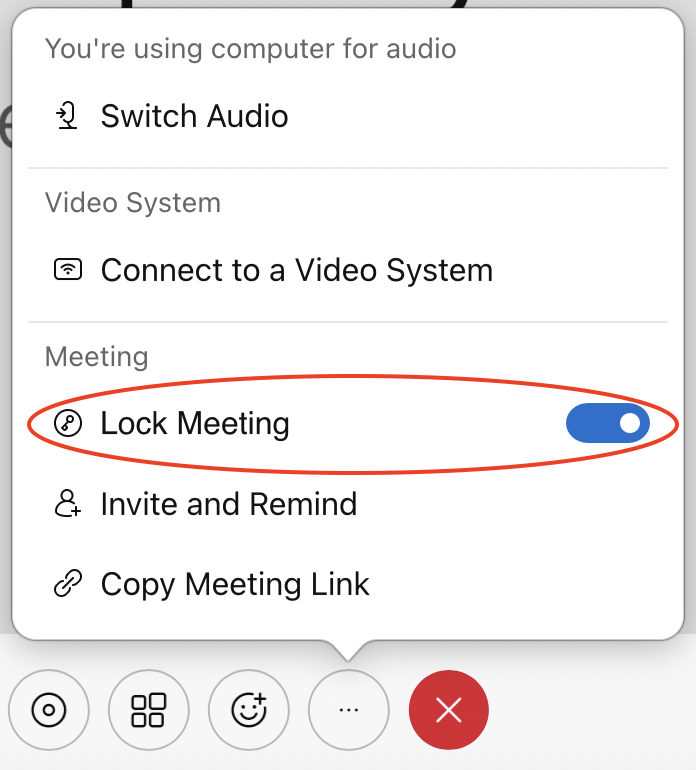
- Lock Meeting: By clicking the three dots in the menu bar at the bottom > Lock Meeting, you can manually lock and unlock the meeting at any time so that no one can join (e.g. after the start of an exam).
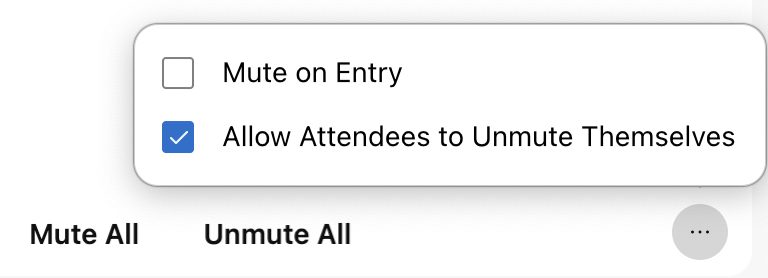
- Mute All: At the bottom of the participants list, all participants can be muted at once, e.g. at the beginning of a lecture. You can also specify that participants are automatically muted when they enter the meeting so that latecomers, for example, do not disrupt the lecture.
Help & contact
If something does not work as described, get in touch – we will look into it.