Creating and embedding interactive videos and learning content using H5P
A special content type is the interactive video, which allows you to add interactions such as multiple-choice questions and links to a video. There are many other interactive H5P activities (external site) , which you can all create and embed in the way described below.
Adding an H5P activity for self-assessment
When to use this feature
Use this feature if you want to create an interactive video or exercise that is only for self-assessment, and you do not want to save the students‘ answers or award points. Some content types are not meant to save points or contents but are only meant to present information.
This is the quickest way to create an interactive exercise or video with H5P. The H5P is created in a place called the content bank and is then embedded in the course.
Instructions for H5P activities where you can also see the students‘ answers and points can be found in Section 2.
Creating an H5P in the content bank
- In your TeachCenter course, go to More > Content bank in the main menu.

- In the top right-hand corner, click the button Add.
Please note: The rest of this section explains how to create an interactive video, but other H5P activities can be created in the same way. The editor might look different for each type.
- Search for Interactive Video.

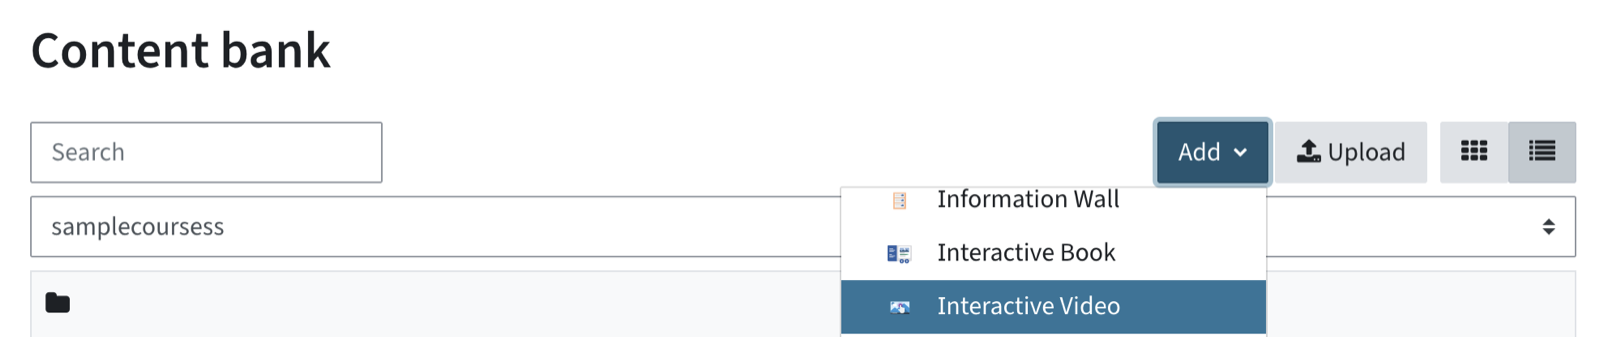
- Add a Title for the video.
- In the section Add a video, click on the + symbol to add a video file. Please do not upload MP4 files directly to the TeachCenter; instead, only use web links, e.g. to YouTube or TUbe videos. To use a TUbe video with H5P, please contact the TUbe team for a static link.
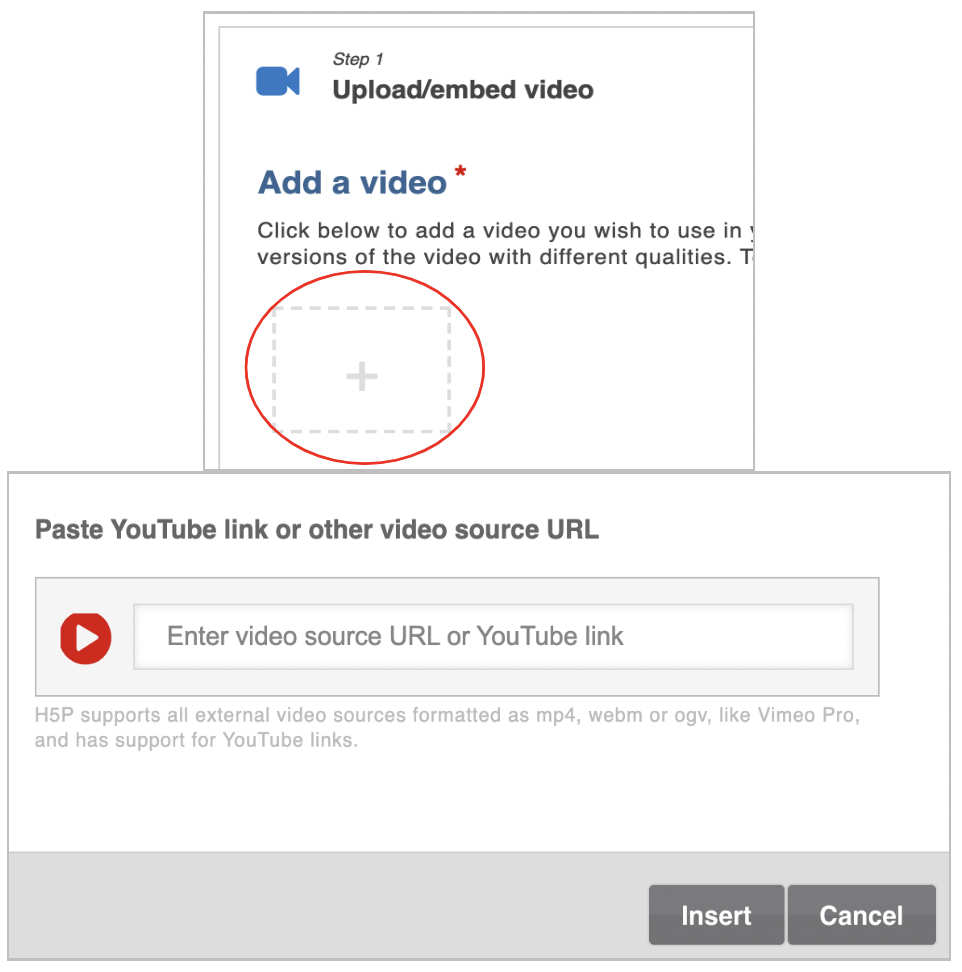
- Switch to Step 2 – Add interactions in order to add interactive questions or tasks (for detailed instructions, see section 2).
- In Step 3 – Summary task, you can add a final task for self-assessment, which will be displayed at the end of the video.
- Save the interactive video by clicking on Save above or below the video.
- You will see a preview; click Close. You can find and edit the H5P at any time in the content bank.
- To make the H5P available to the students in your TeachCenter course, you need to embed it in a text and media area.
Embedding an H5P in a text and media area
- To embed a previously created H5P video or another H5P exercise in a TC course, add a text and media area.
- Click the H5P button in the text editor.
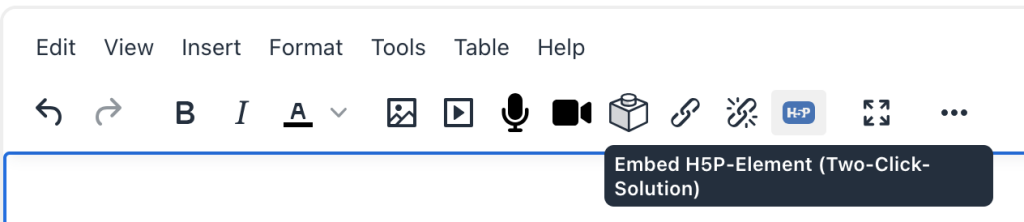
- Select the correct H5P from the list. The name is followed by (Content bank).
- Klicken Sie auf Inhalt einbetten. Sie sehen im Textfeld nun einen Platzhalter im Format {h5pcb:XXXX}
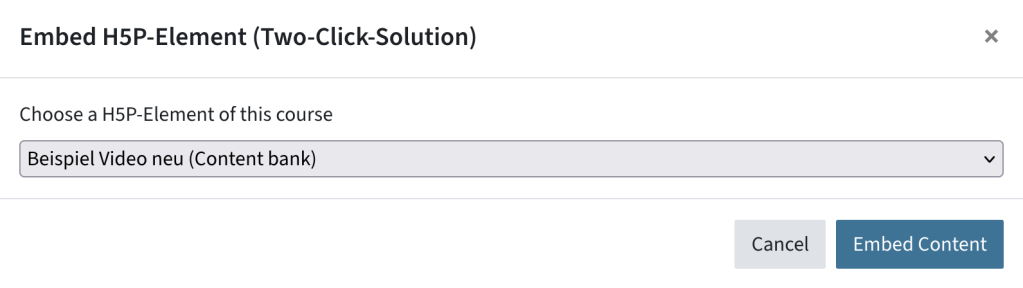
- Click Embed Content. You will see a placeholder in the format {h5pcb:XXXX}
Please note: If you are using a TUbe video, you and your students also need to be logged into TUbe for the video to work.
Adding an H5P activity with results and points visible to teachers
When to use this feature
This option must be selected if the H5P activity will be graded and if you want to view the students‘ detailed results and grade.
This option consists of more steps than the first option:
- The H5P video or exercise is created in the content bank.
- In a second step, the exercise created in the content bank is added to an H5P TeachCenter activity, so that the grades and answers can be saved and shown as part of the course grade.
- An optional third step is to embed the H5P in the course and hide the actual activity that saves the grades and answers.
Creating an interactive video with submit screen in the content bank
Create an H5P video in the content bank as described in Section 1.
Please note: Not all content types support saving answers or grades. Some content types are only meant to present information.
The following steps are for an interactive H5P video:
In order for the students‘ answers to be saved, a submit screen must be activated, and the students must actively submit their answers.
By default, there is a submit screen at the end of the video, but you can add a submit screen at any other time in the video:
- Open the tab Step 2: Add interactions.
- Pause the video at the desired time.
- Click the green star at the end of the video.
- Click + Add submit screen at …
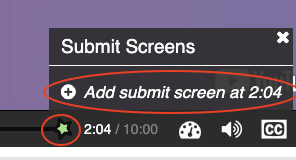
You can recognise the position of the submit screen in the video by a vertical line in the timeline and can view the submit screens by clicking on the green star.
If you want to remove a submit screen, click on the green star, click on the submit screen, and then click on the X to the right of the pop-up that appears.
Inserting a H5P from the content bank into a H5P activity
To save students‘ answers and grades and view them as a teacher, the H5P from the content bank must be added to an H5P TeachCenter activity.
- Add a new H5P activity to the course: Plus icon > Activity or resource > H5P.
- Name the activity.
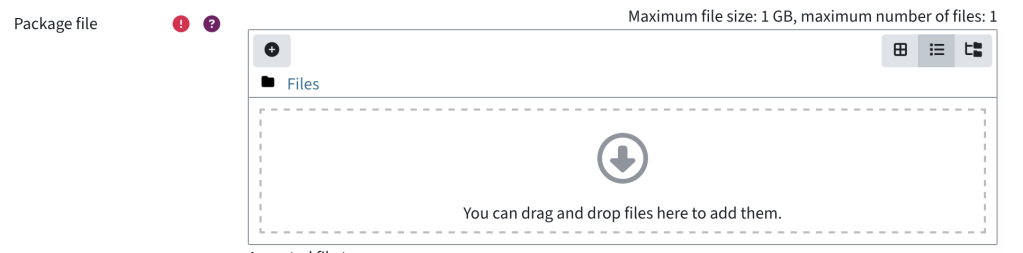
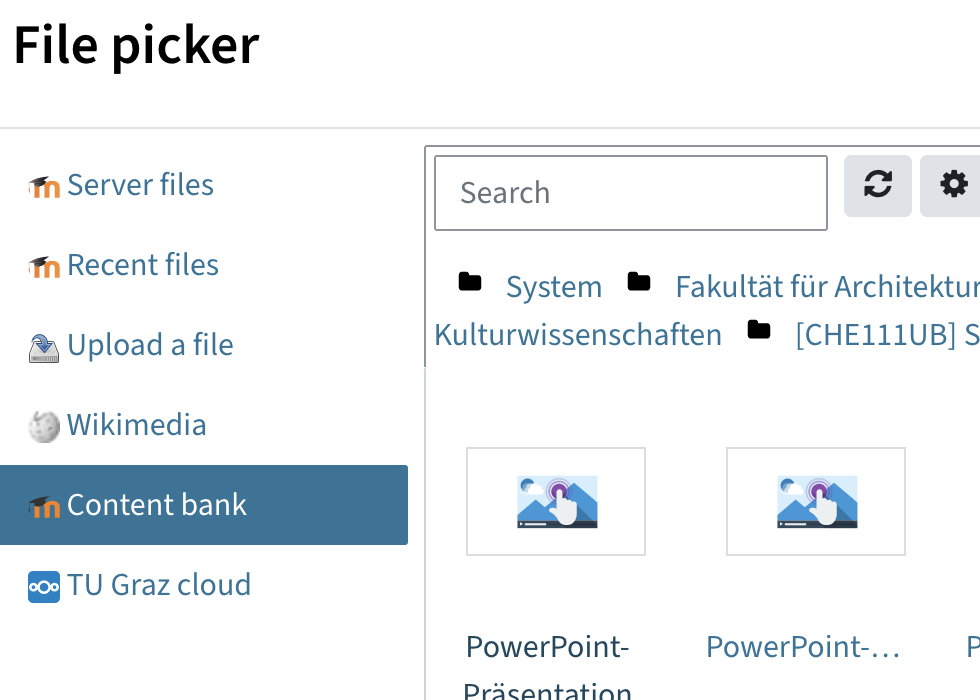
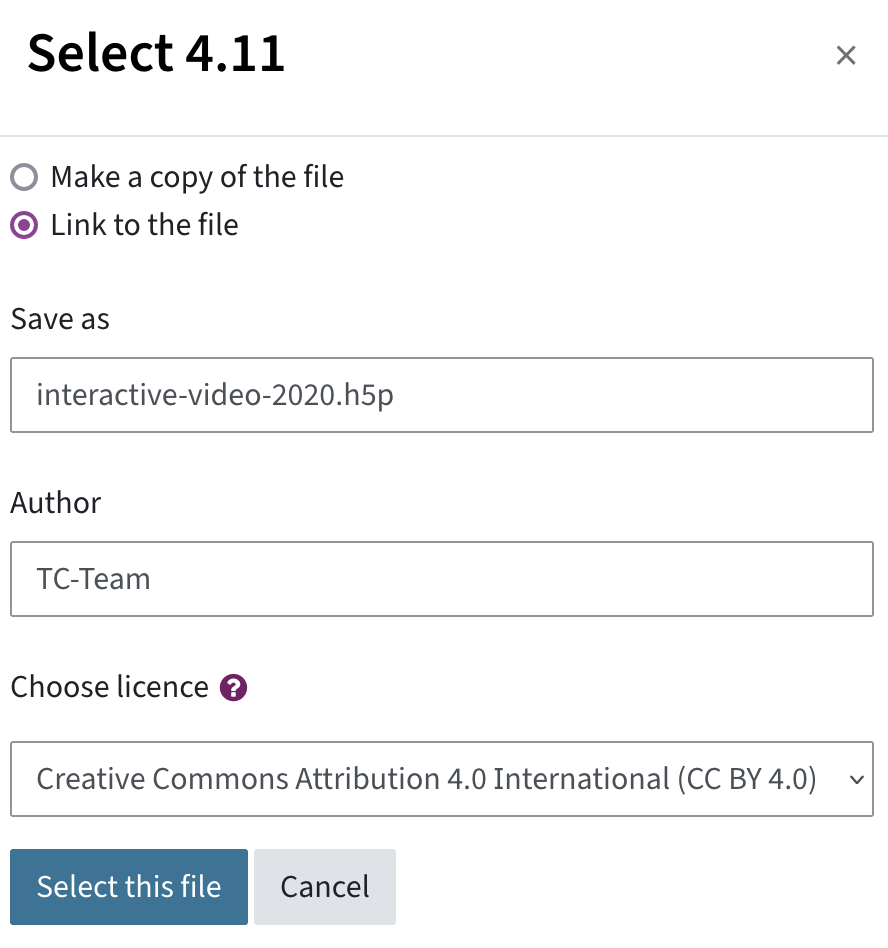
- In the section Package file, click on the plus icon. Choose the content bank as the folder to pick from and choose the H5P you have created there before. Leave the setting Link to file.
- In the Grade section, change further settings, e.g. the maximum grade and the grade to pass.
- Click Save and display.
Optional: Embedding the H5P in a text and media area
Students can click on the H5P activity in the course and watch the video or do the exercise. However, if you would like to make the H5P more prominent in your course, you can embed it.
- To embed a previously created H5P video or another H5P exercise in a TC course, add a text and media area.
- Click the H5P button in the text editor.
- Select the correct H5P from the list. It must NOT include (Content bank) at the end.
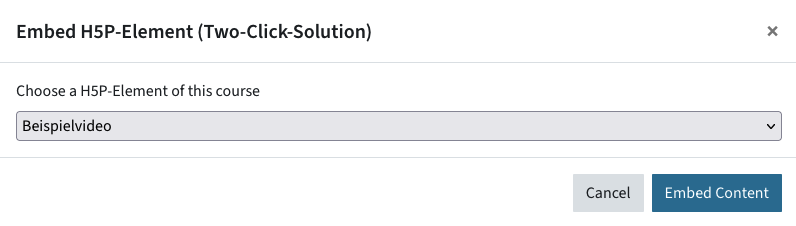
- Click Embed Content. You will see a placeholder in the format {h5pcb:XXXX}
- You can add text before or after the placeholder as in any text and media area. Save and return to course. The H5P video or exercise is now embedded in the course.
Please note: If you are using a TUbe video, you and your students also need to be logged into TUbe for the video to work.
View grades and detailed answers
Please note: Answers and grades can only be viewed if you have created a H5P activity as described in Section 2, and if students have submitted their answers correctly.
The total results (points) can be seen in the overview of grades in the main menu as with any other graded activity.
To view the detailed answers, go directly to the H5P TeachCenter activity:
- Click on the activity, then open the Attempts Report tab.
- In the overview, you can see the percentages the students received.
- Click View user attempts to see an overview of each attempt.
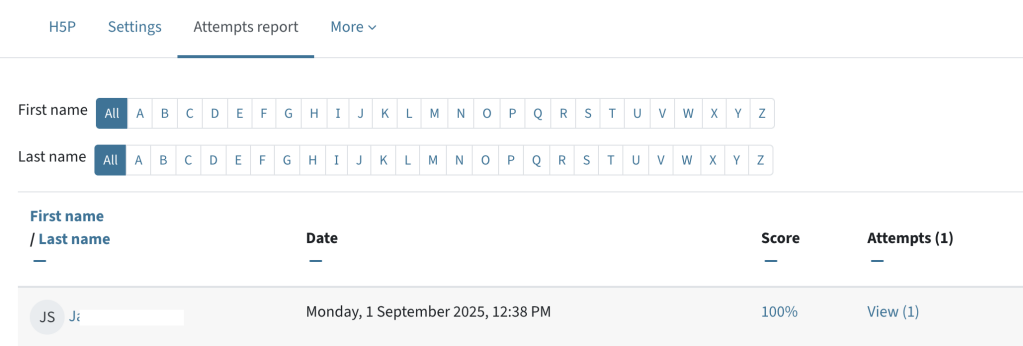
- Click View report to view the answers in detail.

Detailed instructions on how to add interactive questions to an H5P interactive video
Adding multiple choice questions
- Navigate to the video in the content bank and click Edit.
- In step 2, stop the video approximately at the point where you would like to include a question or an activity. The exact start time can also be adjusted later.
- In Step 2, select Multiple Choice in the toolbar.

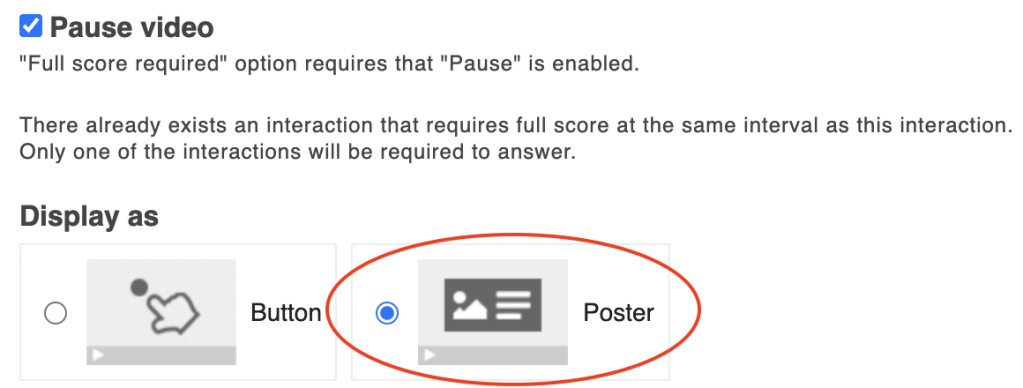
- Decide whether you want the video to pause when the interaction starts.
- Decide whether you want to show the interaction as a button or popup. We recommend: pausing the video, showing a popup, so that no question is forgotten. Interaction settings
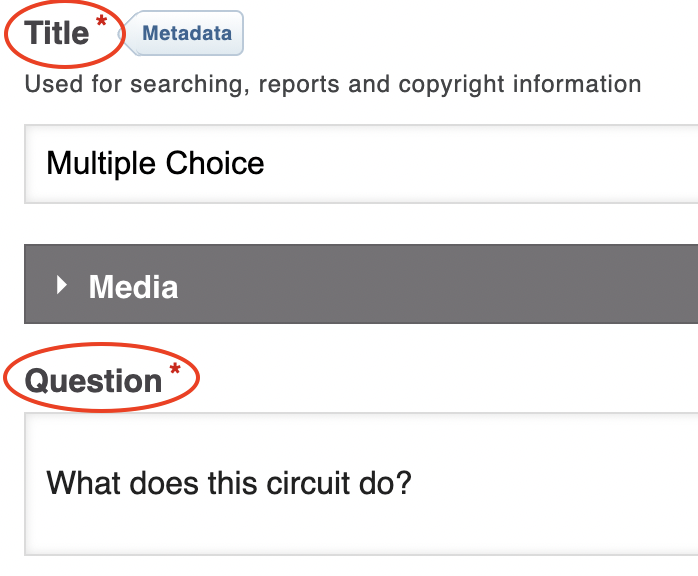
- Write a title (not visible for students) and a question into the fields.
- Enter the available answers (options) and mark the correct one(s). To add additional answer options, click Add option.
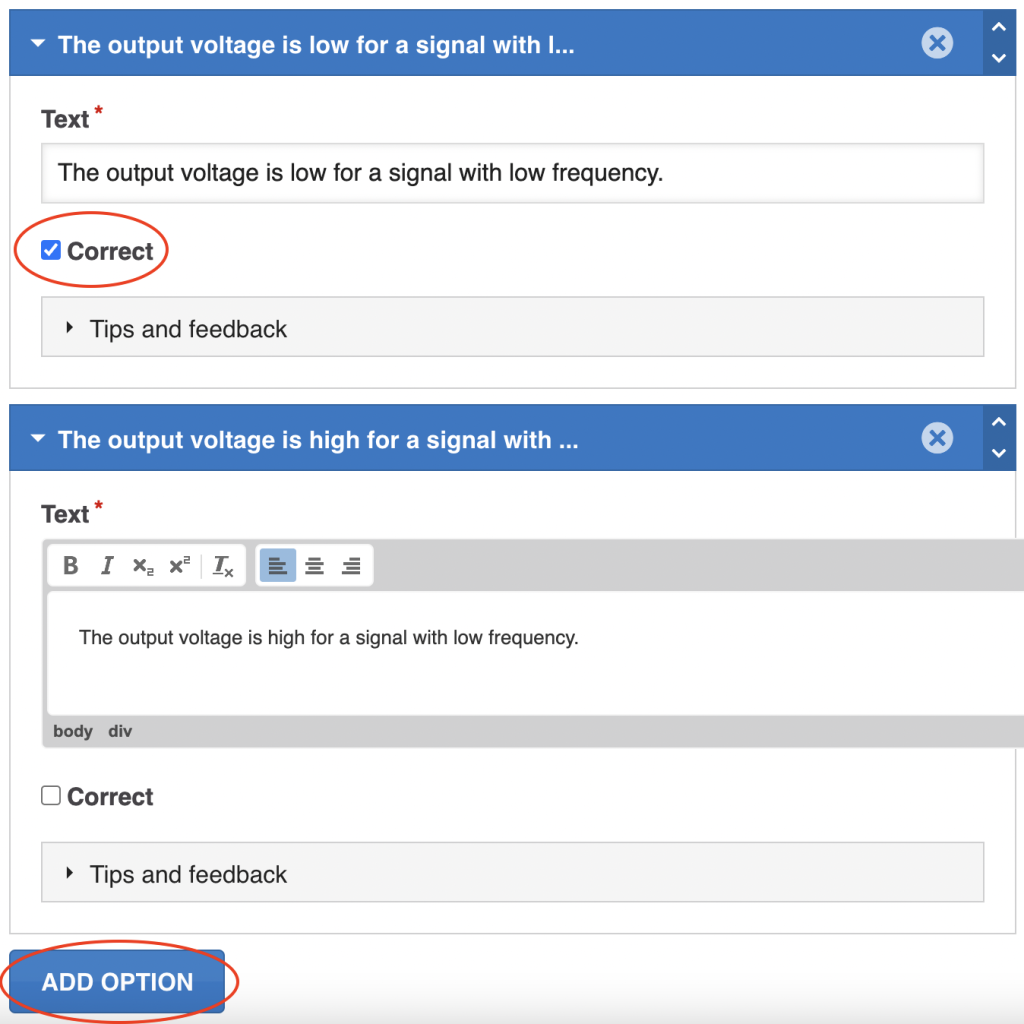
- In the Behavioural Settings, you can specify that the question can be repeated. This may be useful for self-assessment questions.

- Scroll to the end of the editor and click Done.
Adding a Statements question
In this interaction, students should select the correct statement from several options.
- Select the Statements icon in Step 2.

- Decide whether you want the video to pause when the question appears, and whether the question is shown as a button or pop-up. We recommend choosing to pause and the pop-up format.
- Write a name and a clear task description.
- Add multiple statements. The first statement is always the correct one. There is only one correct statement with this question type.
- To add additional wrong statement(s), click add statement(s).
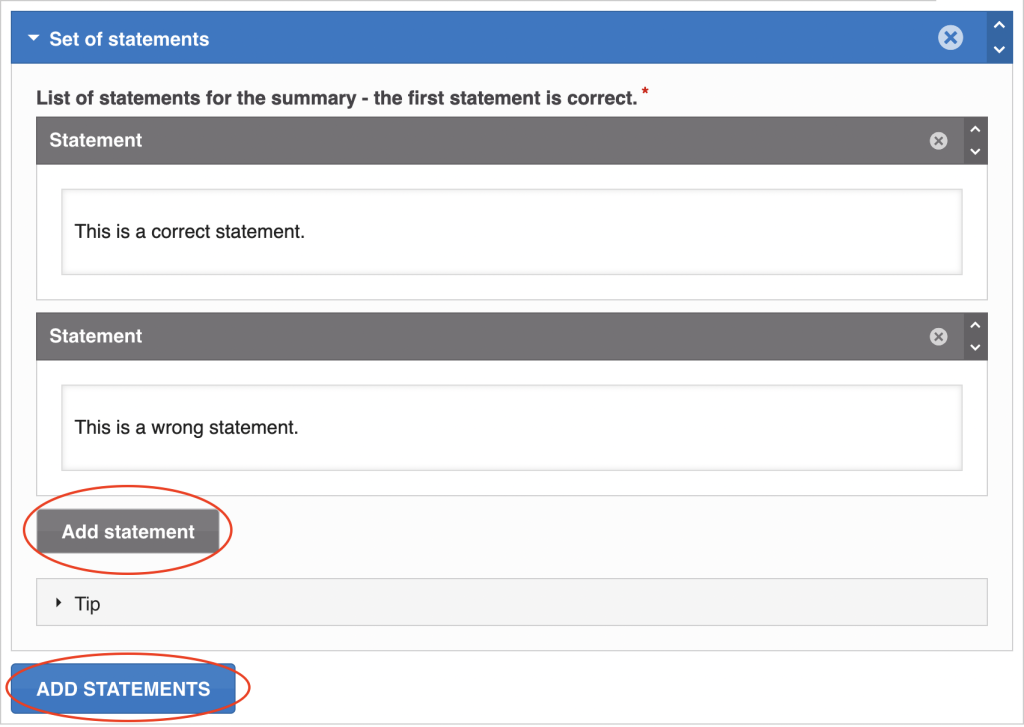
- Scroll to the end of the editor and click Done.
Adding a Drag and Drop question
For Drag and Drop questions, you first add the background, then the drop zones and the answers. In the final step, you define which answers belong to which drop zones.
- Choose Drag and Drop from the toolbar.

- Decide whether you want the video to pause when the question appears, and whether the question is shown as a button or pop-up. We recommend: pausing the video, showing as pop-up.
- Write a name (visible to students). This is where you can explain the task, for example.
- Select the tab Step 1 – Settings in the upper left half of the editor.

- Upload a background image by clicking + Add. If you want to edit the image (crop, rotate etc.), click Edit image. Under Task size, specify (in pixels) how large the background image should be.
- Select the tab Step 2 – Task in the upper right half of the editor.

- To place the drop zones, click on the concentric circle icon. Place as many drop zones as necessary.
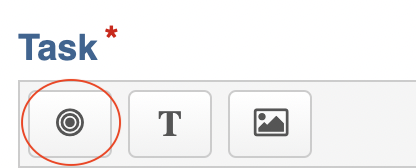
- Write the names of the zones into the text box and click Done.
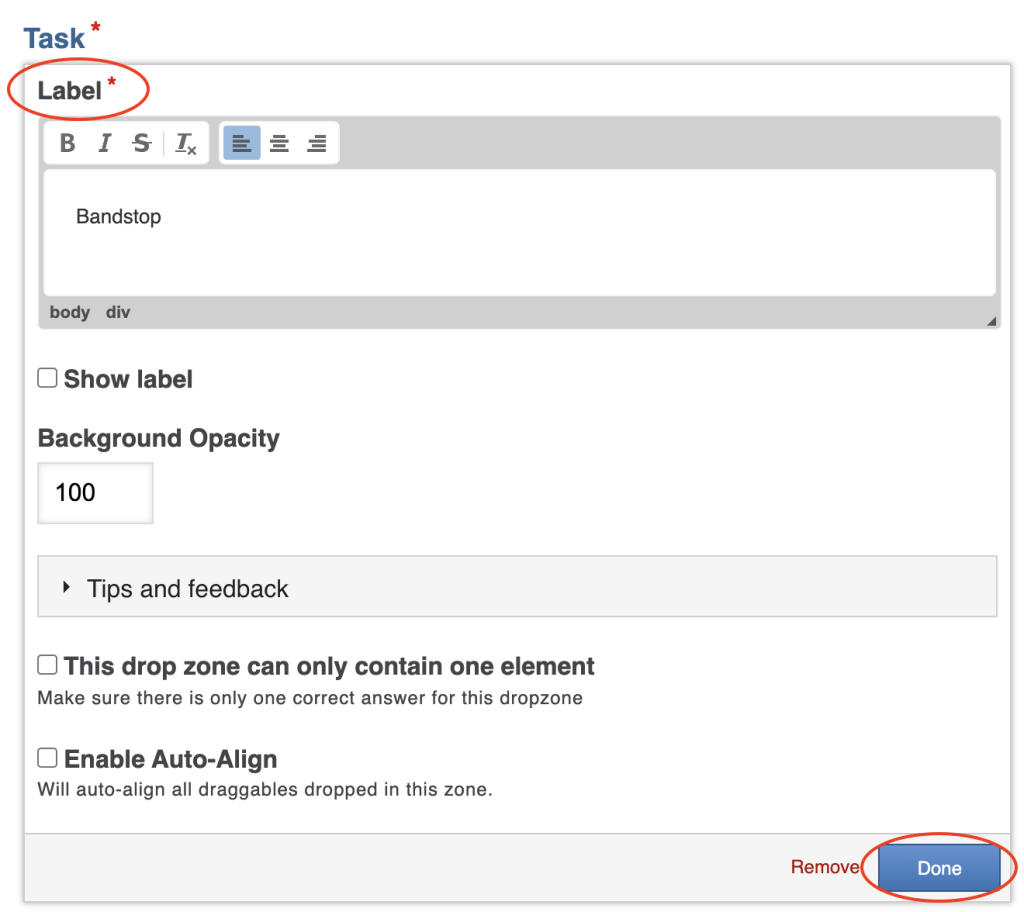
- Click on the drop zone inserted in the video to adjust the size and position. By double-clicking, you can edit the interaction again.
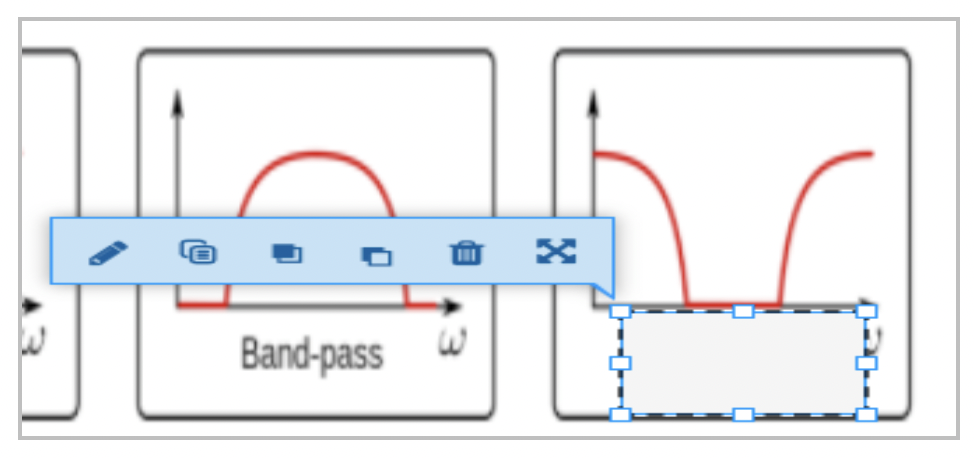
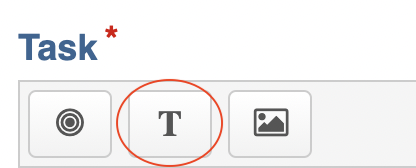
- Now click on the text icon to add answer options.
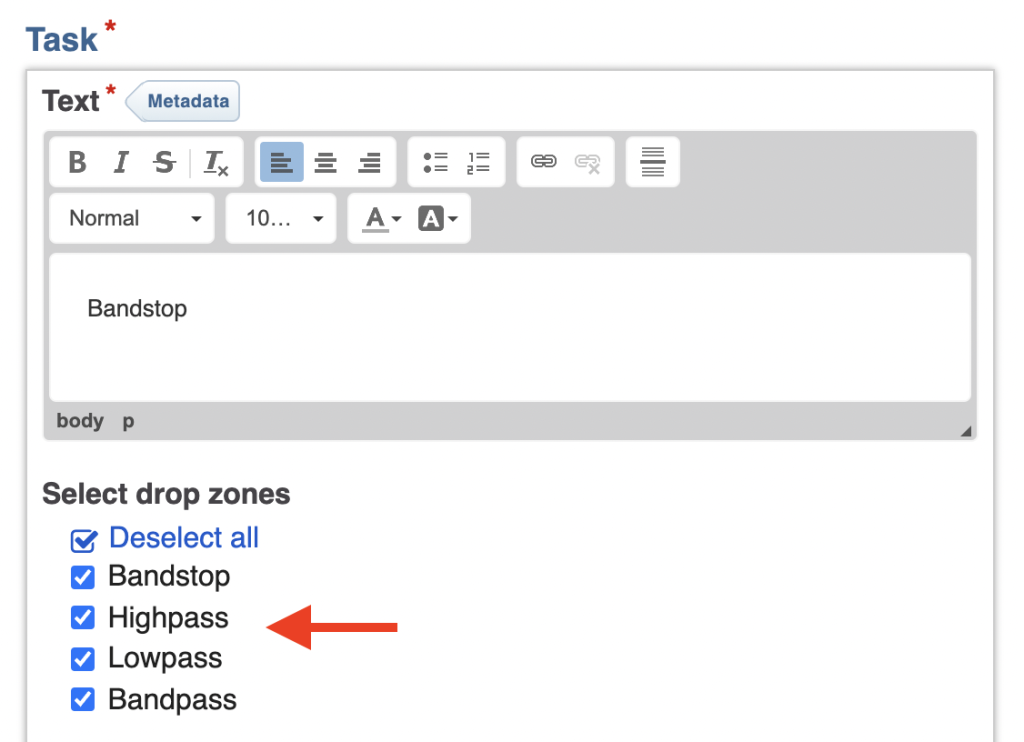
- Write a text (this is how the element will appear to the students) in the corresponding text field and select the drop zones where the element can be dragged – even the wrong ones.
- You can also edit and adjust this later in the preview window.
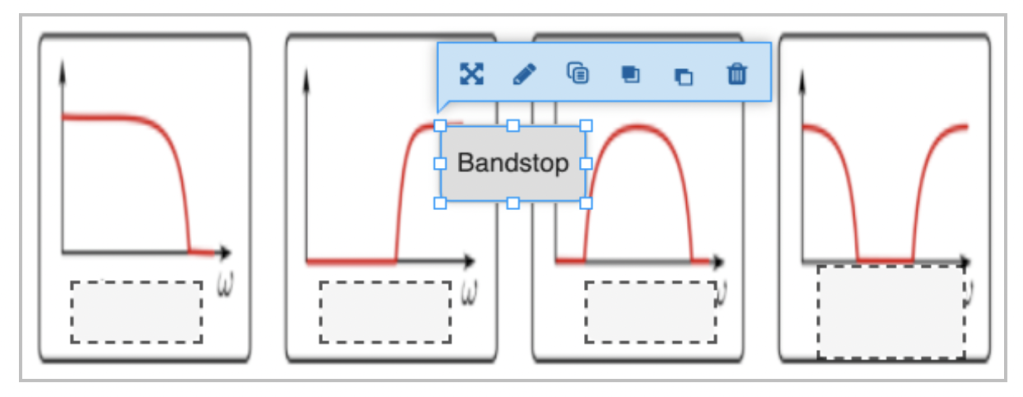
- To define which drop zone is the correct one for certain answers, double-click on the drop zone. Select the correct answer, check This drop zone can only contain one element (if applicable) and Enable Auto-Align. Click Done.
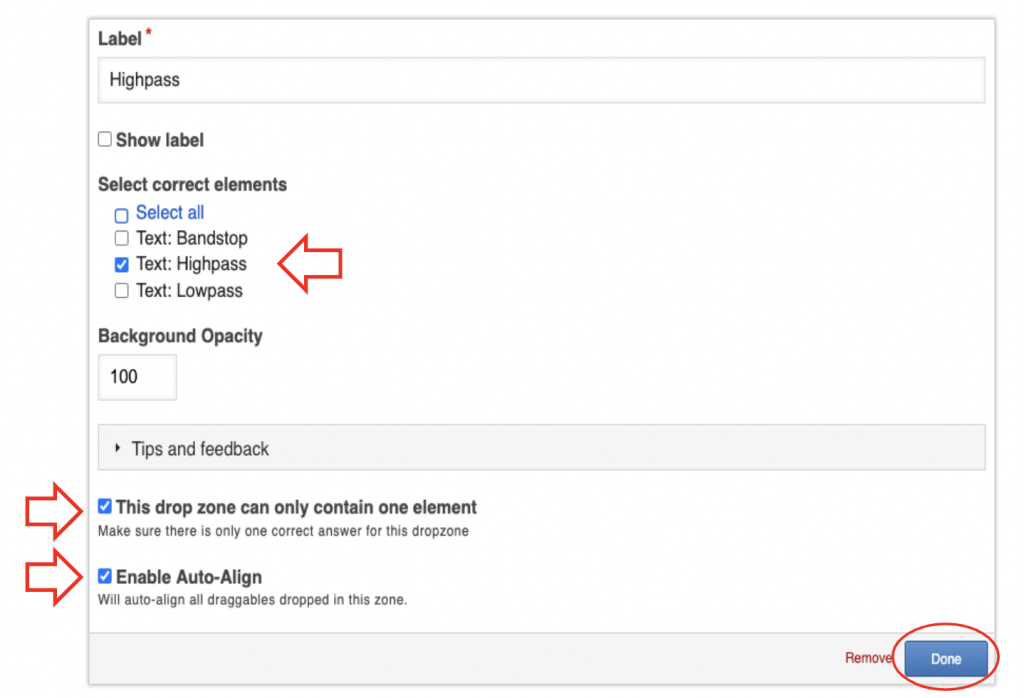
- Scroll to the end of the editor and click Done.
Help & contact
If something does not work as described, get in touch – we will look into it.