Exam Printer in the TeachCenter (Exam)
Overview of the Exam Printer
Overview and printing a simple quiz
To use the Exam Printer, you first need to create a quiz including questions.
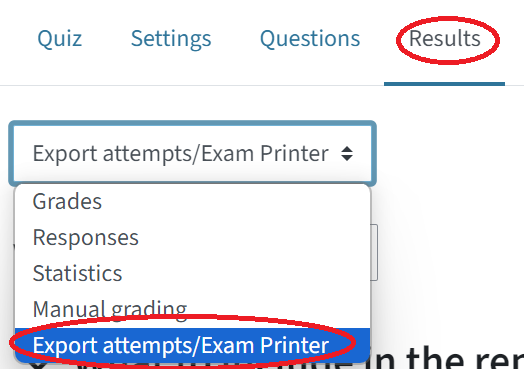
You can then access the Exam Printer via the Results tab. Choose Export attempts/Exam Printer from the drop-down menu.
Scroll down to the section Exam Printer.
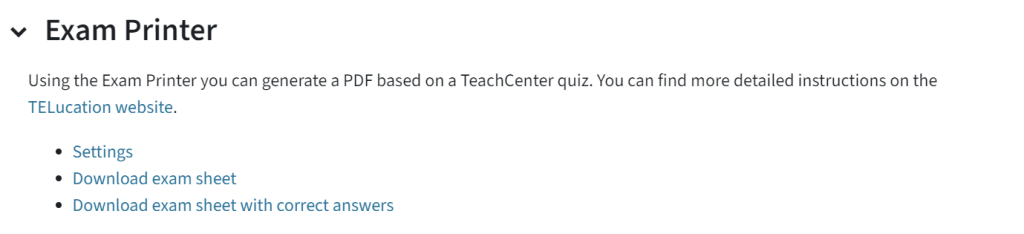
- Settings: Here you can adapt settings for the exam and make additions to the cover page.
- Download exam sheet: The main feature of the Exam Printer. Print the quiz as a PDF with your selected settings.
- Download exam sheet with correct answers: The exam is displayed with correct answers – for easier correction.
- Cover page: Settings for the cover page of the exam.
Settings for the Exam Printer
In the settings, you can create the cover page and customise the design of the exam PDF.
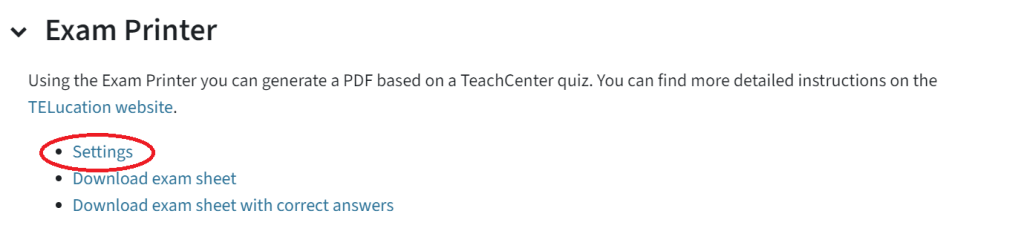
- Select a previously created template for your cover page.
- In Cover Page, you can edit the exam date and create a new cover page or edit the selected template. You can also show your institute name or an info box (an automatically generated table for the student’s name and matriculation number, max. points, grade…)
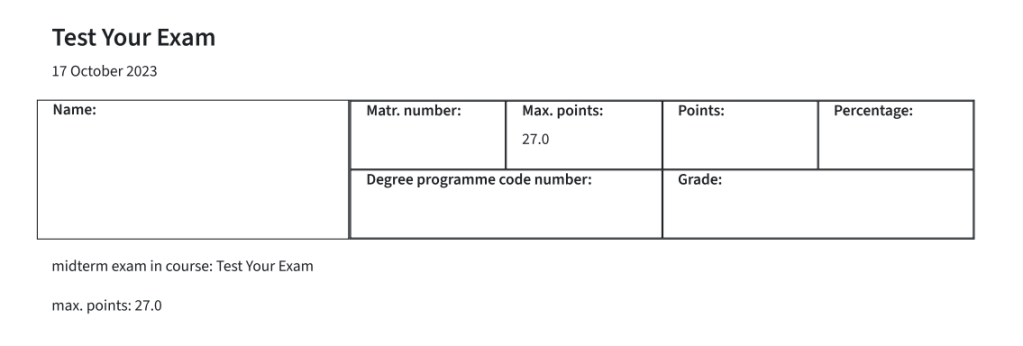
In Settings, you can customise the layout and design of the questions.
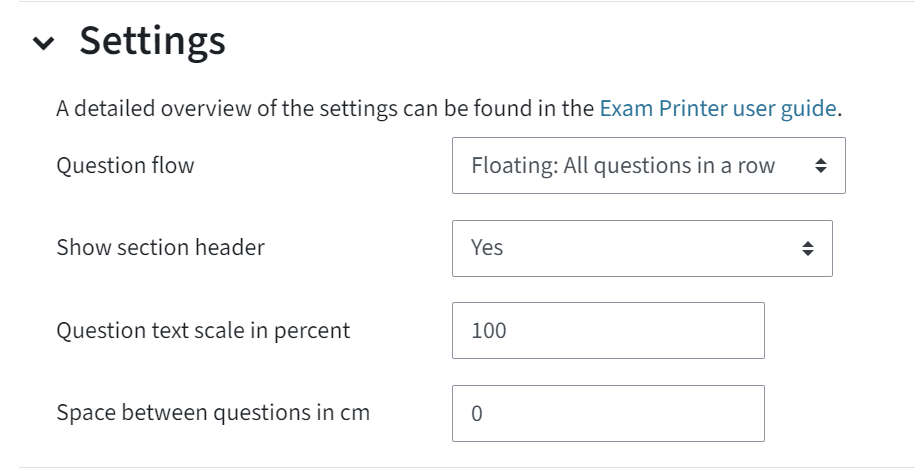
- Question flow: Select whether all questions will be printed one after the other, one question per page or whether each section is printed on a new page (sections are defined in the quiz activity).
- Show section header: Show the section headings (defined in the quiz activity) and which design?
- Question text scale in percent: Adjust the text size of the exam questions. 140% is the default size.
- Space between questions in cm: Add more space after each question to allow more space to answer. This setting is empty by default.
In Advanced settings, you can show a question header, consisting of question number and points, with or without background shading. Select whether you want to show a border around questions.
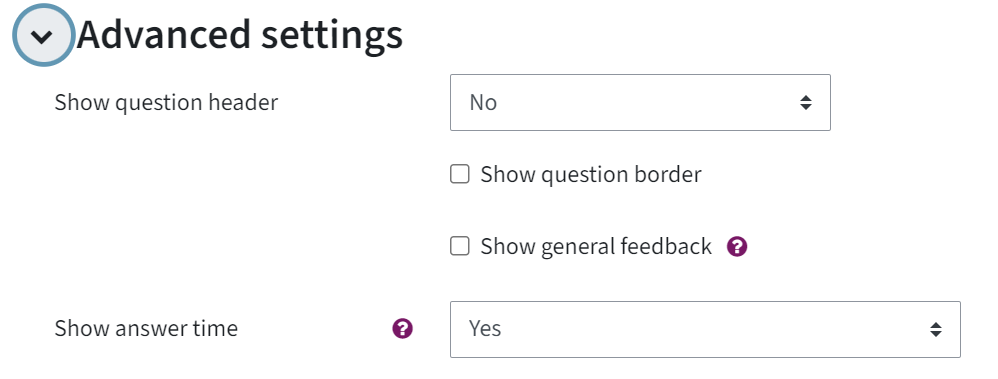
Your question header with background shading could look like this on the printed exam sheet:

If you want to print an exam sheet with a sample solution, check Show general feedback.
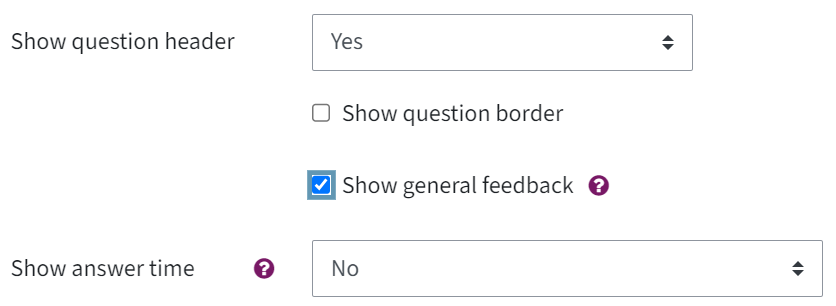
If you have used the tag „answertime:x“ for your questions in the question bank, you can show the estimated answer time.
Printing an exam sheet with sample solutions
Download exam sheet with correct answers in the Exam Printer allows you to create a file including solutions or hints for examiners.
Please note: In order for the sample solutions to be printed, you must tick the checkbox Show general feedback in the Settings.
What is shown as a sample solution?
Most question types (except essay-type questions) will show the answers you have defined as correct as the sample solution.
For questions that are graded automatically, there is a General feedback field that you can use for an additional explanation of the solution.
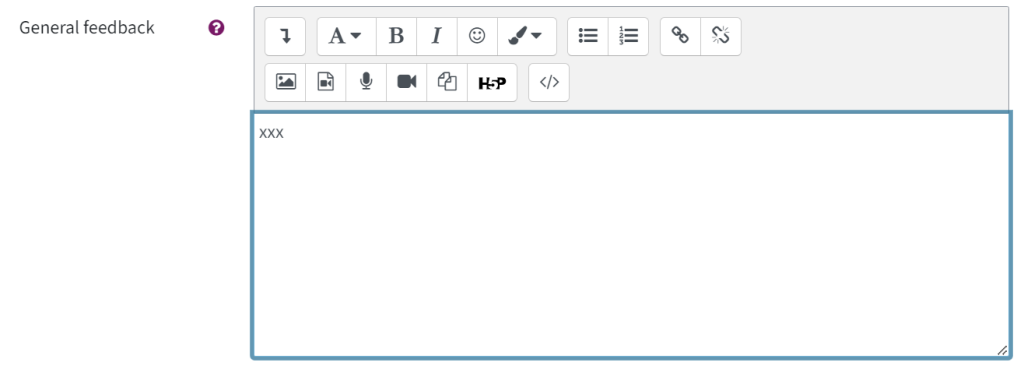
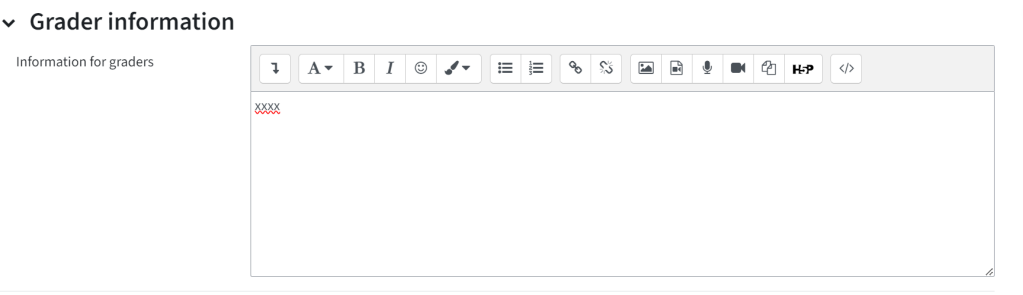
To add a sample solution to an essay-type question, edit the question, e.g. in the question bank. Add the sample solution in Grader information > Information for graders.
Designing a cover page template
You can design a cover page template in Create template, which you can then use for several exam prints.

Choose in Visibility whether your template will only be available within this course or also for all TeachCenter (Exam) courses of your institute.
All templates can be edited or deleted later on.

These templates can then be selected in the Settings of each Exam Printer printout.
Detailed information
Printing an exam with random questions
With the Exam Printer, you can also create a printout of a test with random question. You can either create one quiz for everyone or create an individual printout for each person with different randomised questions.
First, you need to create a quiz with randomised questions.
In results > Export results/Exam Printer, a new subsection Random quiz appears.
There are three options to use the Exam Printer with random questions.
1. Create an exam with random questions that cannot be edited later
In this case, you do not need the Random quiz section at all. Click on Download exam sheet just like when printing a „regular“ exam. The exam will be printed including randomised questions.
2. You want to edit the randomised questions before printing the exam
If you want to generate a random quiz and adapt or edit questions before printing the exam, you first have to create a static quiz from this random quiz.
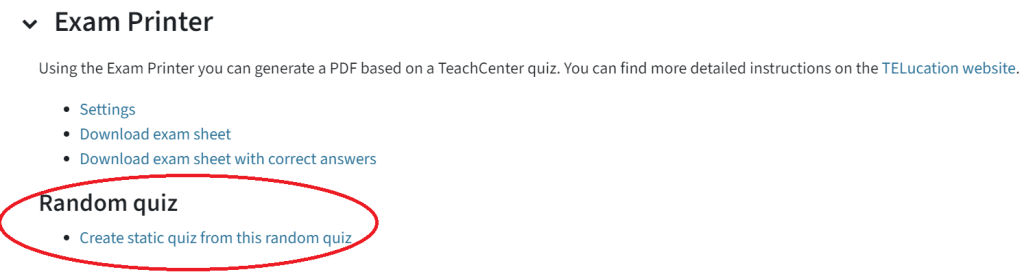
A new quiz is then generated. Click Open the quiz.

A new tab then opens in your browser with a quiz that has the same name as the original quiz but with a unique ID at the end, e.g. Test_48eb930
Go to the Questions tab in this new quiz. You will see a list of questions just like in a regular quiz. These questions were randomly selected from your defined pool of questions. You have the option to edit this quiz and its questions.
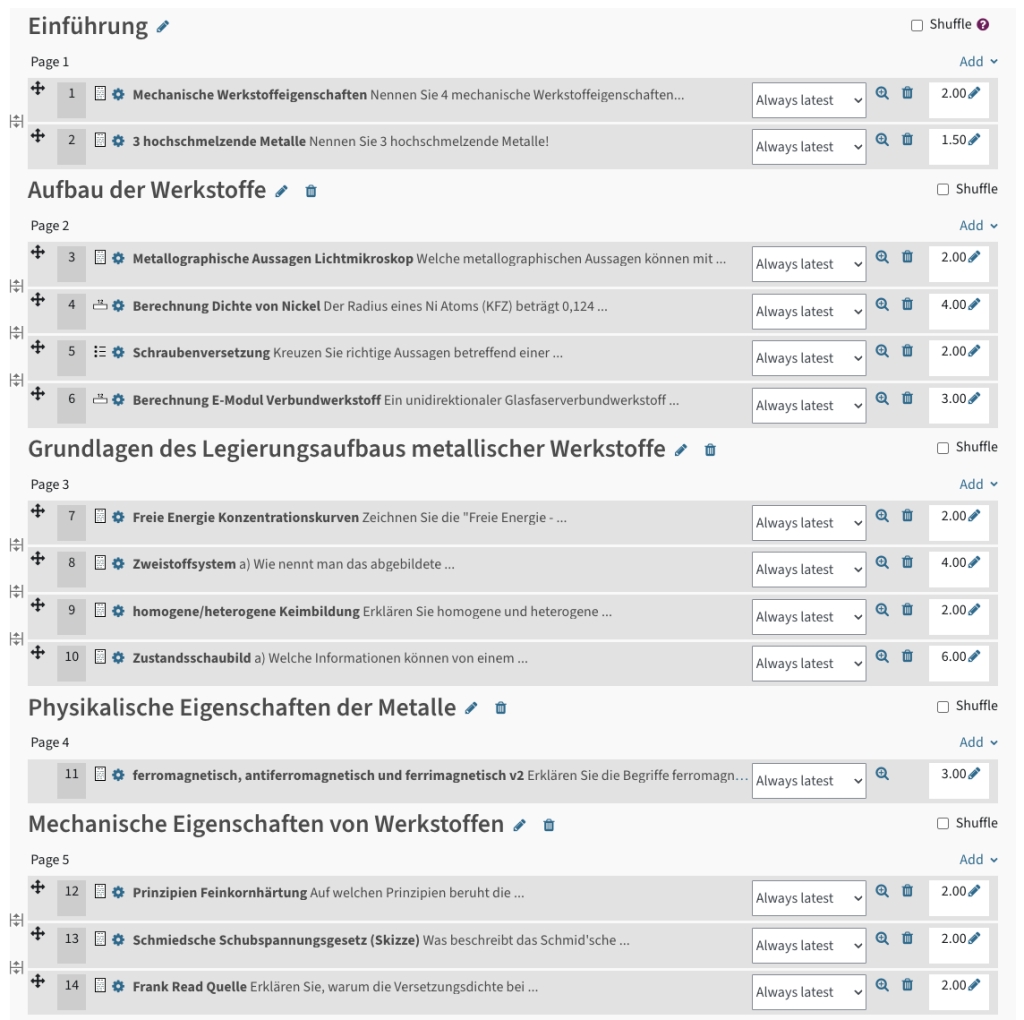
Go to the Results tab > Export attempts/Exam Printer of this new quiz. Click Download exam sheet. The exam will be created and printed with the selected questions.
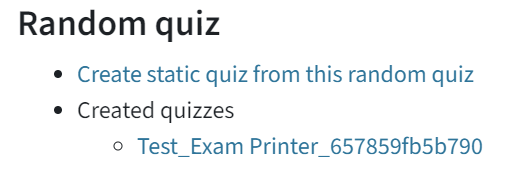
Note: You can go back to the original quiz and create several static quizzes, e.g. to have two versions of a quiz. The list of created static quizzes is listed in the original quiz in Random quiz.
3. Create a customised exam per person
You can create an individually customised exam for one person or for everyone, which means that the questions are randomised in a different way for each person.
Above the heading Exam Printer, there is a table of students. Below this table, click Create attempts to create an individual exam for each student.
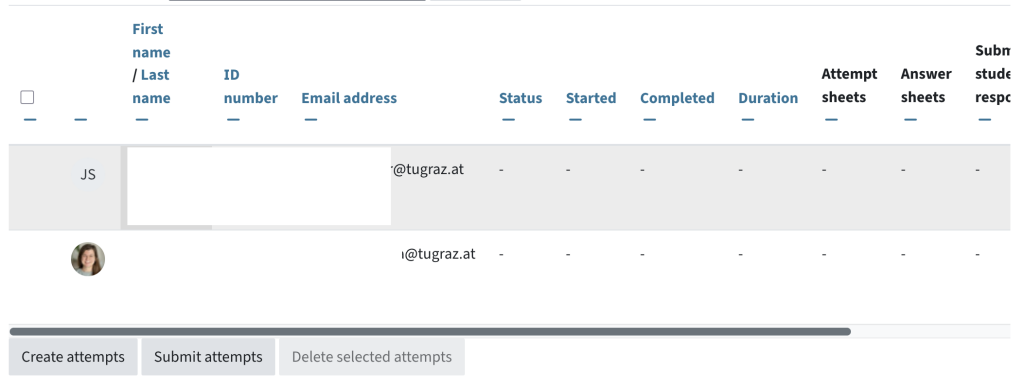
To create an exam for only one person, scroll to the right and click Create attempt in the row with the person’s name.
You can download the Attempt sheet for each person in the respective column.

Suggestion: Create a cover page template using placeholders for the name and/or matriculation number before creating the sheets so that you can easily match them.
How can I add the total exam time in the TeachCenter (Exam)?
In the settings of a question, you can use tags, e.g. for the estimated answer time. Example: „answertime:5“ means that this question should take 5 minutes to answer.
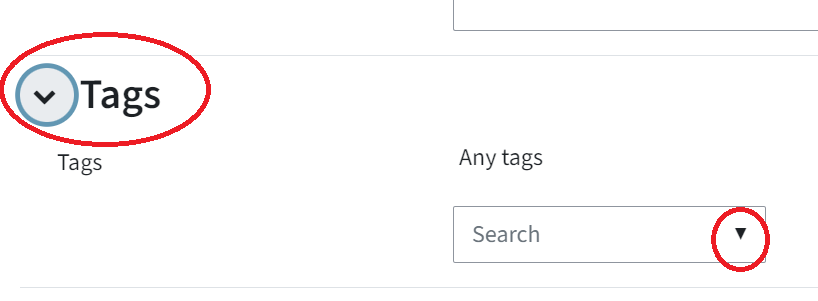
If you use this tag for exam questions, the total exam time will be displayed on the Exam Printer’s „overview page“ below the option of downloading the exam sheet with correct answers.
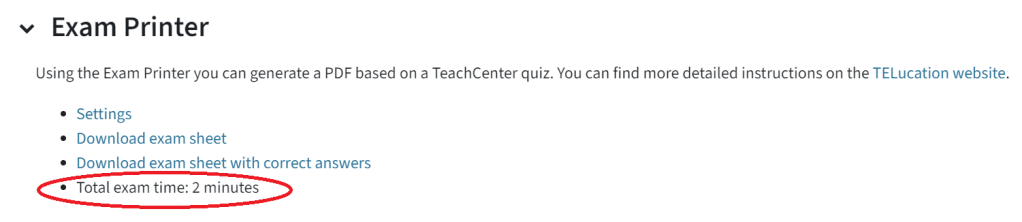
In the TELucation article #11 Best-Practice-Example: Exam Printer in the TeachCenter under „Practical tips and tricks“ you will find more examples of using tags for the Exam Printer.
Help & contact
If something does not work as described, get in touch – we will look into it.