Groups and Groupings in the TeachCenter
General information
What are groups in the TeachCenter?
What are groupings in the TeachCenter
A grouping is a „group of groups“ within a course.
Grouping can be of help to keep an overview of groups (example: „Group tutor A“ contains all 10 groups that are assigned to tutor A).
Groupings are also sometimes needed when students submit assignments in groups, if those students are in more than one group (example: standard group winter semester and group „tutor A“), because otherwise they will receive an error message when uploading their group assignment.
TUGRAZonline groups in the TeachCenter
Groups in the TeachCenter are supposed to be the same ones as in TUGRAZonline
Groups from TUGRAZonline are automatically synchronised with your TeachCenter course. You do not need to recreate the groups.
Of course, you can add your own groups in addition to the ones imported from TUGRAZonline at any time.
Groups are not needed anymore and should be removed
If you would like to disable group synchronisation (e.g. because you are using your own groups and there are problems with assignments), contact the support team. We can deactive the group synchronisation for you. TUGRAZonline groups cannot be deleted manually, as they would reappear after the next synchronisation process during the night.
Groups in the TeachCenter should be additional or different ones to TUGRAZonline
You can manually add additional groups in the TeachCenter to those imported from TUGRAZonline.
However, there are implications for group assignments: If students are in more than one group, they will see an error message in a group assignment. There are two possible solutions: If the groups from TUGRAZonline are not needed, contact support and we will deactivate the group synchronisation from TUGRAZonline for you. If you need both the TUGRAZonline groups and your own groups, you need to work with groupings (see below).
Visible groups and separate groups
Separate groups and visible groups indicate two modes for the visibility of group members and their activities.
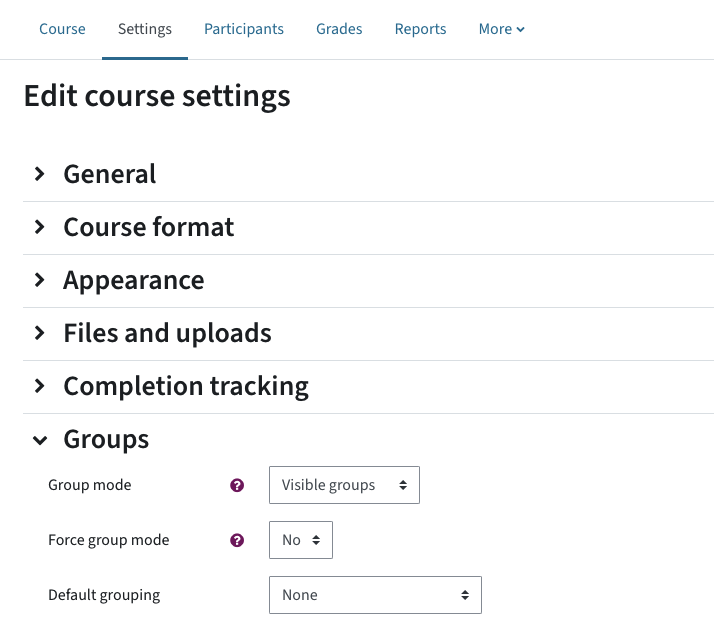
This mode can be set on a course level (in the course settings in the main menu) or it can be set for individual activities in the activity settings.
Visible groups
This activity will give you as a teacher an additional drop-down menu at the top of activites, which lets you filter by group. It is recommended for a better overview in large courses with many groups.
For students, there is not much difference, because this setting allows them to still see the other groups‘ activities (read-only).
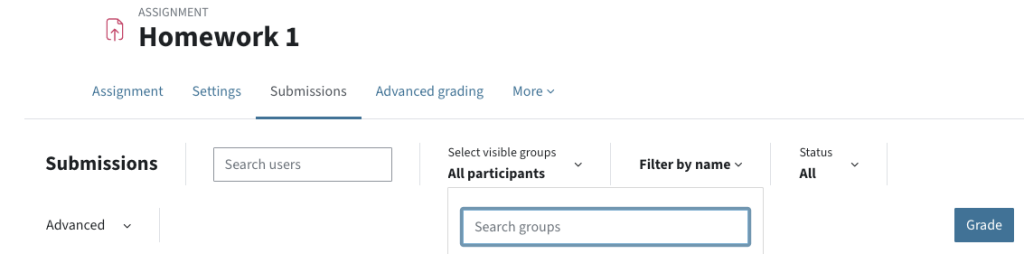
For students, there is not much difference, because this setting allows them to still see the other groups‘ activities (read-only).
Separate groups
Separate groups means that each group member only sees activities of their own group members. The other groups and their members and activities (such as forum posts and wiki posts) are hidden.
We do not recommend using this setting on a course level, if not strictly necessary. This setting can have far-reaching consequences, because students might not be able to see other people’s forum posts anymore or might not be able to join a BigBlueButton meeting.
Creating and managing groups and groupings
Creating individual groups
In the main menu, click on the Participants tab. Choose groups from the drop-down menu.
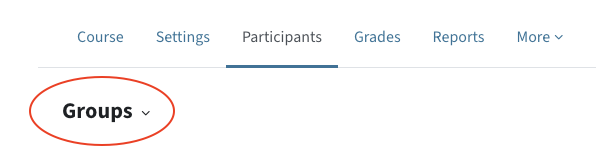
Then click on Create Group below the list of groups.
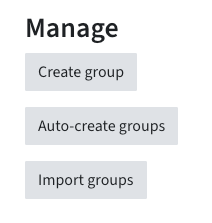
Enter a group name in the corresponding field. Click on Save changes.
Info: You can add additional groups at any time, even during the semester.
Creating several groups according to a naming scheme
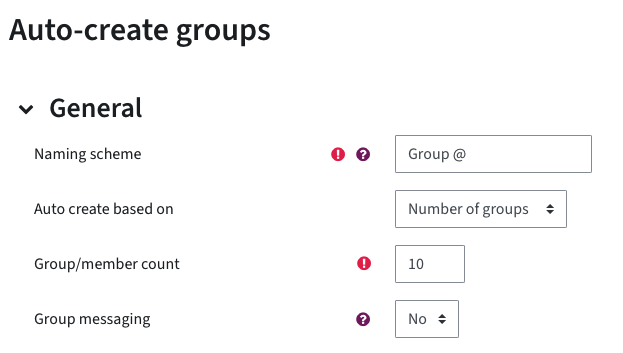
To create several groups at once according to a scheme (A, B, C) or (1, 2, 3), go to the Participants tab in the main menu. Choose Groups from the drop-down menu and click on Create groups automatically.
Choose a naming scheme for your groups: „Group @“ will create groups according to the scheme A, B, C. „Group #“ will create groups like 1, 2, 3. Define the number of groups you would like to create.
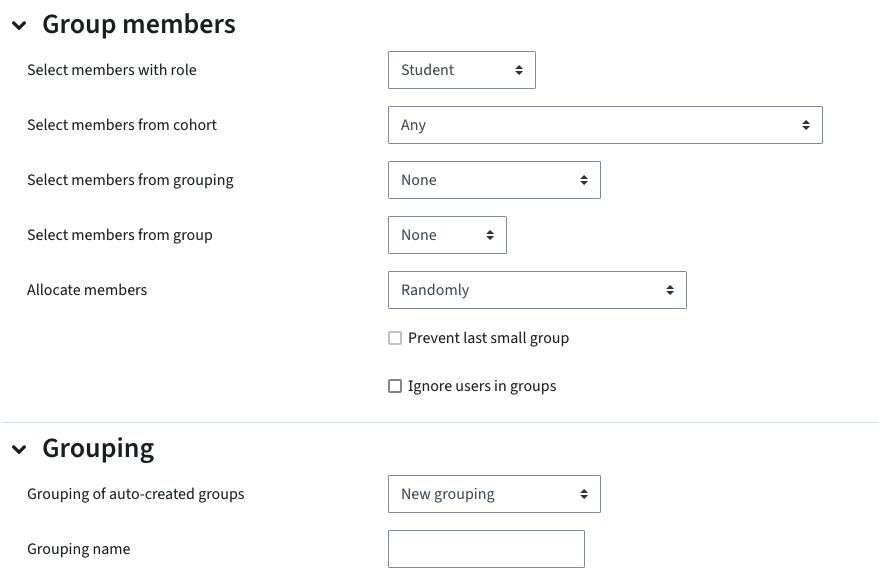
In the Group Members category, you can specify whether users should already be assigned to groups or not. If you want to make the groups subordinate to a particular grouping, you can specify this in the Grouping category.
Click on Preview to check the result of your group creation and confirm it with Submit.
Info: You can always add new groups even during the semester.
Filling groups with users
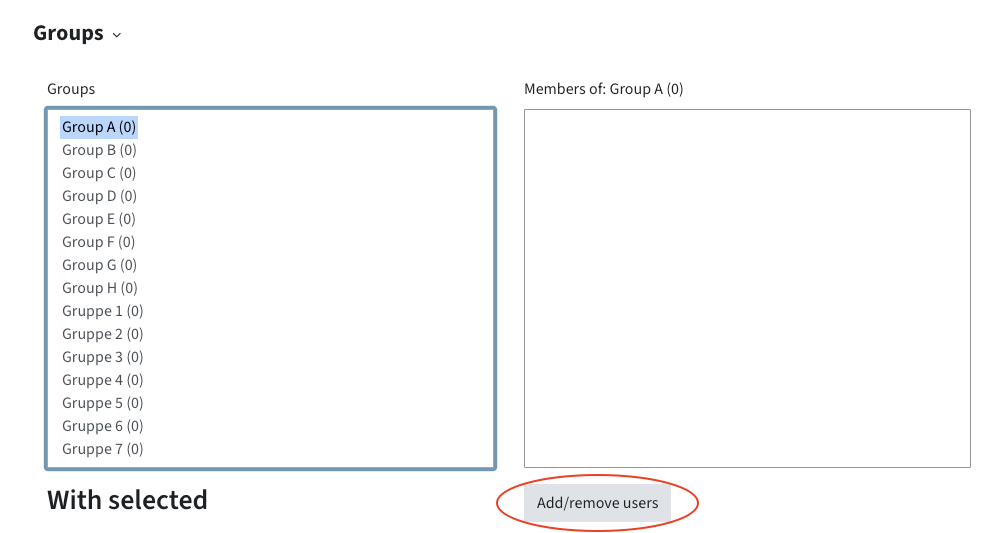
To add users to the group, select a group on the left and click on Add/Remove users.
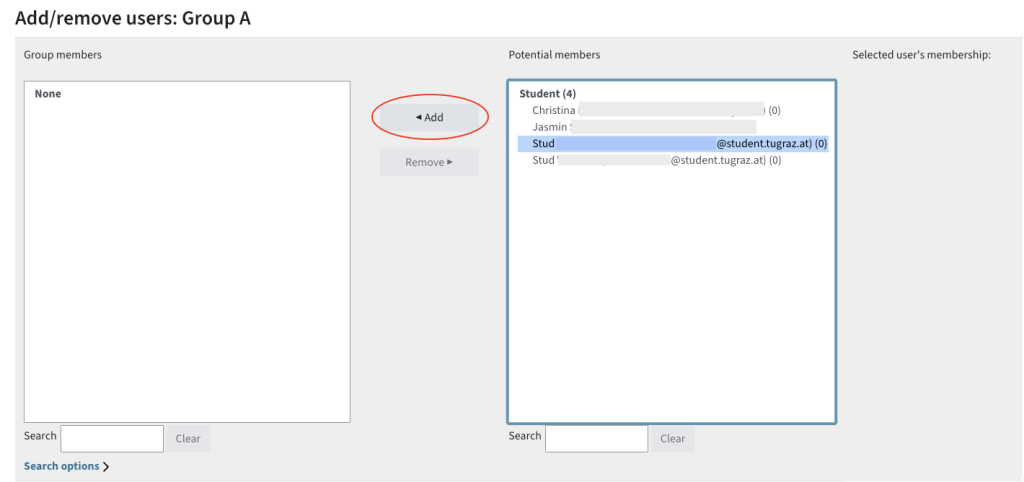
In the right-hand column, select the users you wish to add to the group and click on Add.
Have students assign themselves to groups (group choice)
At first, you need to create empty groups that students then can assign themselves to (see question: How can I create a group?). Then create a group choice activity. Turn on the editing mode.
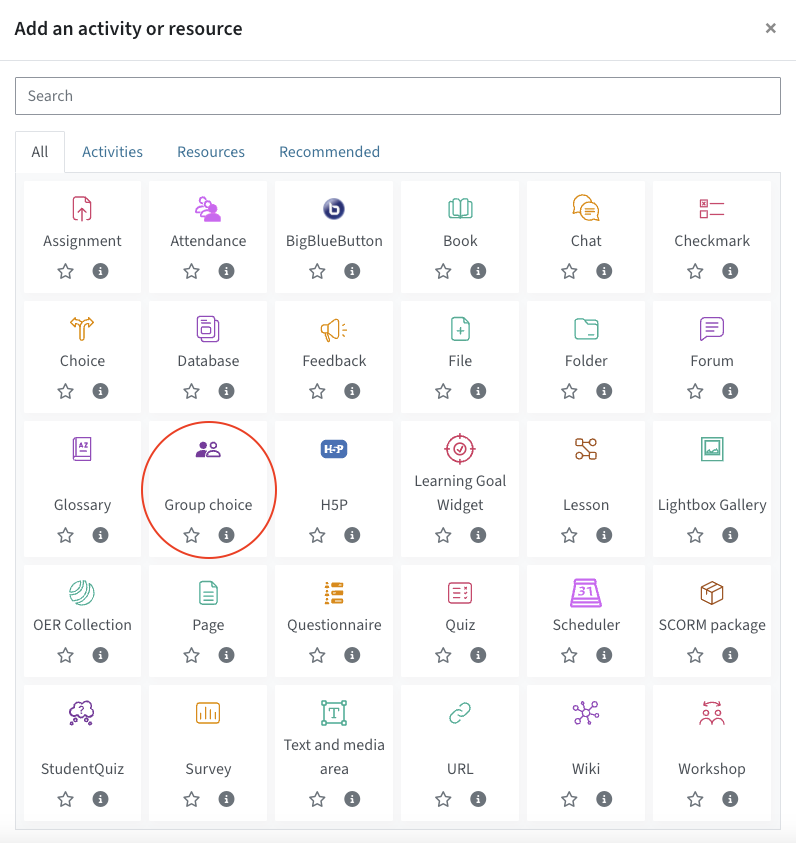
Click Add an activity or resource in the desired section. Select Group Choice and click on Add.
Select Group choice and click on Add.
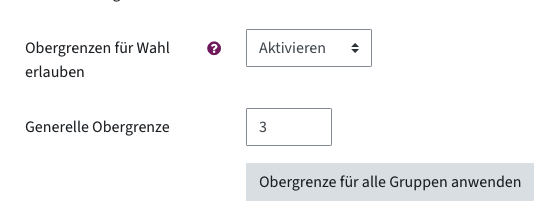
If you would like there to be a certain maximum number of participants per group, set Limit the number of responses > Enable.
Enter the desired number under General limitation and click on Apply to all groups.
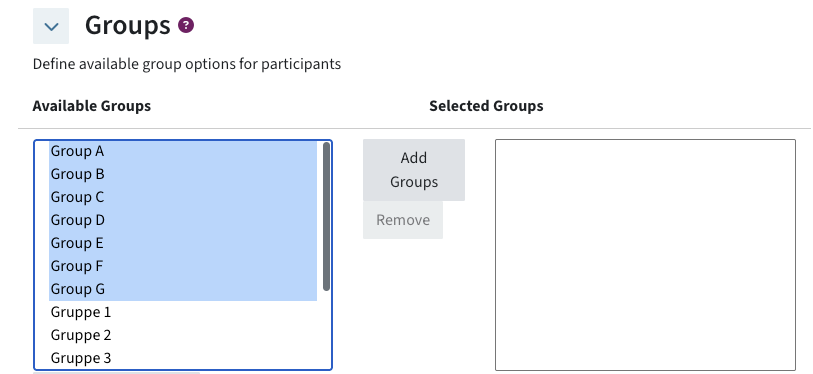
In the Groups section, select the groups you have created and click on Add groups.
Finally, click on Save and Display.
Adding groups to a grouping
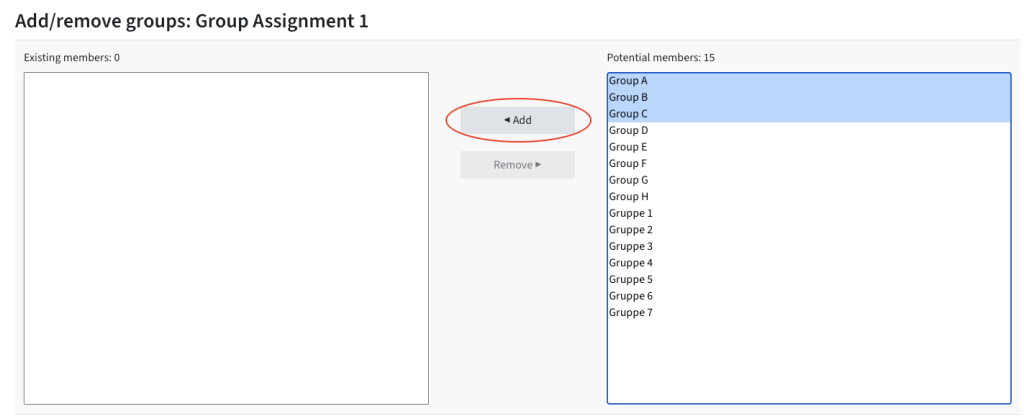
If you are using group assignments in your course, you might need a grouping, i.e. a group of groups (example: „Grouping Assignment 1“ contains the groups A, B and C.)
To create a grouping, go to the Participants tab in the main menu. Choose Groupings in the drop-down menu.
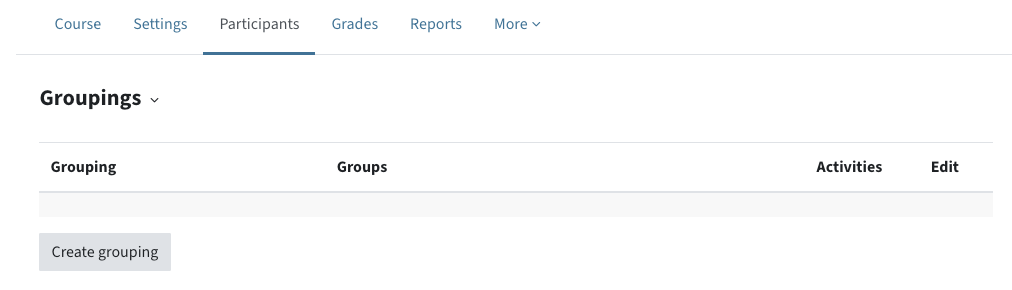
Create a new grouping (Create grouping) and name the grouping. Click on Save Changes.
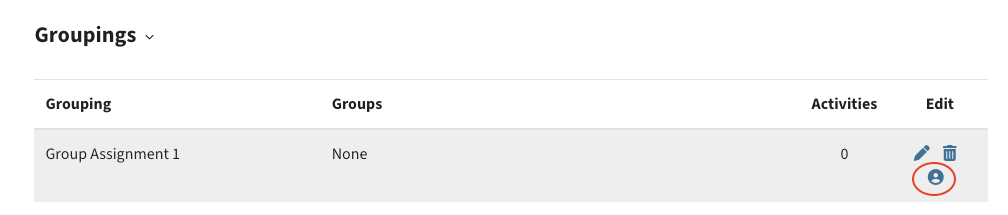
In the grouping overview, click on the person icon next to the grouping you want to edit.
In the Members column on the right, select the group(s) you want to assign to the grouping. Click on Add.
Assignments for existing groups and groupings
Creating a group assignment (students submit individually or in groups)
First create an assignment in your TeachCenter course. Open the activity’s edit mode.
Students submit individually, but only students from a certain group should be able to submit:
In the Restrict Access section, select Add restriction > Group > Select group > Save and return to course. Note that the section says that students must match this group.
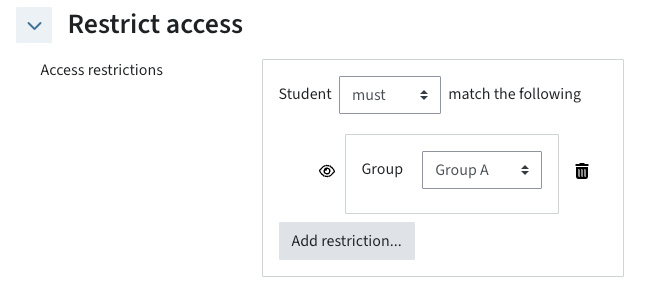
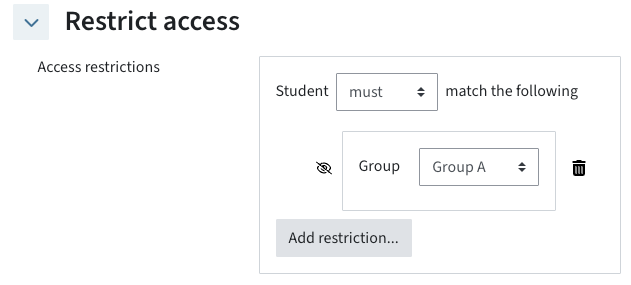
By clicking the eye icon next to the restriction, you can set whether the assignment should be visible (but read-only) for other groups (open eye icon) or whether the assignment should be hidden for members who do not belong to the chosen group (crossed-out eye icon).
Students submit as a group:
In the activity’s edit mode, go to the Group Submission Settings tab > Students Submit in Groups: Yes > Require group to make submission: Yes (unless you want to allow individual uploads by students who do not belong to any group).
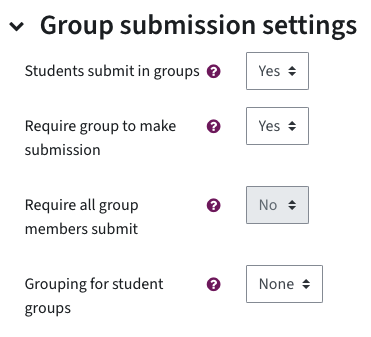
If you are not using the same groups throughout the whole semester or if students are in more than one group at a time, you would receive an error message: „Students are members of more than one group and cannot submit„. In this case, you need to create a grouping with all the groups that are pertinent to this assignment (example: Grouping Assignment 1 containing the groups A, B, C).


In the activity settings, choose Grouping for student groups: Name of the grouping (e.g. Assignment 1).
Example: A student Anna Test is member of the groups A and D. For this assignment, she would submit for group A, which is part of the grouping. There are no conflicts.
Help & contact
If something does not work as described, get in touch – we will look into it.