File upload (for exams or homework) in the TeachCenter
Creating a file upload
Where do I create the file upload?
„Assignment“ activities can be created in both the TeachCenter (external site) and the TeachCenter Exam (external site) .
- If the file upload is a homework or, for example, a submission as part of a course with continuous assessment, the activity can be created in the TeachCenter (external site) .
- If the upload is for an official exam date in TUGRAZonline and only the students registered for the exam should have access, the activity can be created in the TeachCenter Exam (external site) .
How do I create a file upload?
- Activate the editing mode using the slider at the top right.
- Click on the plus icon that appears in the middle of the course wherever you want to add an activity, then +Add an activity or resource.
- Select Assignment from the list and click Add.
- Add a title for the assignment.
- If necessary, add a description or activity instructions (these will only be displayed on the file upload page).
- Under Additional files, you can, for example, provide a task specification, templates or other files for students. Please note: By default, these files are visible as soon as the activity is visible. If you are using the assignment for an exam, it is advisable to activate the option Only show files during submission and to set a start date for the assignment. The files are then only displayed on the submission page.
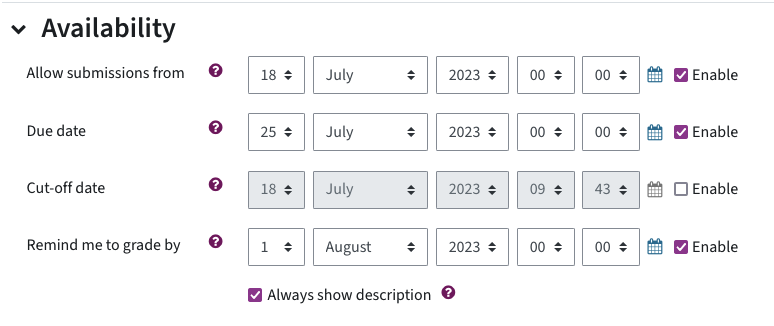
- Under Availability, you can set from and until when files can be uploaded. The Due date is displayed to students at the submission. If you only activate the due date but not the cut-off date, files can also be uploaded after this date. The submission are marked red in the system and labelled „late“. If you want to prevent uploads after a certain date, you can activate the Cut-off date.
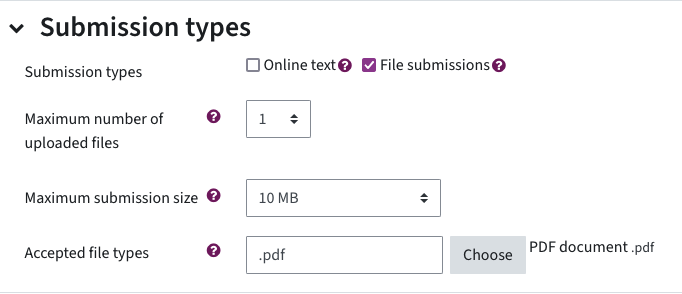
- Under Submission types, you can set the Maximum number of uploaded files as well as the accepted files types (e.g. PDFs only). If you do not restrict the accepted file types, all file types are allowed.
- Under Feedback types, the default setting is that you can leave comments or feedback files for students. You can also use the offline grading worksheet for a collective assessment of all submissions. If you would also like to be able to view and annotate the submission directly online as a PDF, tick the Annotate PDF box (only recommended for PDFs and text files!)
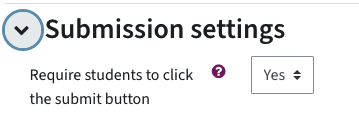
- Under Submission settings, you might want to require students to click the submit button. This gives students the opportunity to change their file until they finally hand it in by pressing the submit button.
- If you use groups in your TeachCenter course, and you want students to submit in groups, you can activate this option in the section Group submission settings. Please note: If the groups change throughout the semester or if students belong to more than one group at the same time, you will need to work with groupings. You can find more information in the User guide on groups and groupings.
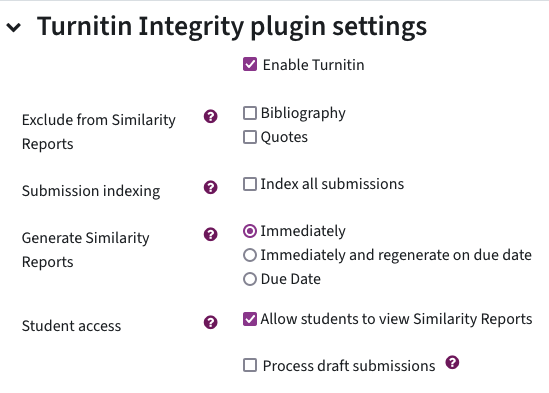
- Under Turnitin Integrity plugin settings, you can Enable Turnitin so that a similarity check is carried out for the submissions. Additionally, you can allow students to view Similarity Reports.
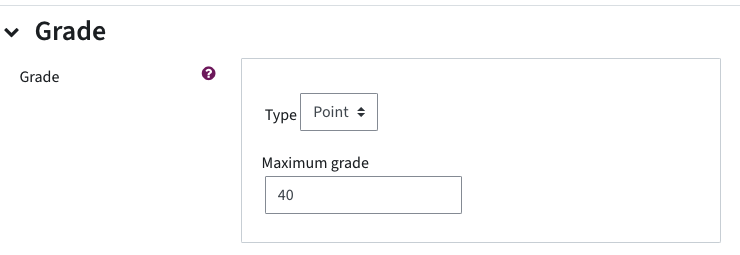
- In the section Grade you can set the Maximum Grade for the assignment. The default value here are 100 points.
- Under Restrict access, you can make the assignment only available to certain groups, for example. For more information, see the User guide on Restrict access in the TeachCenter.
How do I give certain students more time to upload?
As long as no cut-off date is set in an assignment, students can make late submissions. If the cut-off date is activated, for example for exams, you can overwrite the date for individual students.
- To do this, click on the assignment.
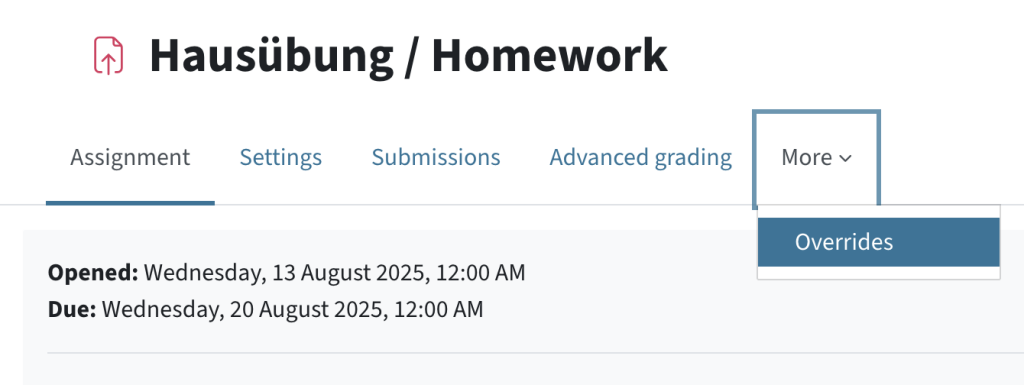
- In the menu, click on More > Overrides.
- Click on the Add User Override button.
- Search for the name of the student who should get an extended upload time.
- Change the cut-off date or due date accordingly. N.B. Cut-off date means it is not possible to submit anything after this date.
- Click on Save.
In the following overview, you can still edit (gear icon) or delete (recycle bin) the user override.
Grading file uploads
Grading
When you click on the assignment activity in your TC course, you will see an overview of how many students have already submitted their assignments and how many still need to be graded.
Download submissions
Click on the Submissions tab to go to the overview of uploaded files.
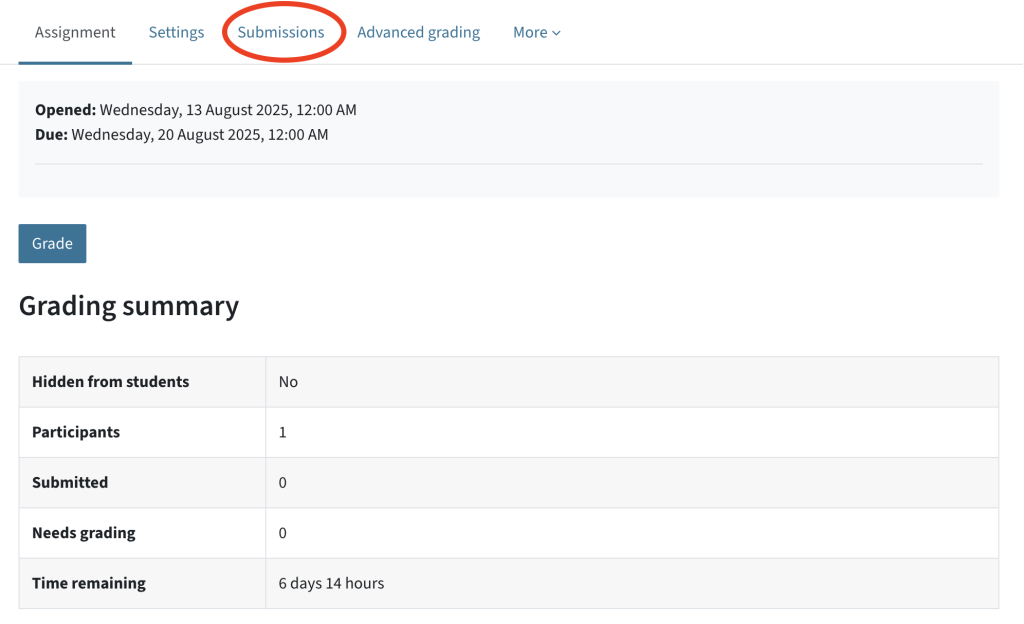
In this overview, the Status column indicates which students have already submitted a document. To annotate a document locally on your computer, click on the file in the File submissions column to download it.

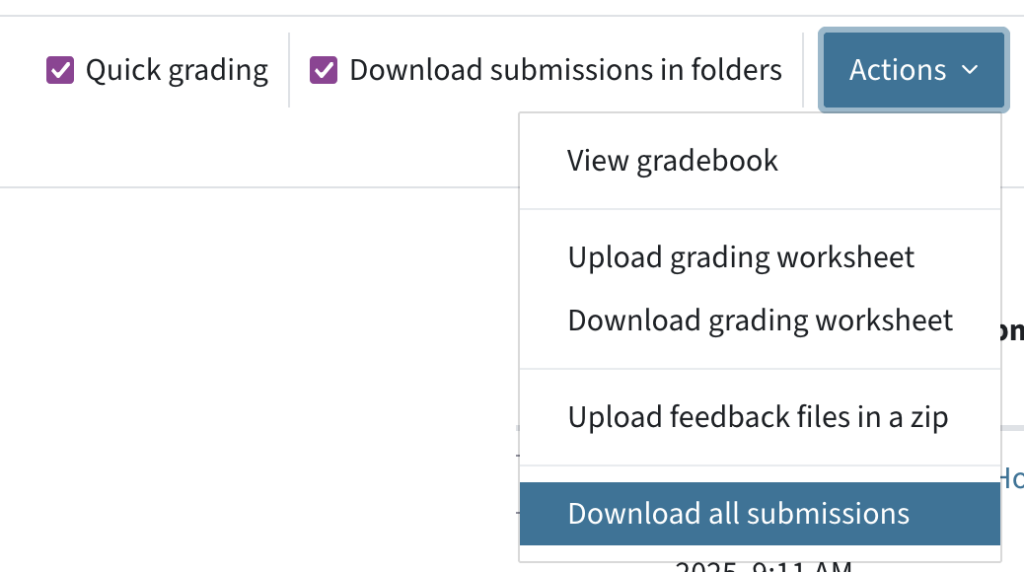
To download all files at once, click on Actions – Download all submissions above the table.
Quick grading
When quick grading is enabled, you can enter points and comments directly in the overview table in the Grade or Feedback comments column. Tick the quick grading checkbox above the overview table to activate this feature. Do not forget to Save changes.

Grading single submissions
To see the individual submissions, upload feedback files or view and annotate the submission directly as a PDF (if PDF annotations have been activated in the settings under Feedback types), click on the three-dot menu in the column Grade – button Grade.
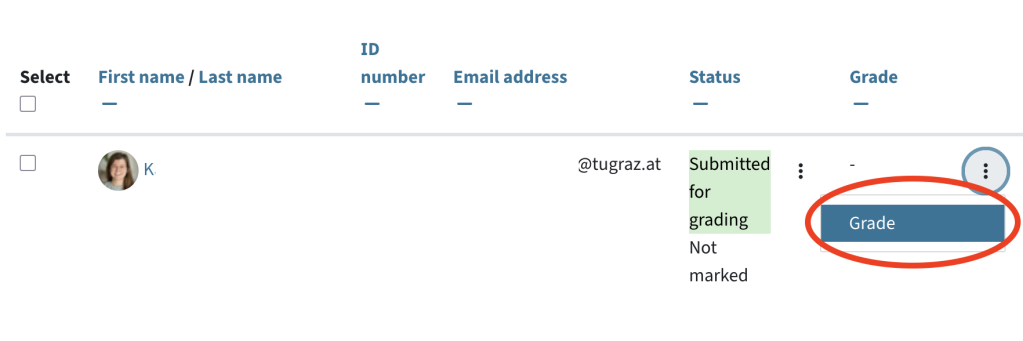
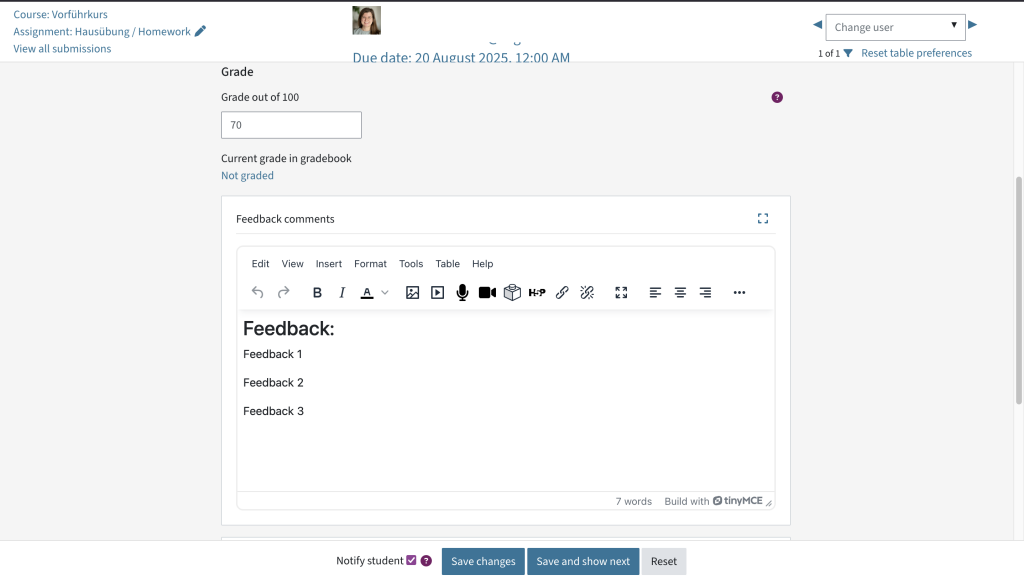
A new interface with a single student view opens.
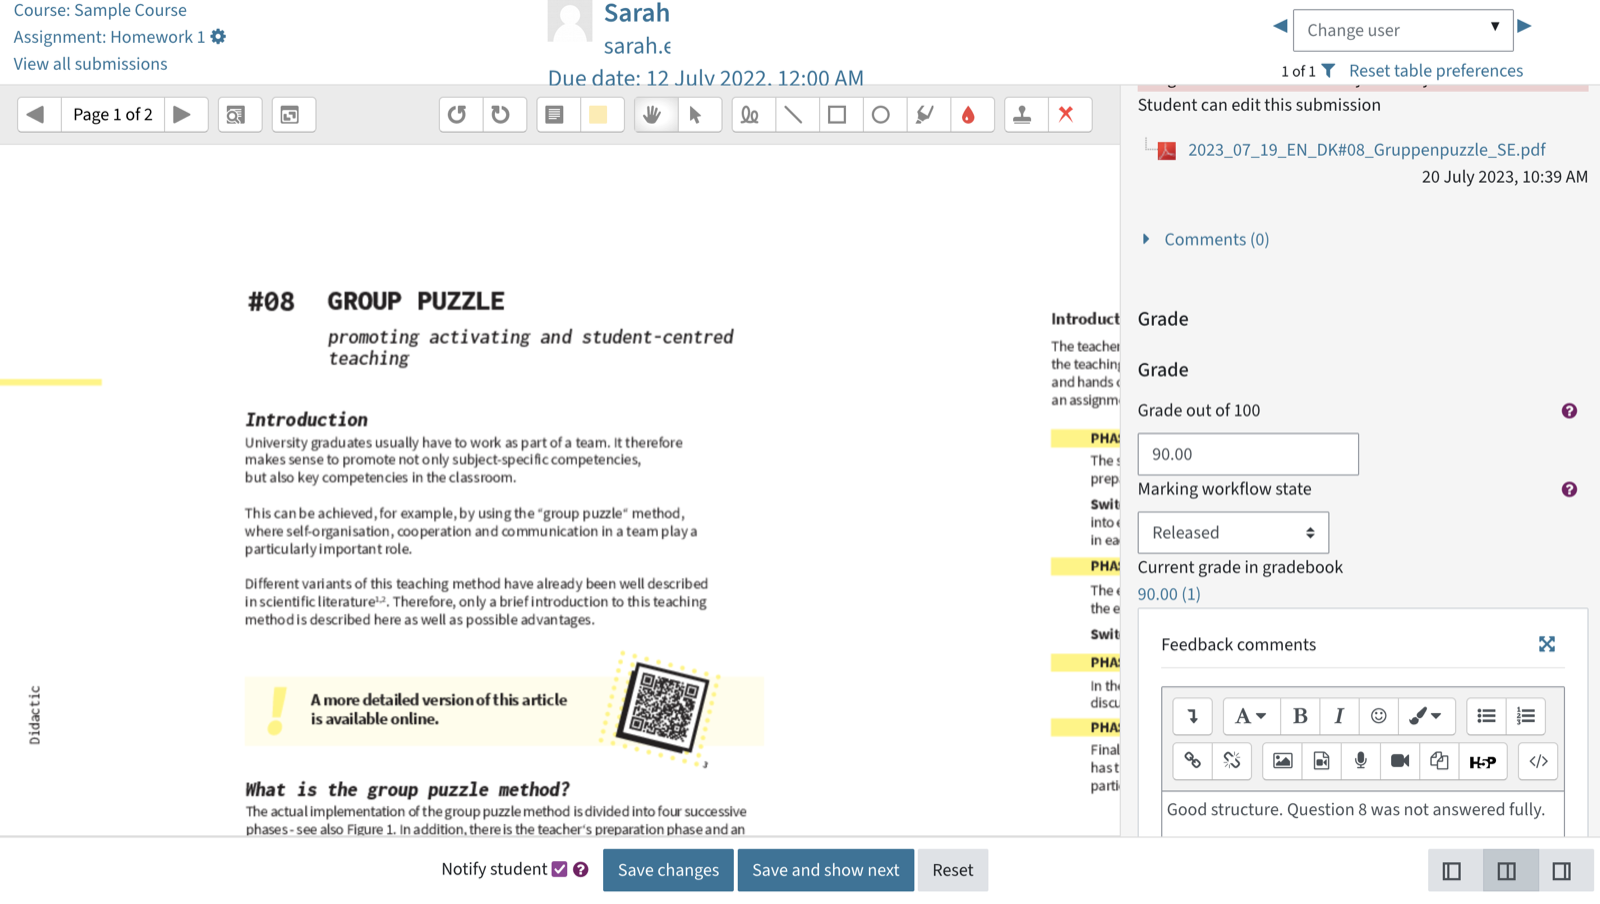
Here you can:
- view the submission as a PDF and annotate it using the tools, provided you have previously activated PDF annotation in the activity settings under feedback types.
- enter the student’s grade. You have defined the maximum points in the settings of the assignment.
- provide feedback by adding a comment as general feedback or uploading a feedback file.
- save changes, reset or save and show the next submission.
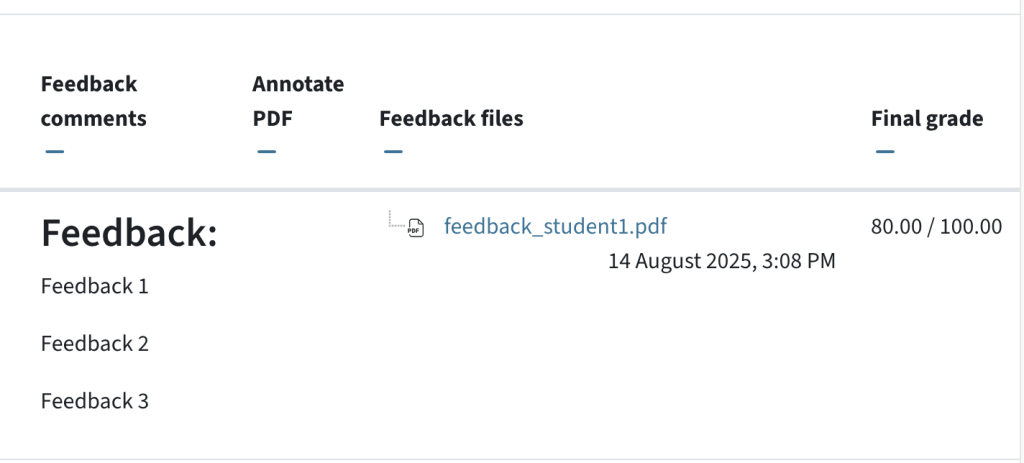
Once you save the changes, the status in the overview changes to Submitted for grading – Marking completed. You will see the points entered and possibly the feedback comment or the feedback files. You may have to scroll to the right to see this.
Offline grading worksheet
The offline grading worksheet is suitable if you want to correct the submitted files locally on your computer and then upload the grades all at once.
Download the grading worksheet from the Actions menu. You will receive a CSV file in which you can enter the points and any feedback as comments. Feedback files cannot be uploaded in the offline evaluation table.
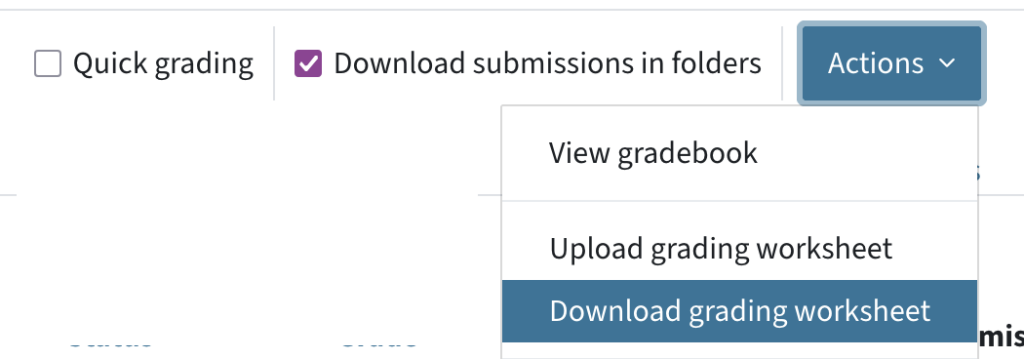
To import the grades, select Upload grading worksheet in the same Actions menu.
Marking workflow
The marking workflow is particularly useful when several people correct the submissions at the same time or you want to make all grades visible at the same time, as it divides your grading process into several stages.
The workflow can be activated in the Settings tab of the assignment activity in the Grade section. Set the option Use marking workflow to Yes. Additionally, you can activate Marking allocation, which allows you to assign submissions to specific people for grading.
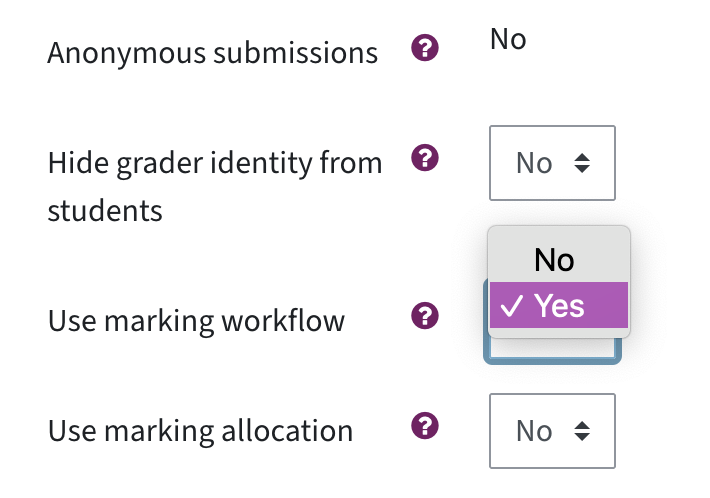
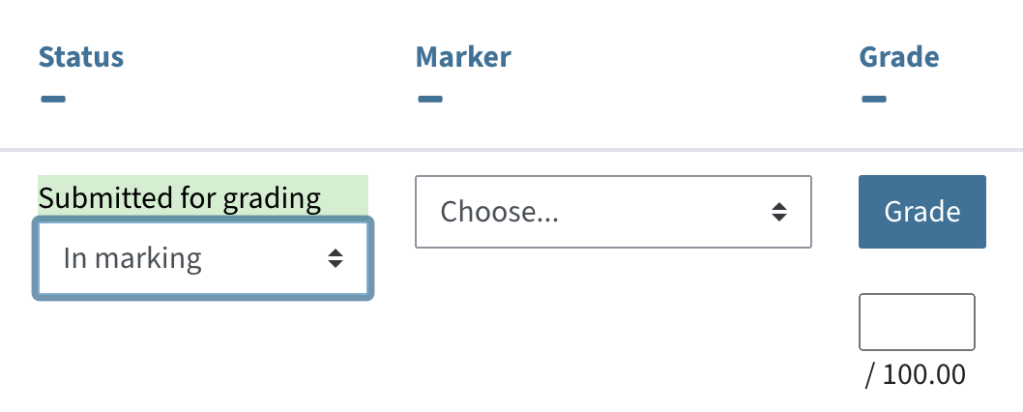
If you have activated the marking workflow, an additional drop-down menu with various marking workflow stages appears (both in the quick grading and in the individual view). The different states are:
- Not marked
- In marking
- Marking completed
- In review
- Ready for release
- Released
If you have activated marking allocation, a further drop-down menu with all teachers and tutors in the course will appear.
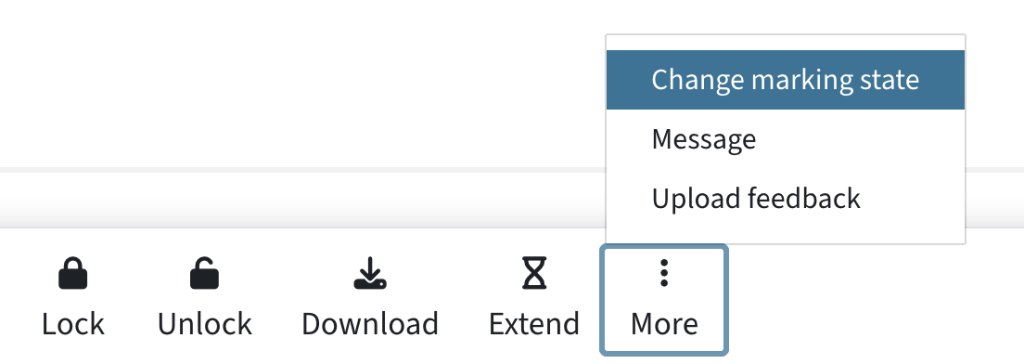
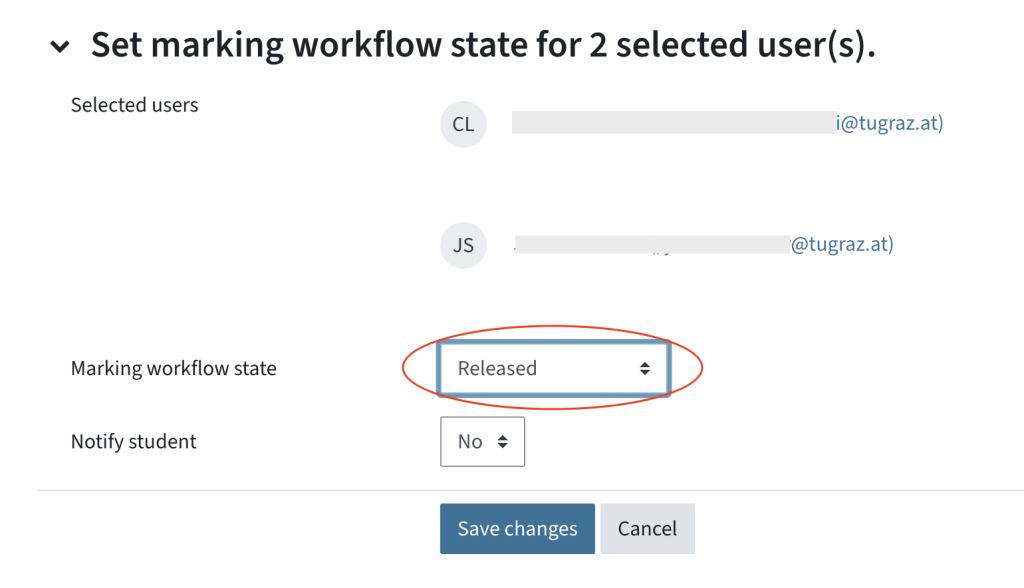
To set the marking workflow state for several students, select the respective students in the table. Below the table, click More – Change marking state. On the following new page, set the desired marking workflow state and save.
To set the marking workflow state for several students , select the relevant students in the table. Below the table, select More > Change editing status. In the following overview, select the desired Marking workflow state and save.
The marking workflow also allows you to release all the grades to students at once. Select the workflow state to Released to achieve this. The students will only see the grades, comments and feedback files in the assignment activity once the workflow state is set to „Released“.
Student view
A detailed description on how to upload files can be found in the TELucation user guide on Taking exams in TU Graz TeachCenter Exam in the section „How do I submit an assignment?“
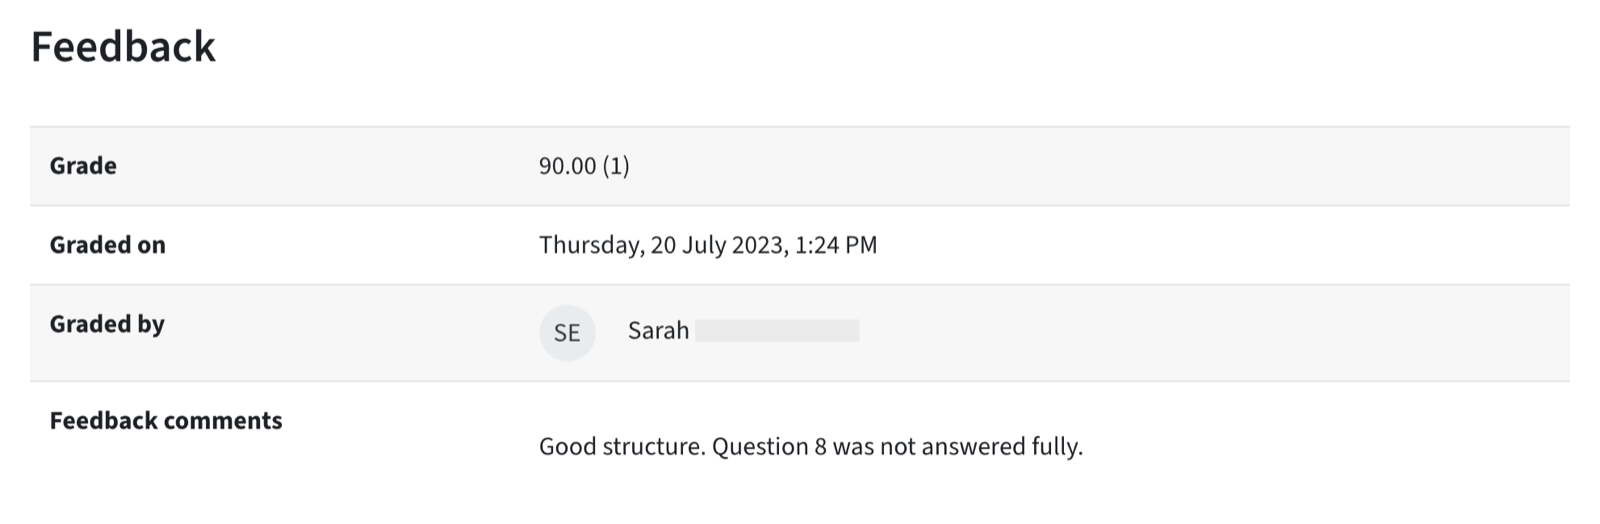
If the assessment has been saved and the activity is accessible to students, students will see their points, the annotated file, feedback files and comments after opening the assignment activity. Please note that the assignment must not be hidden.
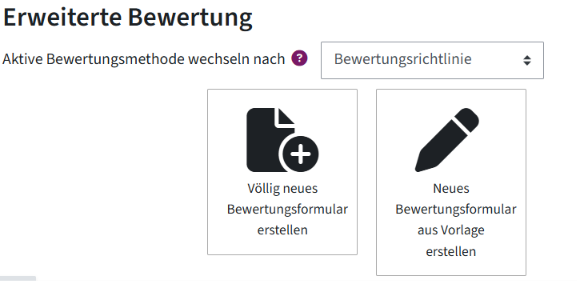
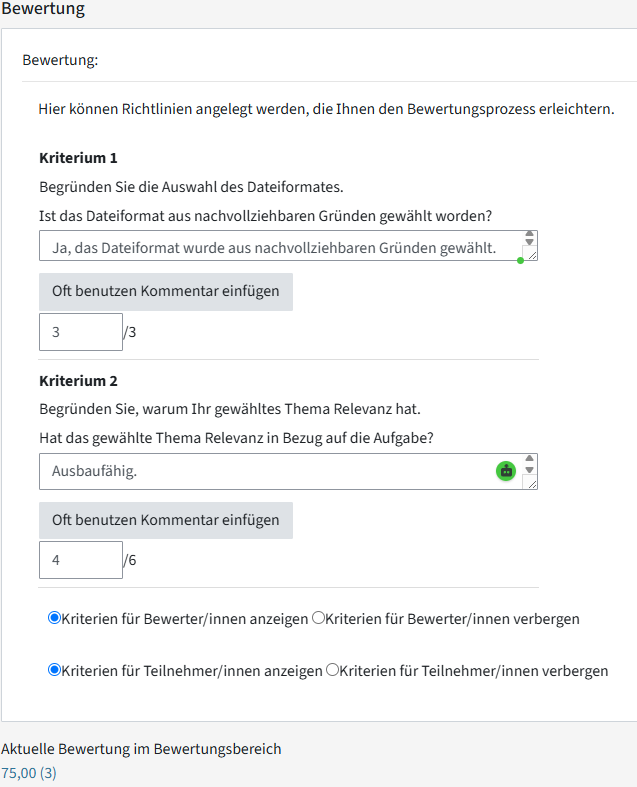
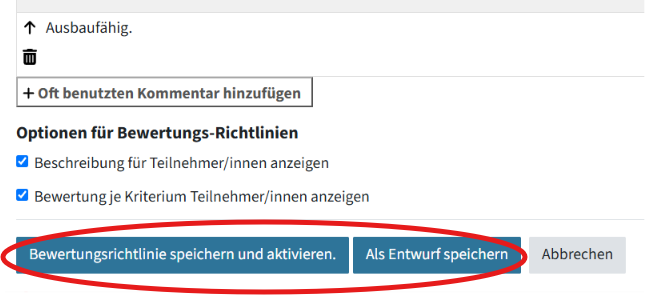
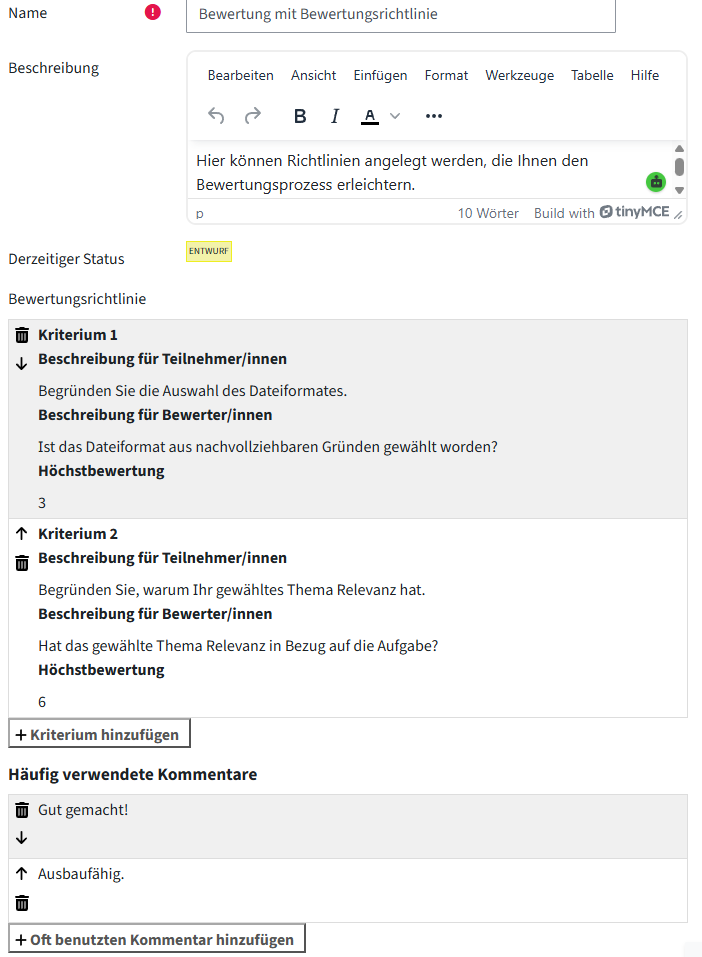
- If Marking guide is selected, the following buttons appear: Define new grading form from scratch and Create new grading form from a template. Clicking on the first option allows you to create a grading form. The marking guide consists of Criteria , which consist of a Description for students, a Description for markers and a Maximum grade . In addition, below this there is the option to add frequently used comments .Note: You can create any number of criteria and comments. Finally, the marking guide can be saved and made ready for use or saved as a draft .
If you use the marking workflow, students will not see their grades until the workflow state is set to „Released“.
In the tab Assignment/submission click on the button Grade. A new view opens. A menu appears in the top right (Change user), which can be used to navigate between users. Once a user has been selected, their assignment is displayed. Below it you will find the criteria you created for your marking guide. Here you can use the empty comment field either for free text entries, or insert one of the previously created frequently used comments . In addition, at the end of each criterion there is an empty field in which a number of points can be entered.
Important: The number of points must not exceed the maximum number of points defined in advance.
Once the grading process is complete, you can select below the criteria whether these are shown to or hidden from markers and/or participants. Below the criteria of the marking guide there are also two options for giving feedback: feedback can be written as a comment directly in an editor, or feedback files can be uploaded. The footer shows the buttons Save changes, Save and show next and Reset. Saving applies your grading.
- If Rubric is selected, the following buttons appear: Define new grading form from scratch and Create new grading form from a template. Clicking on the first option allows you to create a grading form. The rubric consists of Criteria , which in turn consist of several Levels . You can create different numbers of criteria and levels. Finally, the rubric can be saved and made ready for use or saved as a draft .
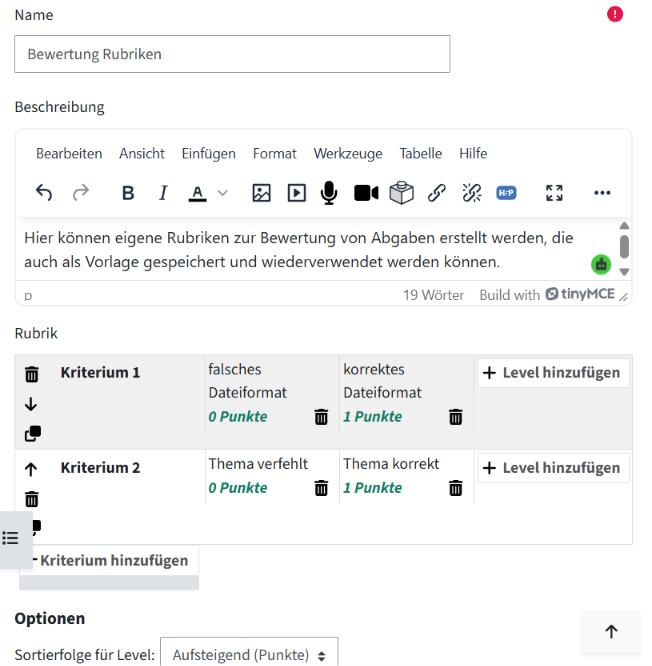
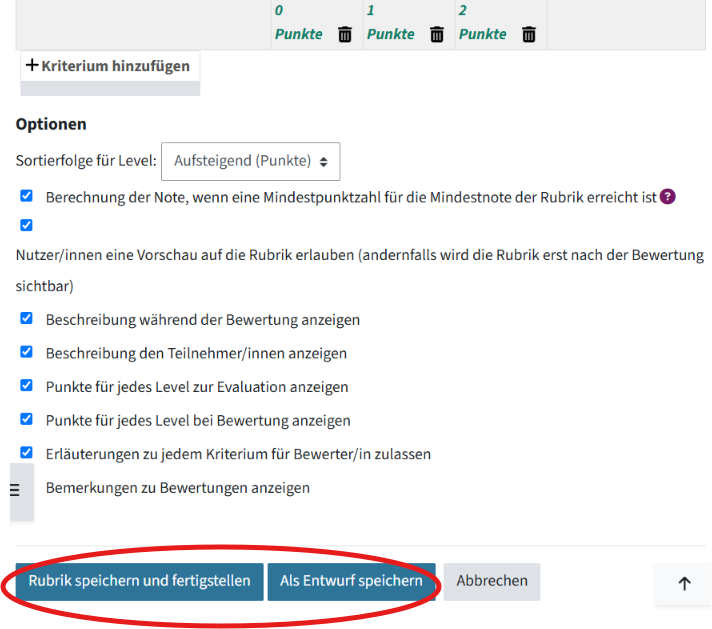
Once the rubric has been saved and selected in the Advanced grading tab, it can be used to grade assignments.
In the tab Assignment/submission click on the button Grade. A new view opens. A menu appears in the top right (Change user), which can be used to navigate between users. Once a user has been selected, their assignment is displayed. Below it you will find the rubric. By clicking on the respective levels in the criteria are theipoints awarded for the assignment. The selected level turns green.
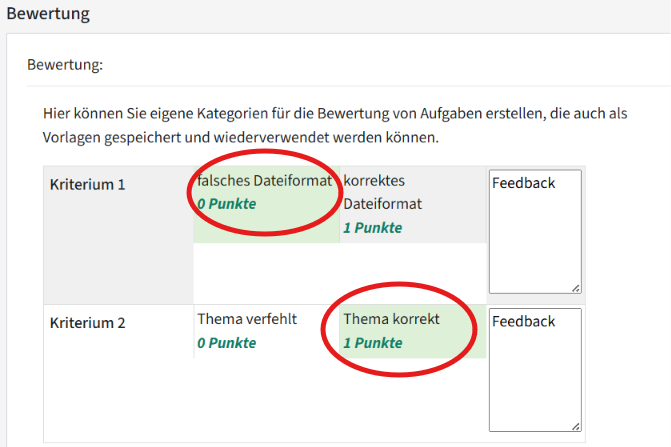
You can give feedback directly in the rubric, in the comment field on the far right. Two further options for giving feedback can be found below the rubric. Feedback can be written as a comment directly in an editor, or feedback files can be uploaded.
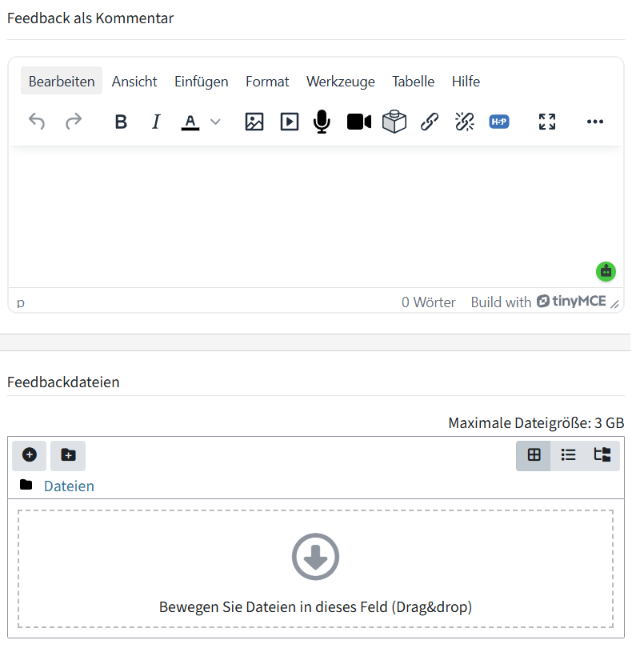
In the footer, the buttons Save changes, Save and show next and Reset are displayed. Your grading is applied when you save.
View for students
A detailed description of how to submit files can be found in the TELucation guide on taking exams in TeachCenter Exam in the section “How do I submit a file?”.
Once the grade has been saved and the activity is accessible to students, students will see after Opening the assignment/submission their points, the file you annotated and, if applicable, the feedback files and comments. Note that the submission activity must not be hidden for this.
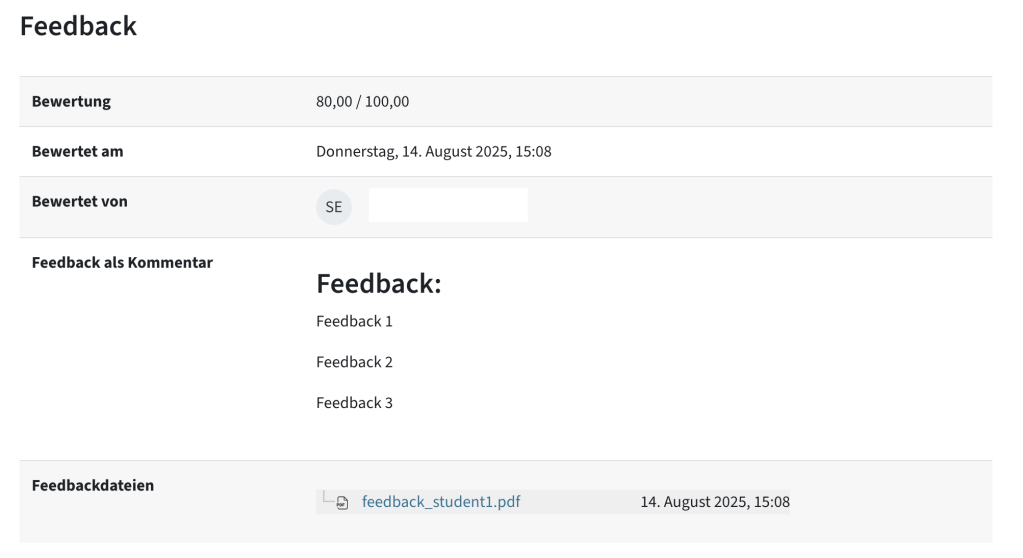
If you use the grading workflow, students will only see the grade once the status has been set to “Released”.
Help & contact
If something does not work as described, get in touch – we will look into it.