Restrict access in the TeachCenter
General information on restrictions
What are the benefits of setting restrictions in the TeachCenter?
- General structure and transparency about access rules for teachers and students.
- Planning and controlling availability (e.g., make prepared course content visible step by step or make it accessible only to certain users)
- Tracking students‘ learning progress (especially in combination with completion tracking)
- Adaptive learning paths for students, depending on their knowledge and performance level (e.g., a test result determines which further content becomes visible to students)
What types of restrictions are there?
- Activity completion: Completing a previous activity is the condition to access the following content. Example: Students will only see this content once they have successfully passed quiz XY. Please note: In order to use this feature, completion tracking must be activated in the course settings.
- Access to activities can be restricted to a certain date or period of time. Example: Students will only see this content from DD/MM/YYYY.
- Learning material becomes available when a certain grade has been obtained. Example: Students will only see this content if they have received at least 50 points for the previous project work.
- Sections or activities can be restricted to certain groups. Example: Students only see this content if they are members of group „John Doe“.
- Groupings allow several groups to access sections or activities (e.g., for common tasks). More information in our how-to guide on groups and groupings. Example: Students will only see this content if they are part of one of the groups in the grouping „Jane Doe“.
- User profile: Use information such as last name or email address as an access criterion. Example: Only the person with the last name „Miller“ will see this content.
- Restriction set: Logical link between some of the restrictions mentioned before. Example: Students will only see this content if they have completed „Task 1“ OR „Task 2a AND Task 2b“.
How to set restrictions?
You can set restrictions for all activities and sections.
- Turn on edit mode by using the slider on the top right.
- Go to the section, content or activity you would like to restrict:
- Sections: Click on the three dots next to the section > Edit topic.
- Activities: Click on the three dots next to the activity > Edit settings.
- Wählen Sie den Punkt Voraussetzungen > Voraussetzung hinzufügen.
Go to the setting Restrict Access > Add restriction.
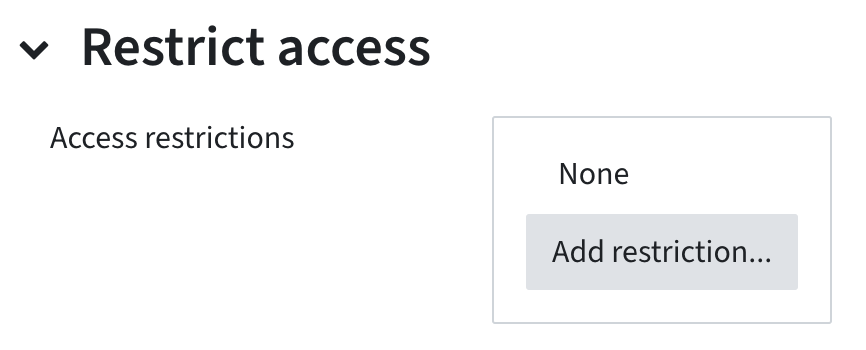
- You will now see the seven possible restriction types in a pop-up window.
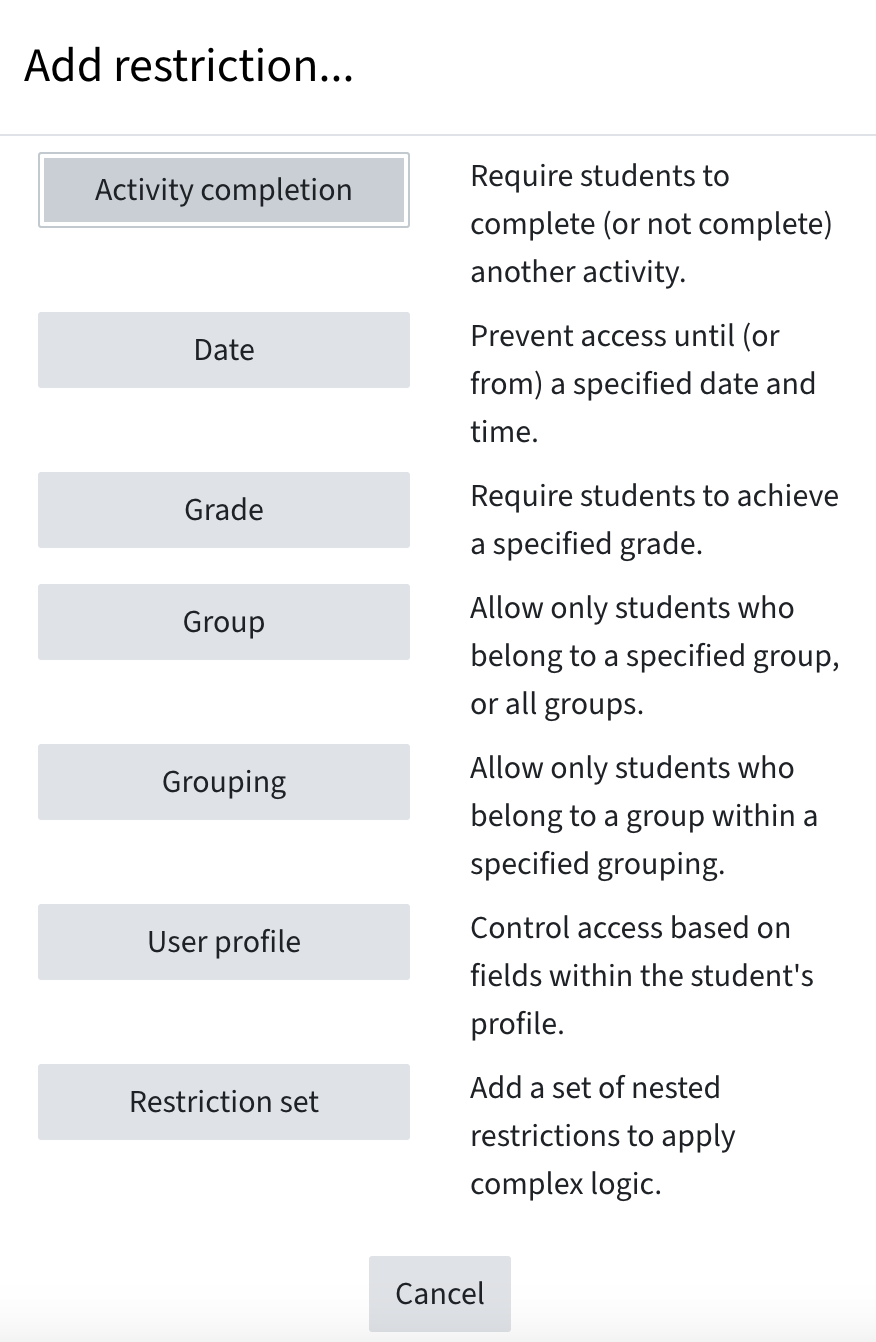
Please note: The restriction types Activity Completion, Group and Grouping are only available if they have been activated or created in your TeachCenter course.
To activate completion tracking, see the section Activity completion and completion tracking; to create groups and groupings see our how-to guide on groups and groupings.
- Choose the restriction you want to apply. Some detailed examples on how to set them are given in the section „Types of restrictions in detail“.
- In the drop-down, set whether this restriction MUST be fulfilled or MUST NOT be fulfilled.
- To delete a restriction, click the grey X.
- To set another restriction, click Add restriction again.
- Set whether any or all of the restrictions must apply; this creates a logical link with AND or OR.
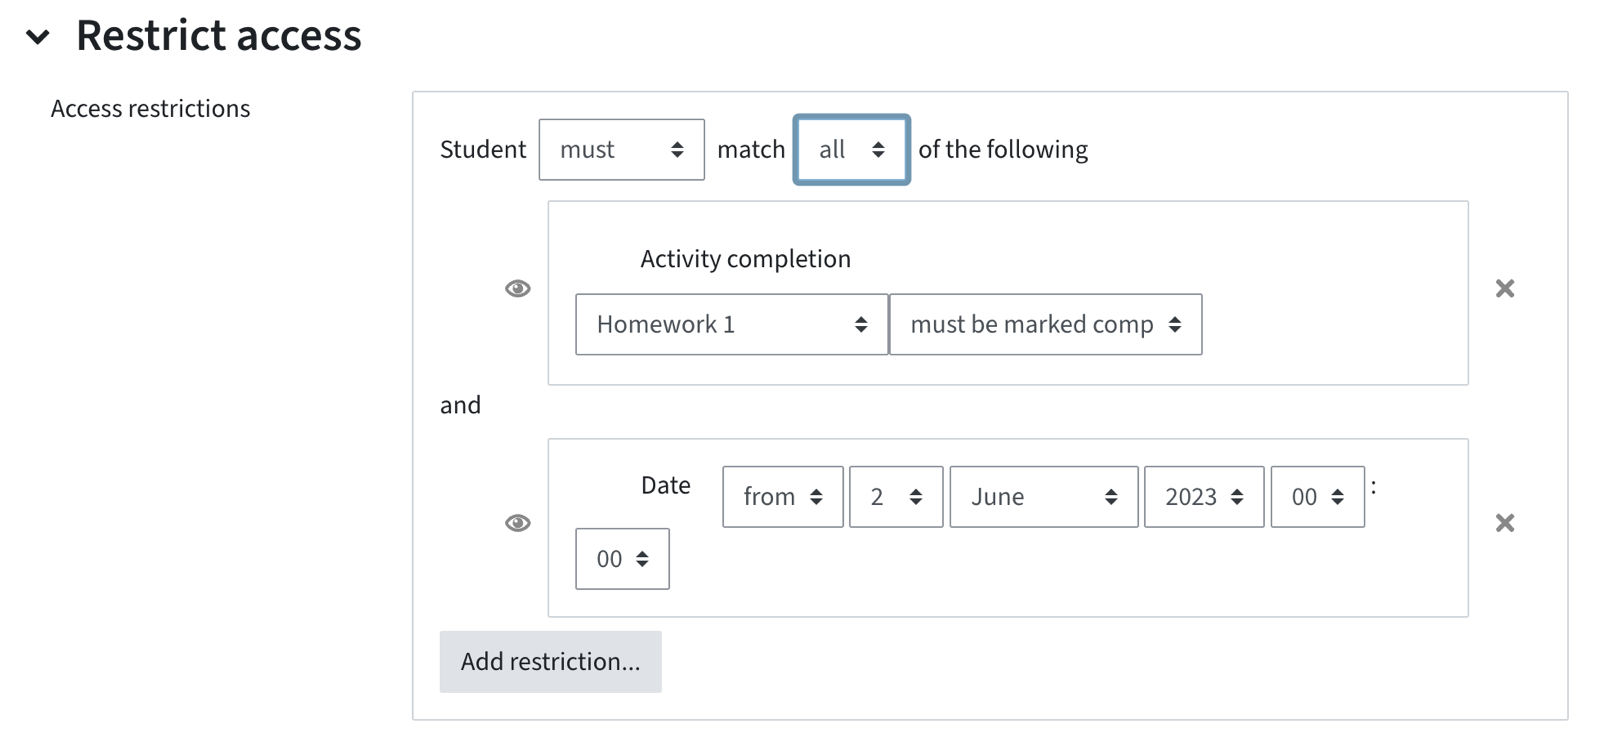
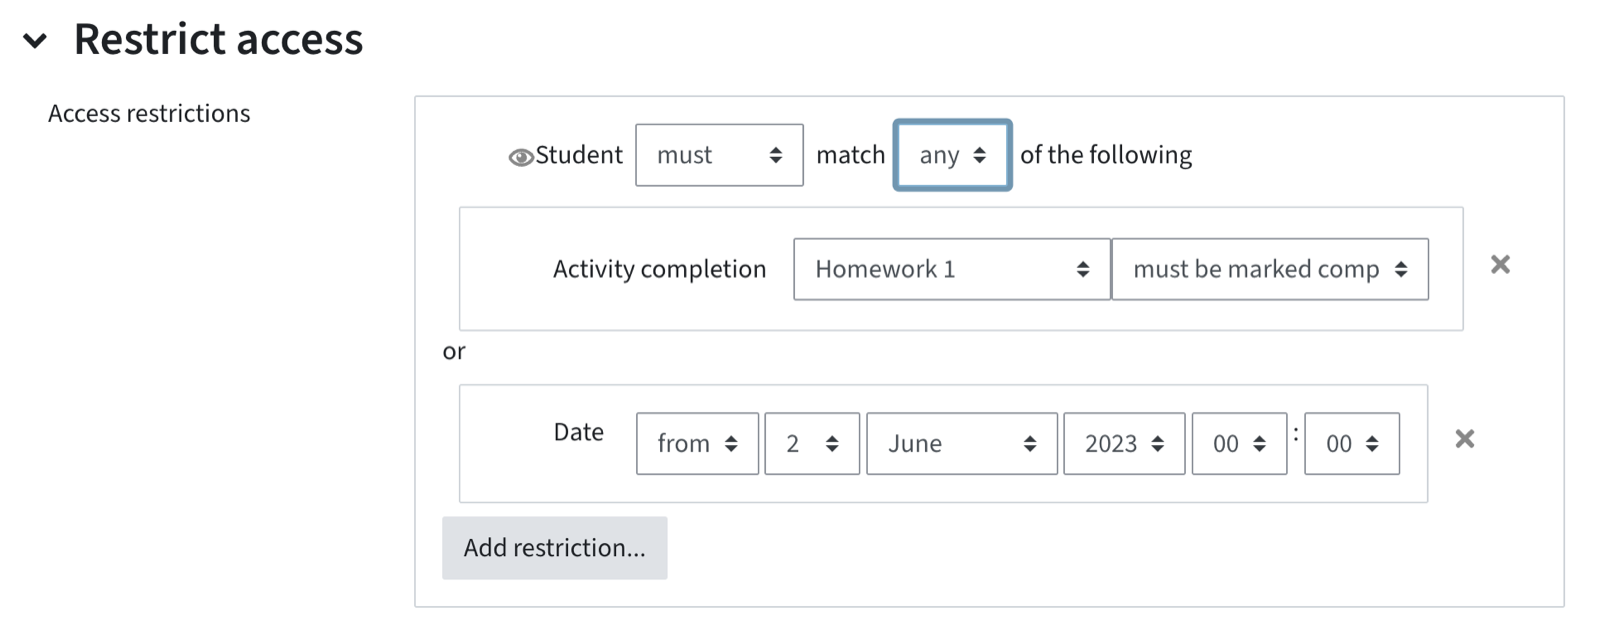
- For more complex scenarios involving the operators AND or OR, use restriction sets.
For more complex scenarios involving the operators AND or OR, use restriction sets.
Visibility
There is an eye icon next to restrictions you have applied.
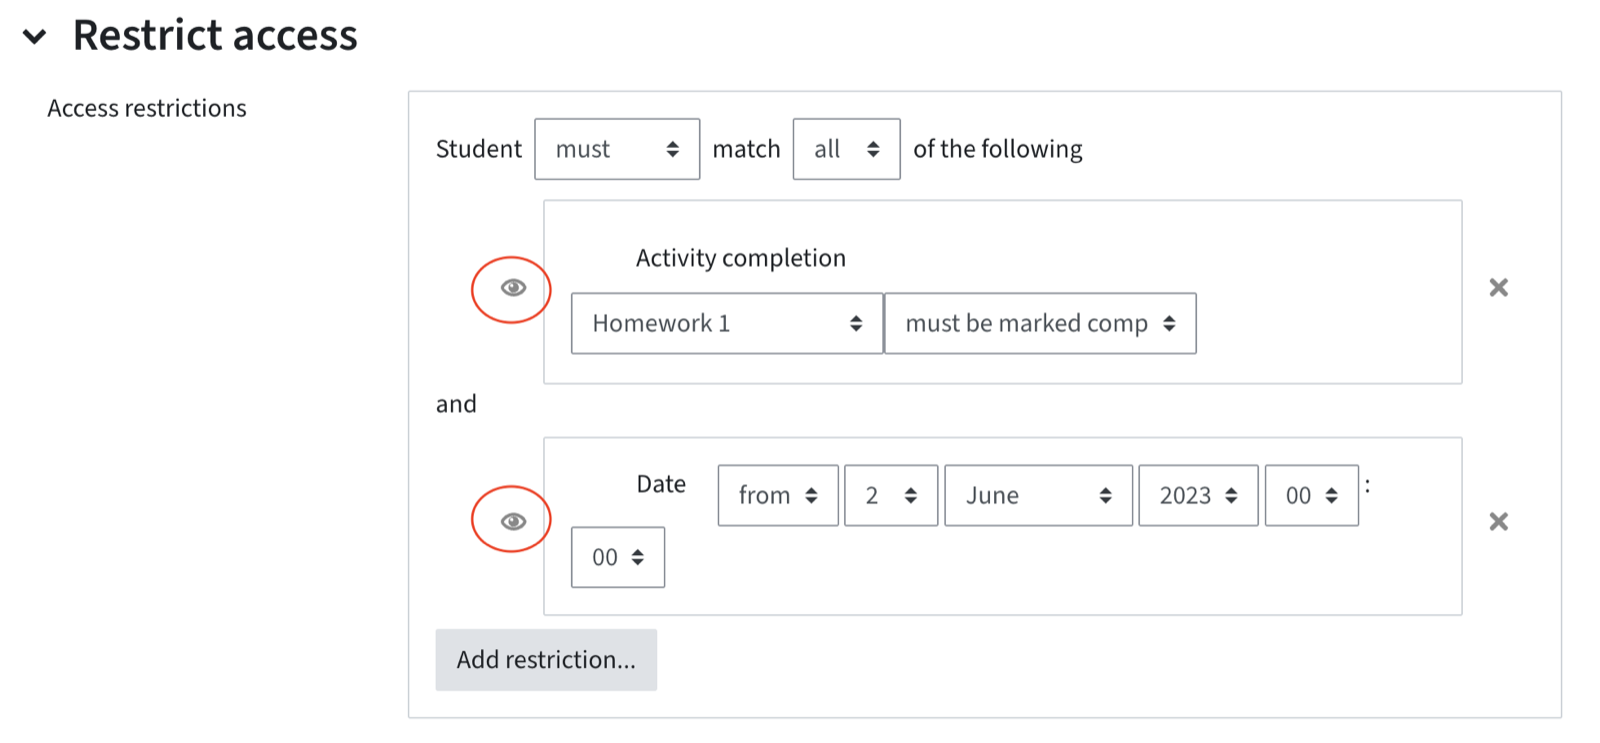
If the eye is NOT crossed out, students who do not meet the criteria see the activity (or section) and the conditions that must be met to access it. The activity or section is greyed out though and students cannot access it.
If the eye is crossed out, the activity (or section) and the conditions that must be met are not visible for students who do not meet those criteria. The students will not know at all that there is an activity or section
By clicking the eye icon, you can choose the visibility settings. It might be better in terms of overview and transparency for students not to hide the activities completely.
Please note: Restrictions are only active when the activity is visible to students and not hidden. You can test the visibility from a student perspective by changing your role (click on your name at the top > Switch role > Student).
Types of restrictions in detail
Activity completion and completion tracking
If you would like to tie access to activities/sections/content to the completion of another activity , you need to activate completion tracking for this course.
- In the menu on top, click on the tab settings.
- In the section Completion tracking, set Enable Completion Tracking and Show activity completion conditions to Yes.
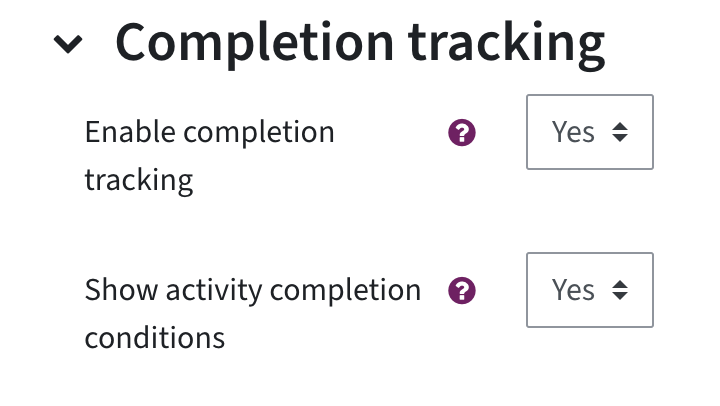
- Save and return to the course.
Activity completion will be set to „manual tracking“ for all future activities created. For activities that are already in the course, you need to activate activity completion and define when the activity that should be used as a condition is considered completed.
- Turn editing mode on. Go to the activity that is to be used as a condition, click on the three dots > Edit Settings. Go to Activity Completion.
- Klicken Sie rechts neben der entsprechenden Aktivität auf die drei Punkte > Einstellungen bearbeiten.
- Wählen Sie den Punkt Aktivitätsabschluss.
These are the options available in a drop-down menu:
- Do not indicate activity completion does not track when the activity is completed.

- Students can manually mark the activity as completed means that students will see the button „Mark as done“ below the activity on the course page. They can click this button on their own. Remember that students can always manually mark the activity as completed, even if they have not really completed it!
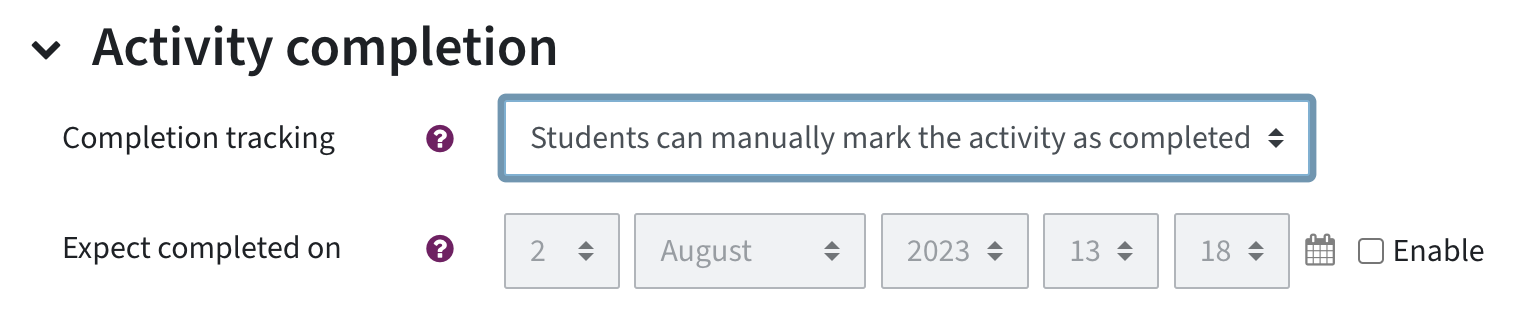
Please note: Students can also mark an activity as done even if they have not completed it!
- Show activity as completed when conditions are met allows you to define when an activity has been completed. There are different options available depending on the type of activity (e.g., students need to view the content, receive a grade or pass grade, submit a file, make a choice).The conditions are listed below the activity on the course page and will automatically turn to green for a student once they are met.
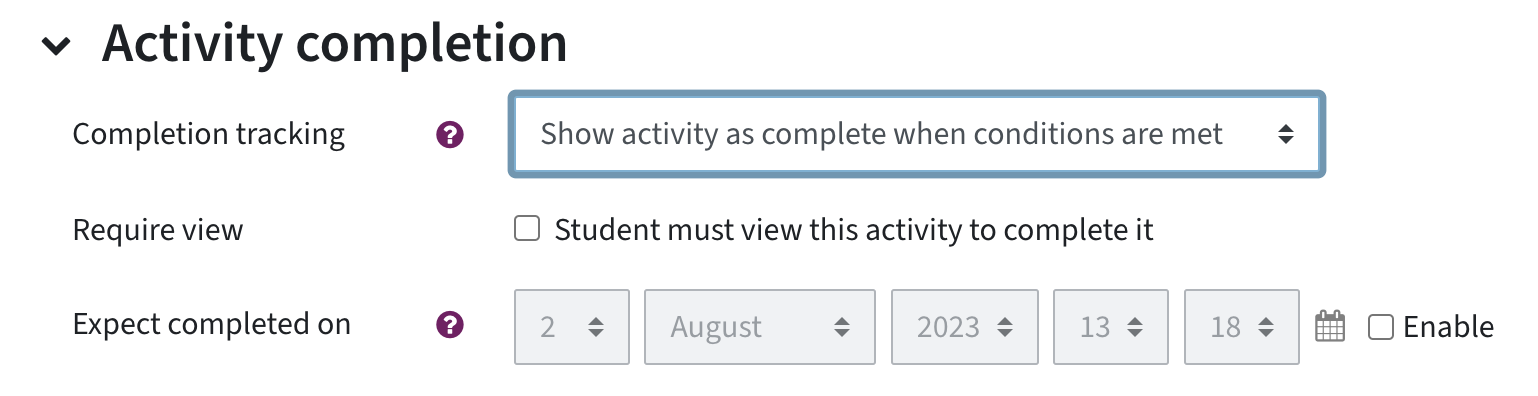
Only if an activity has had its completion tracking activated, it can be used as a condition to access another activity.
- Go to the second activity and in the settings, Add Restriction > Activity completion.
- Choose will open a drop-down menu with all available activities that have completion tracking activated. Choose the activity you need.
- In the next drop-down, choose IF and HOW the activity must be completed.
- Choose the visibility via the eye icon (See „Visibility“).
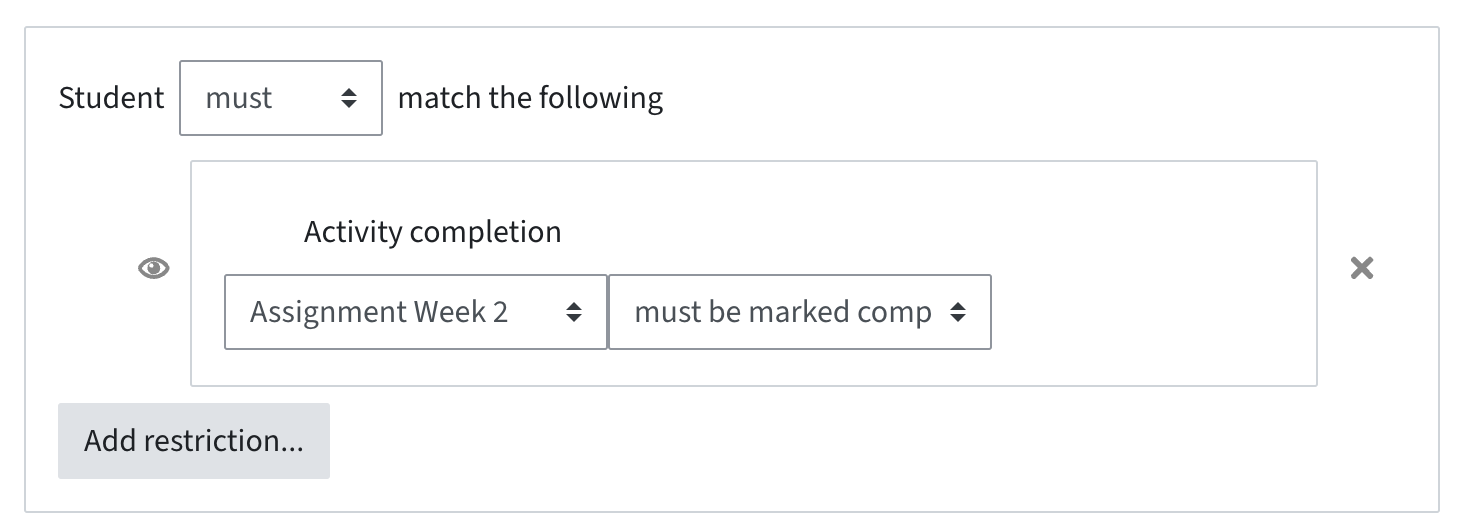
Example scenario: Students should only be allowed to book an appointment for office hours once they have submitted the assignment. Go to the submission first and activate completion tracking with the condition „must make a submission“. Then go to the scheduler and set the restriction Activity completion > Submission > must be marked complete.
Date
- In the settings of the activity or section, add a restriction > Date
- Set a date and time.
- In the drop-down, set whether this condition MUST or MUST NOT be met.
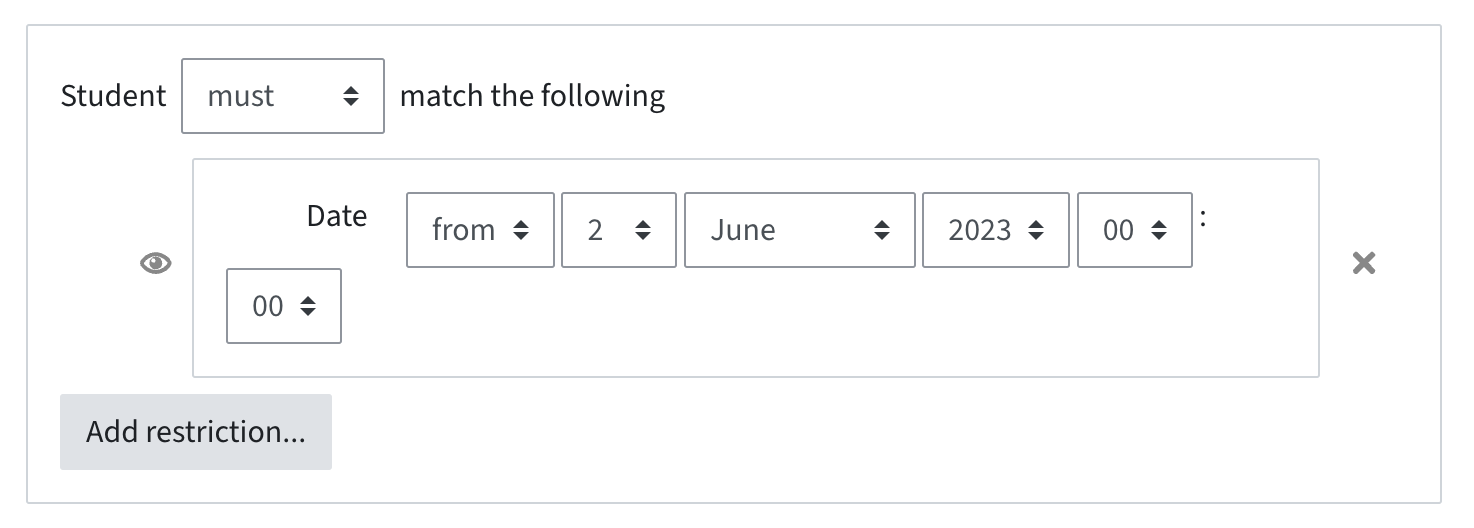
- Choose from or until, depending on whether you want to make something available from or until a certain date.
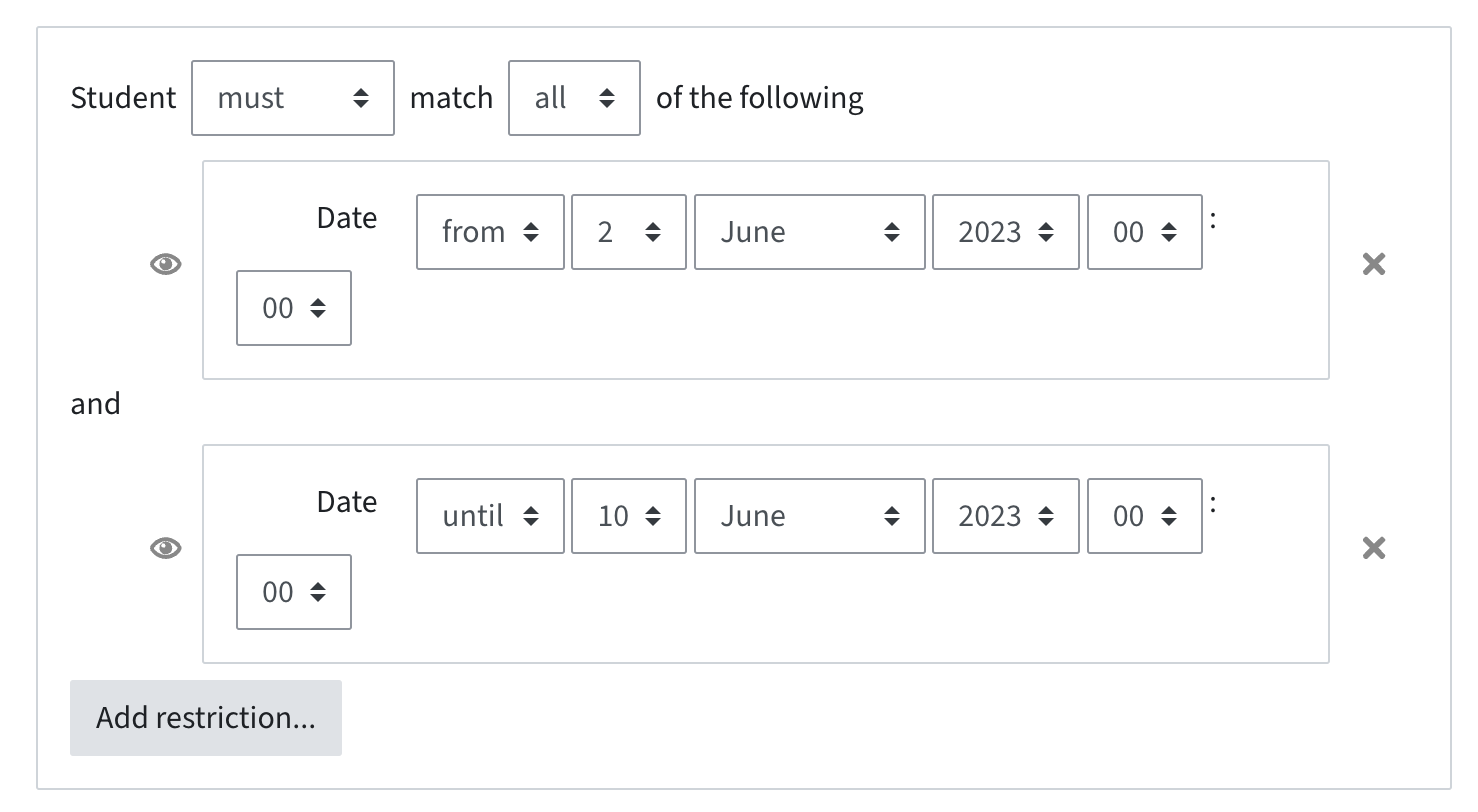
- You can also set both the from and until values to make something available for a certain period of time.
- Choose the visibility via the eye icon (see „Visibility“).
Example scenarios:
Scenario 1: The sections of a TeachCenter course are to become visible one by one each week. Set a date restriction for each section.
Scenario 2: A document is to be visible only during a certain period of time. Set two restrictions (from and until) for this file.
Grade
- Go to the activity or section settings and add a restriction > Grade.
- Choose whether the condition MUST or MUST NOT be met.
- In the next drop-down, choose the activity whose grade is used as a condition. You will only be able to choose graded activities (e.g., quizzes, submissions, H5P videos).
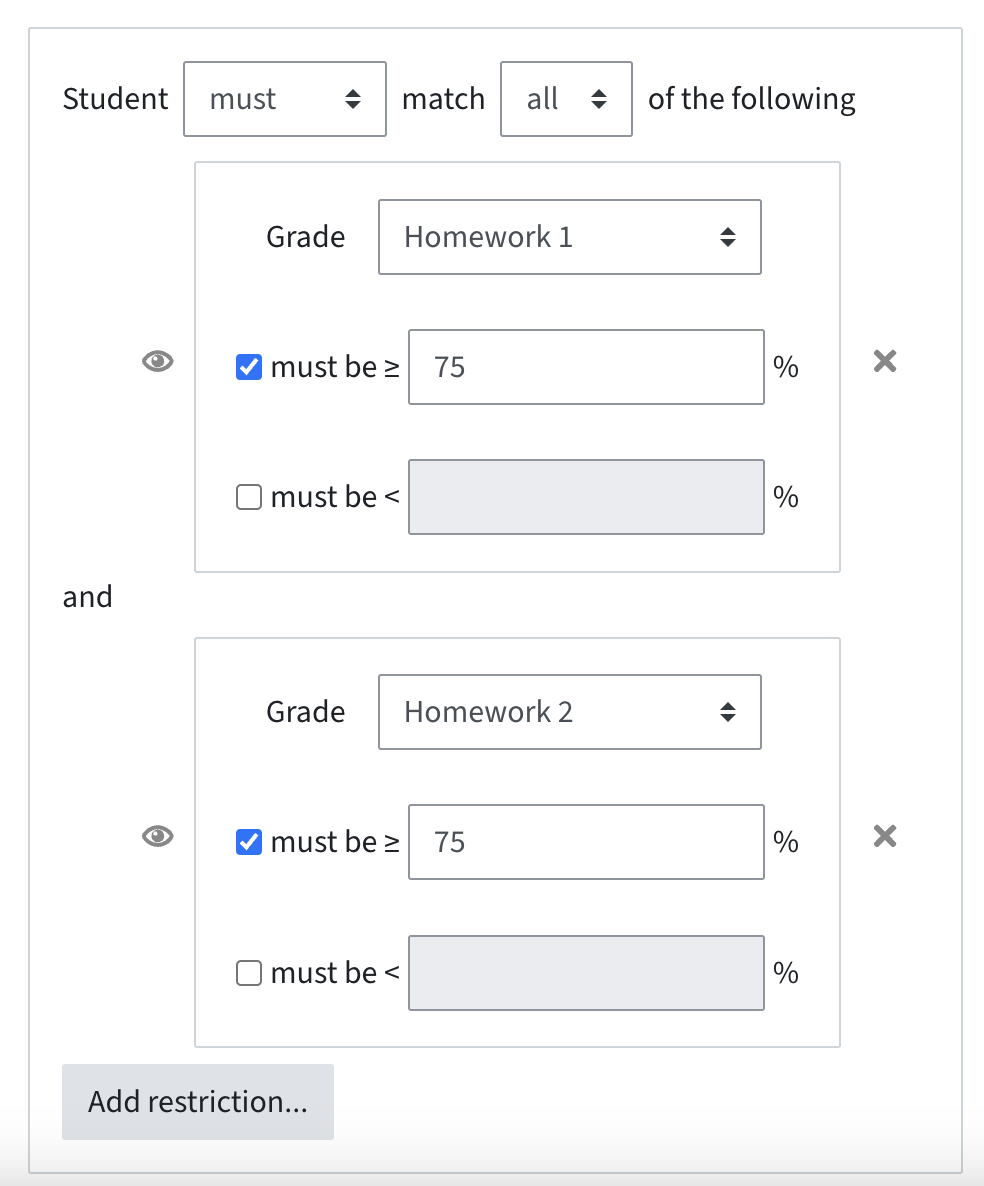
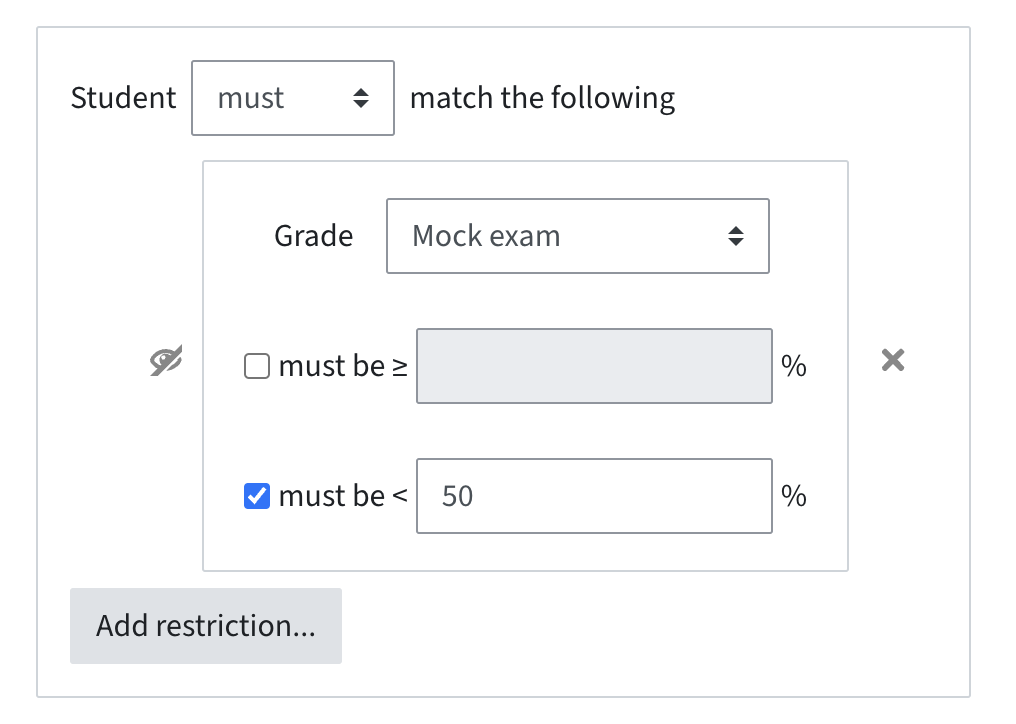
- Depending on whether the grade must be above or below a certain percentage, choose the desired option and enter the percentage.
- Choose the visibility via the eye icon (see „Visibility“).
Example scenarios:
Scenario 1: Students are only supposed to see a homework task if they have reached at least 75% in the previous homework tasks. Set a restriction „Grade“ for each previous homework task.
Scenario 2: Students who have scored less than 50% in the mock exam are supposed to receive additional exercise material.
Groups and groupings
To set this restriction, groups or groupings must be available in your TeachCenter course. The groups can be synchronised automatically from TUGRAZonline or they can be created manually as described in the how-to guide on groups.
- Go to the activity or section and add a restriction > Group or Grouping.
- Choose whether the condition MUST or MUST NOT be met.
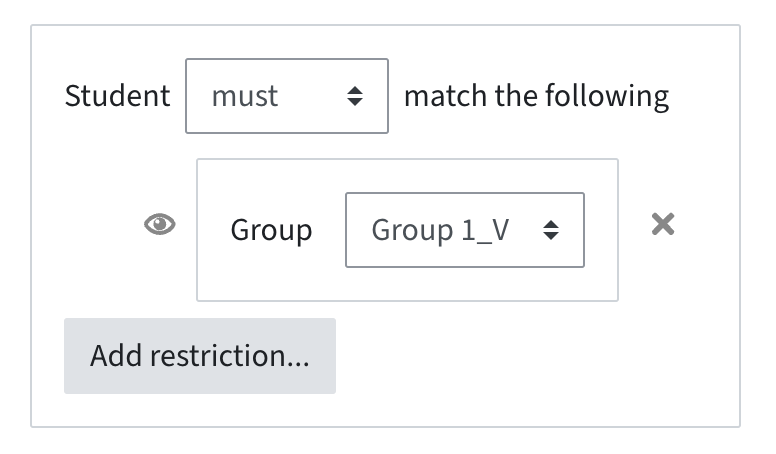
- In the drop-down, choose the group or grouping you want to restrict the activity to.
- Choose the visibility via the eye icon (see „Visibility“).
With these restrictions, you are regulating only the visibility or access for groups. If you want your students to submit in groups, for example, this must be set separately in the settings of the submission.
Example Scenarios
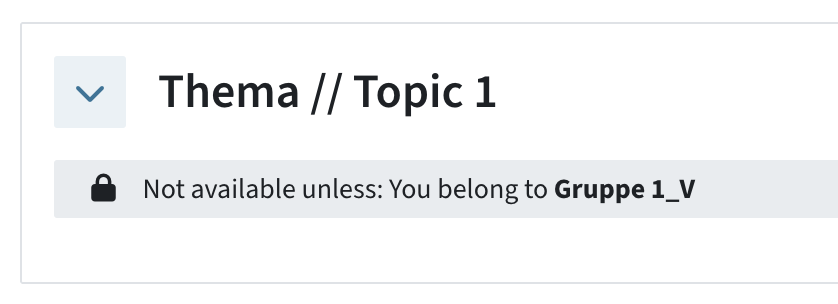
Scenario 1: You want to make a separate section visible to each group. Go to the settings of each section and set a restriction „group“.
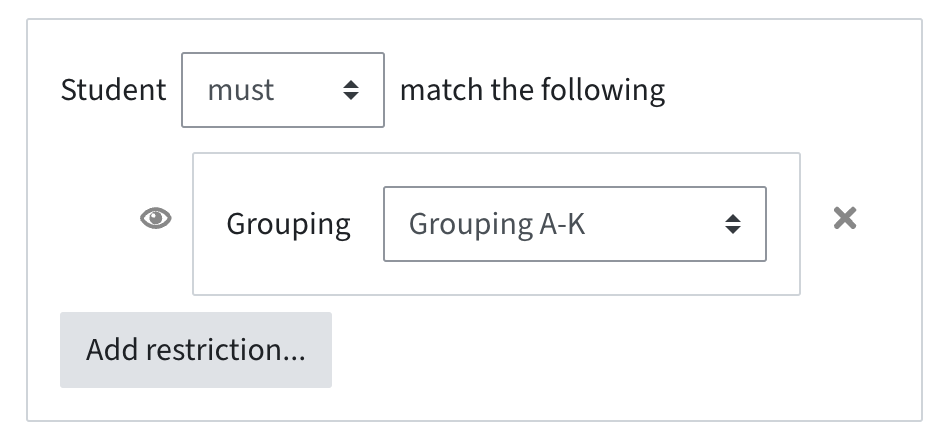
Scenario 2: Only some of the groups are supposed to book an appointment. Create a grouping with these groups. Then set a restriction to this grouping in the scheduler.
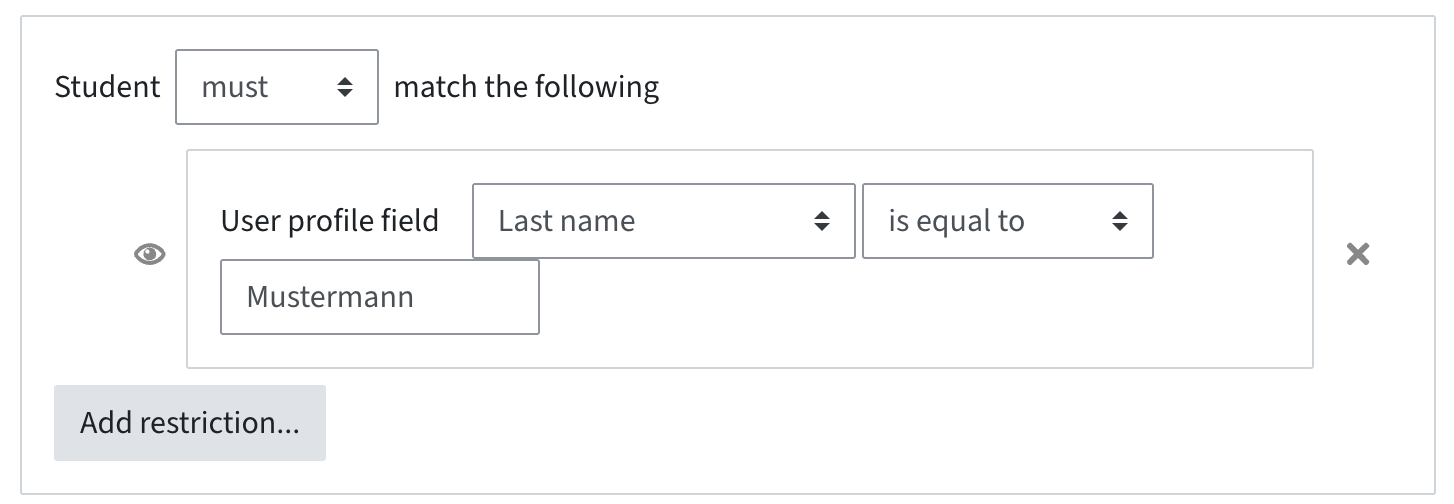
User profile
- Go to the activity or section and add a restriction > User profile.
- Choose whether the condition MUST or MUST NOT be met.
- In the next drop-down, choose the user profile field (e.g., e-mail address, last name).
- Set the condition to be met (e.g., equal to, contains, starts with) and add the respective information in the input field.
- Choose the visibility via the eye icon (see „Visibility“).
Example scenario: There is a separate midterm exam for one student. In the quiz settings, add a restriction „User profile“ and set that last name must be equal to the student’s last name.
Restriction set
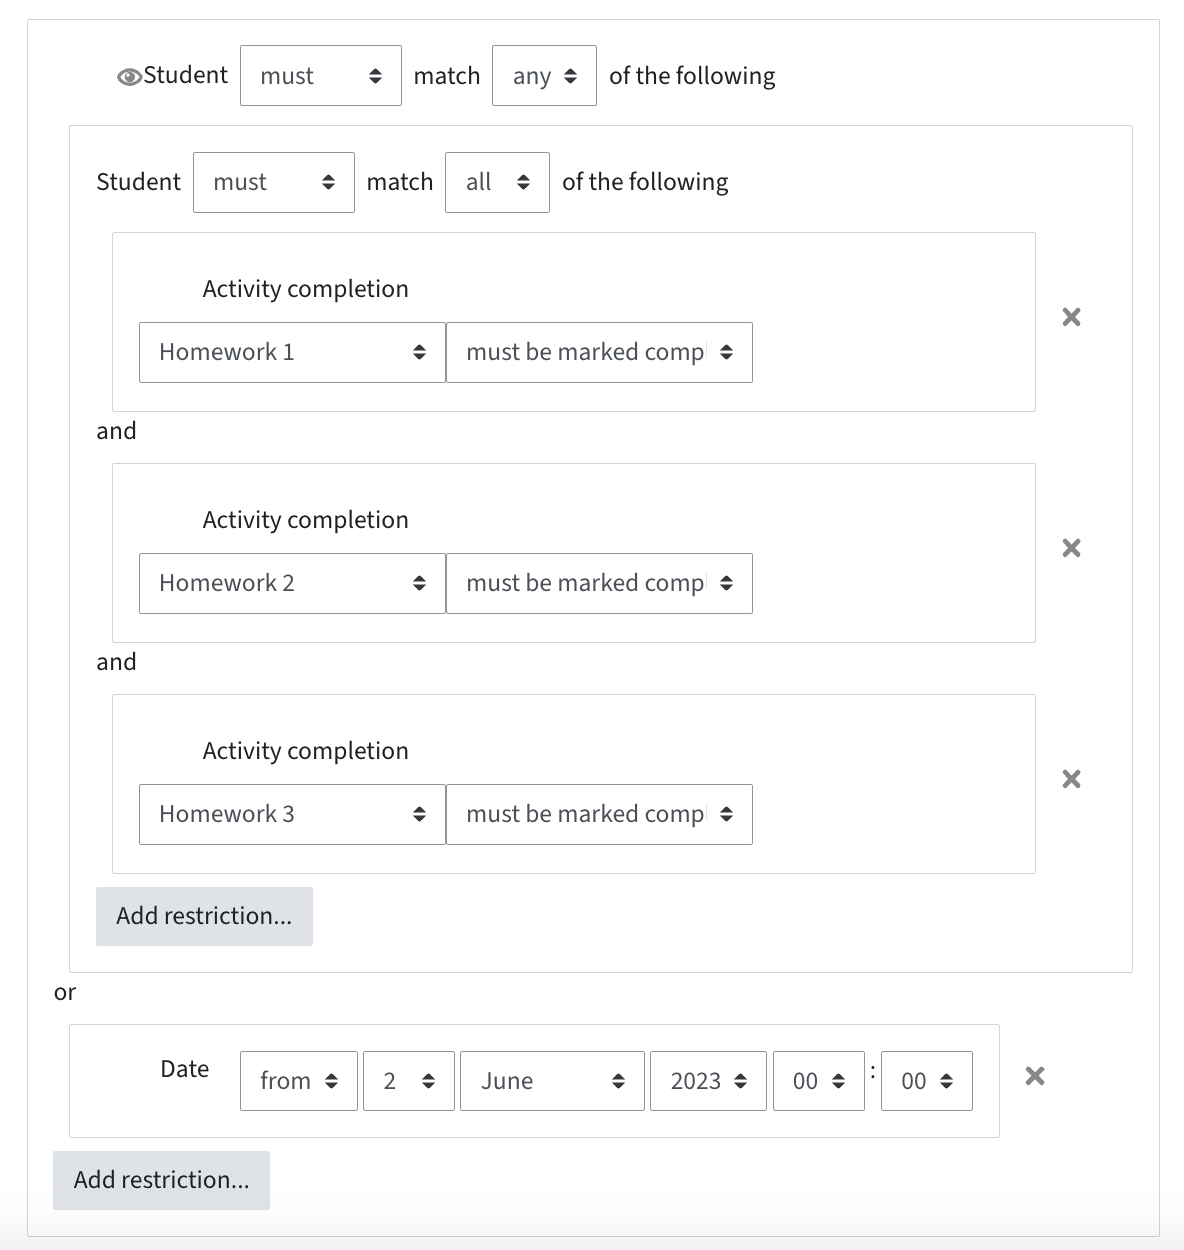
Restriction sets are helpful if you want to link several access conditions. They allow for clusters of conditions and more complex rules (similar to parenthesis in mathematics). Restriction sets expand your options beyond a simple „and“ / „or“.
- Go to the activity or section and add a restriction > Restriction set.
- A separate section appears where you can enter and cluster several restrictions.
- Add one or more restrictions in a restriction set.
- If you add more than one restriction in a set, you can connect these by setting that any or all of the conditions must (not) be met.
- Outside of the set, you can add other conditions or restriction sets.
- In the outermost restriction, you can again set whether any or all of the conditions must be met.
- Choose the visibility via the eye icon (see „Visibility“).
Example scenario: Students should see a quiz only if they have completed homework 1, 2 and 3; or after a certain date, even if the homework tasks are not (all) completed. Add a restriction set and add the homework tasks in one cluster; set that all of them must be completed. In the outermost section, add a new restriction „date“ and set the parameters to „any“ of them „must“ be completed.
Help & contact
If something does not work as described, get in touch – we will look into it.