Scheduling appointments in the TeachCenter
Teacher’s guide
How to add a Scheduler activity
Add this activity as any other activity or resource in your TeachCenter course:
- Use the Edit mode slider in the top right-hand corner and slide it to the right.
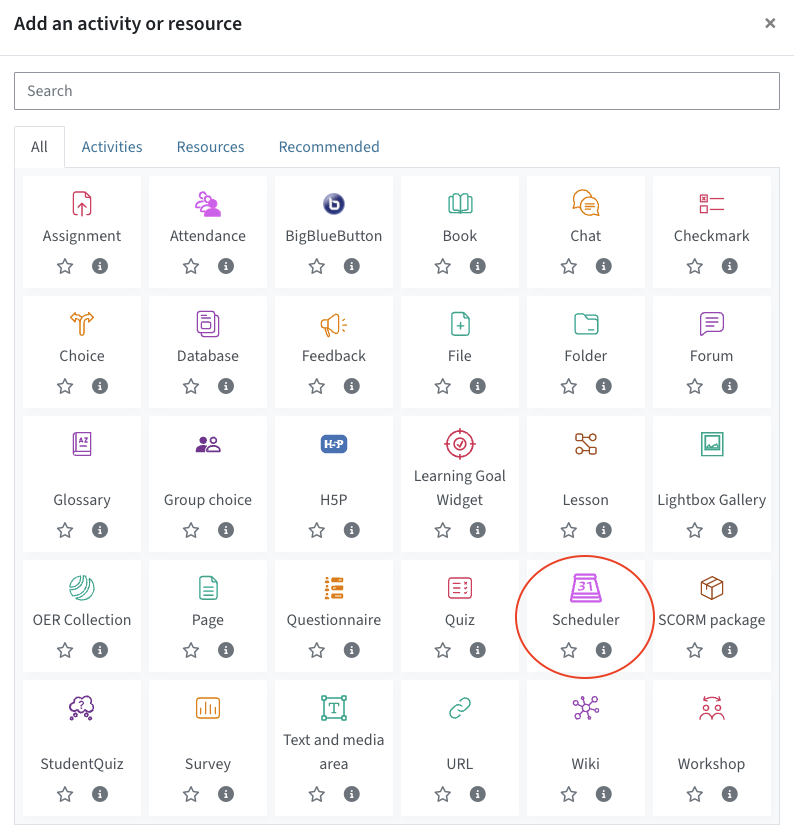
- Go to the section where you want to add the Scheduler activity, click on the plus icon and Activity or resource.
- Select the activity Scheduler.
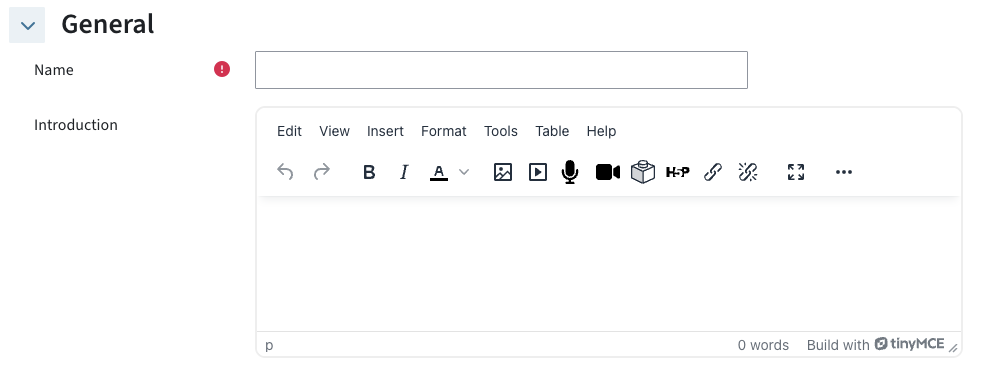
- Now enter the name and optionally a description of the Scheduler (introduction).
Now enter the Name and optionally a description of the Scheduler (Introduction).
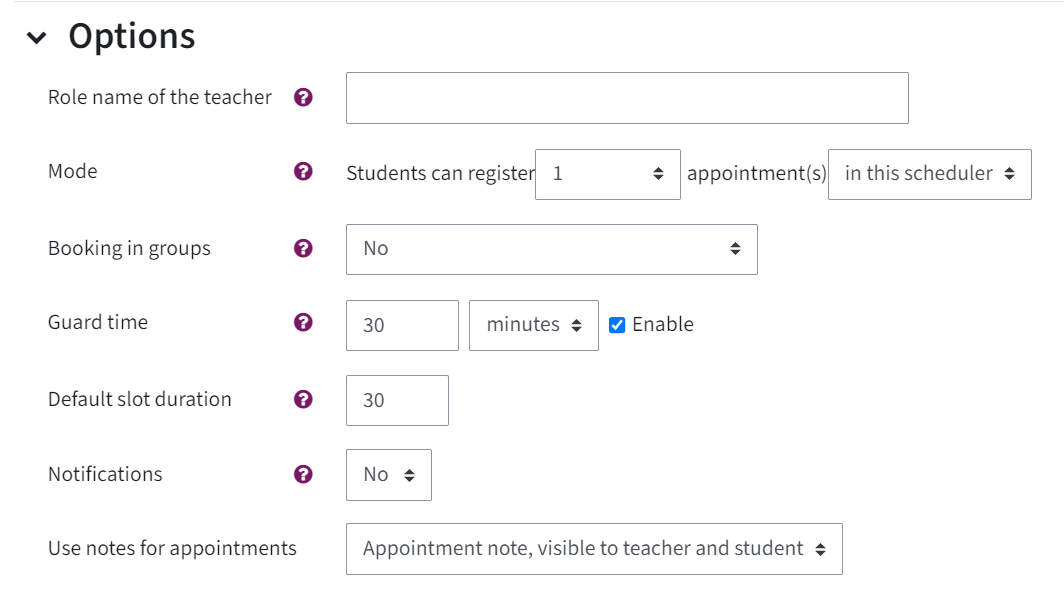
Below, you will see the Options settings. You can now customise basic settings in the Options section:
- Role name of the teacher: Name of the trainer. Is displayed at the time slot and does not necessarily have to be the teacher.
- Mode: You can adjust how many slots students can book at once or in general.
- Booking in groups: Here you can determine whether slots can be booked by individuals or by a whole group. Exists separately from the group mode, which controls the students‘ visibility of slots.
- If you tick the checkbox Guard time, you can set a time limit: After this time limit, students can no longer change their booking.
- Default slot duration: Here you can adjust in minutes how long an available slot will last.
- Standardmäßiges Zeitfenster: Hier können Sie in Minuten festlegen, wie lange ein verfügbarer Termin dauern soll.
In the following example, a Scheduler for office hours was created: The teacher adjusted the appointment mode, type of booking, a time frame for cancellation (Guard time) and time slots:
In addition to Options, there are other settings such as Grade or a Booking form and student-supplied data: If enabled, students see a separate booking screen before they get to available slots. This booking screen may, for example, require them to enter or upload data.
- Then click Save and display.
Then click Save and display.
How to add a slot
After adding the Scheduler activity, the following screen appears:
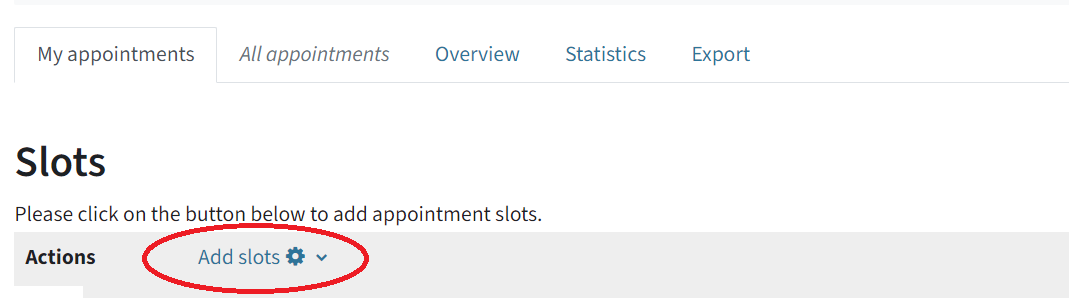
As a teacher, you will see several tabs above the heading Slots:
- My appointments: New time slots can be added.
- All appointments: If you have not yet added any slots, All appointments is still greyed out. If you have already added slots, you will end up on All appointments by default. All added appointments are displayed.
- Overview: displays your own appointments. You can filter them by teacher and only display their appointments.
- Statistics: You can see the number of time slots, participants, booked time slots, etc.
- Export: Appointments can be exported as CSV, Excel, ODS, HTML or PDF files.
Click Add slots next to Actions. Choose whether you want to add a single or repeated slot.
- Add a single slot:
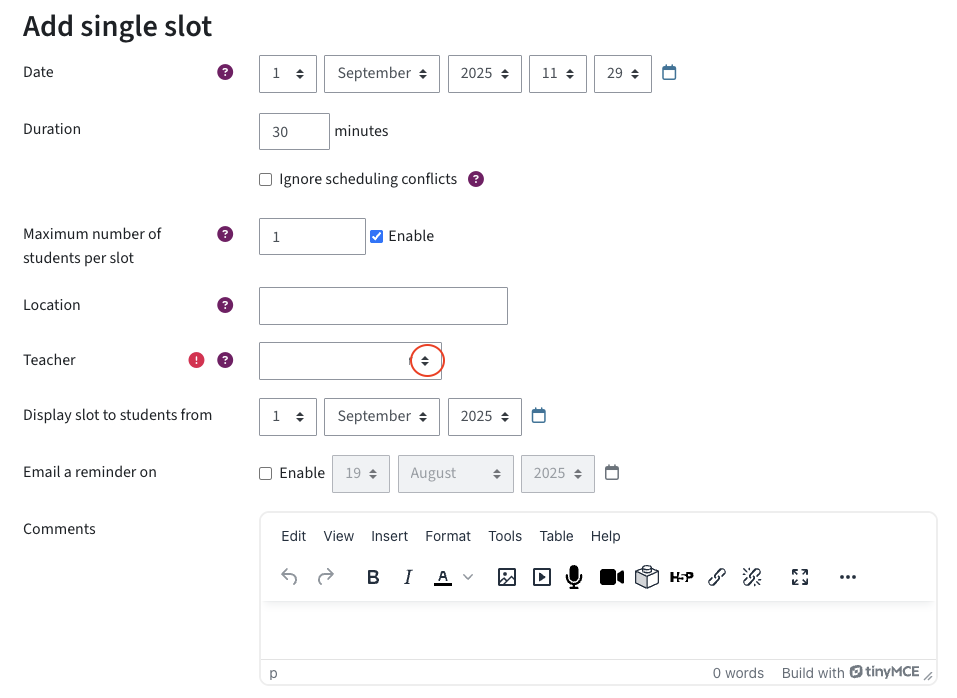
Besides date and time, the maximum duration as well as the location of an appointment can be adjusted. Name a teacher, who is responsible for each slot. Additionally, you can set the visibility for students (Display slots to students from) and, if necessary, an appointment notification.
Then click Save changes. The time slot has now been added and is available for booking.
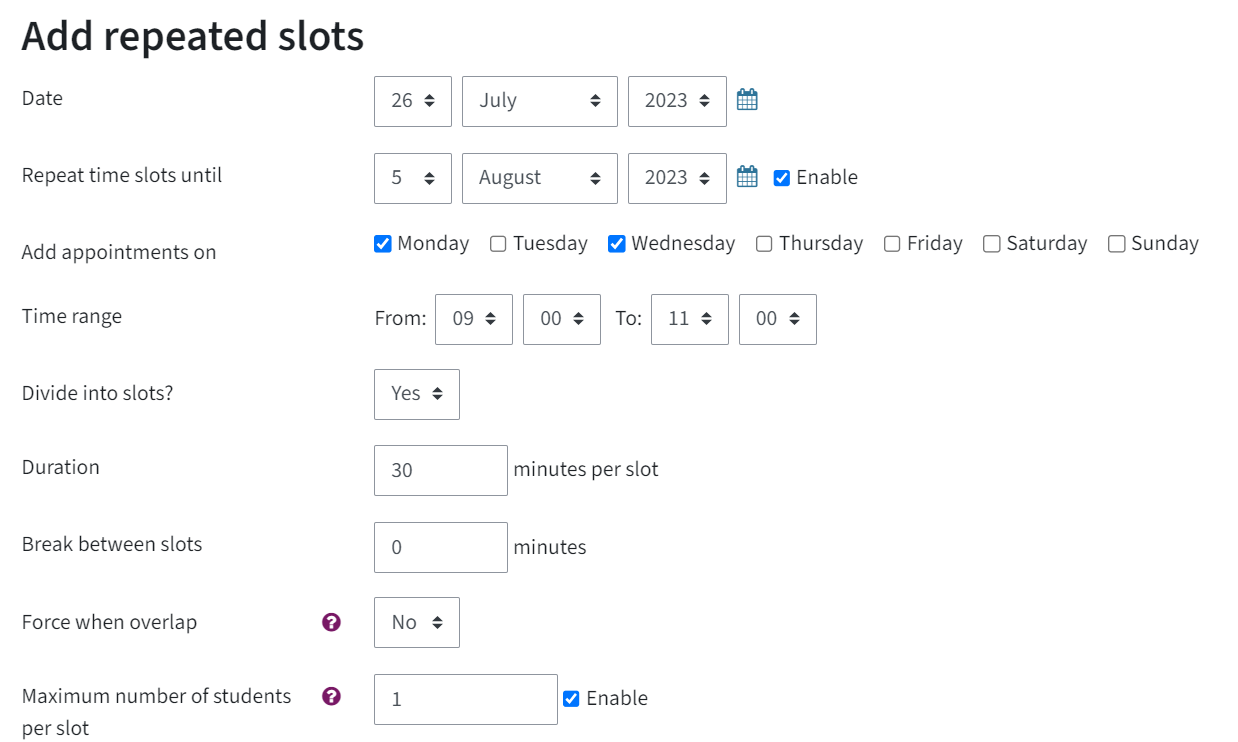
- Add repeated slots:
Practical for setting office hours. The following figure illustrates how settings can be adjusted for repeated slots:
Then all added time slots appear in a table:
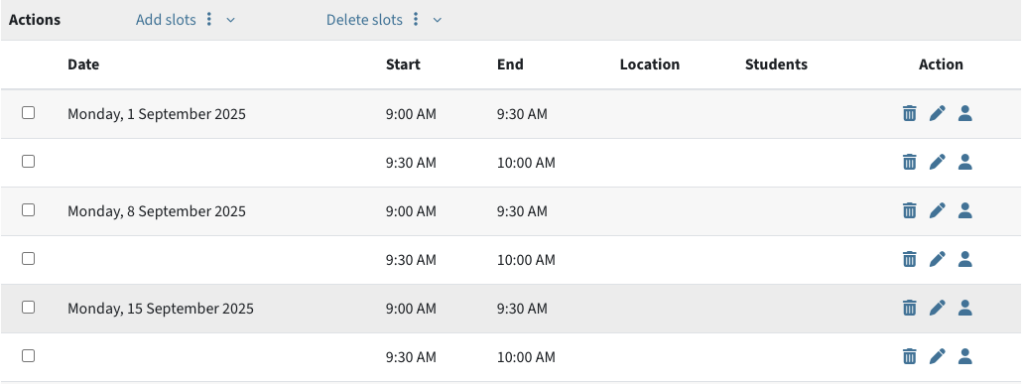
Note: You cannot create time slots in the past.
To the right, under Actions, there are three icons: the bin icon for deleting the time slot, the pen icon for editing, and the group icon:
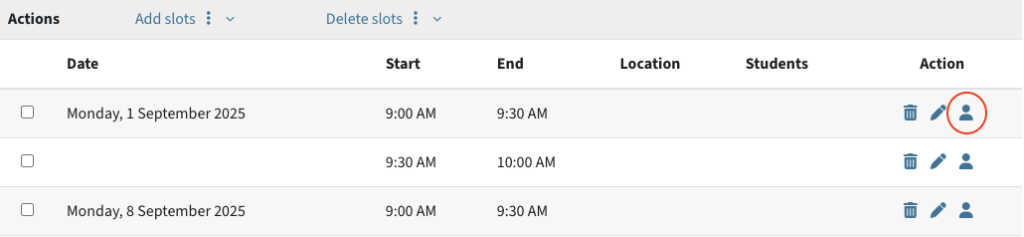
The group icon can be used to change an exclusive slot to a group slot (When group mode is set, the person icon is circled). Students can then see whether it is an individual or group appointment. For more on this topic, see Using the Scheduler with groups.
Booking appointments for students
Directly below the list of available slots you will see a list of all students in the course. Click Schedule. As a teacher you can then book individual time slots for students (Schedule in slot).
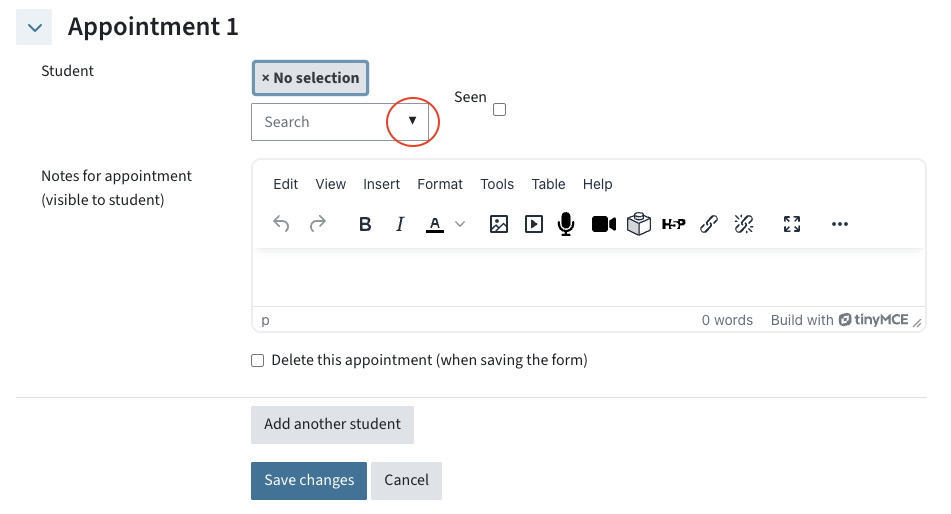
You can also click the pen icon to the right of each desired slot, then go to Appointment 1 and choose the name of the student you want to add from the drop-down menu. By clicking Add another student, you can open more input fields to add more students.
Then click Save changes.
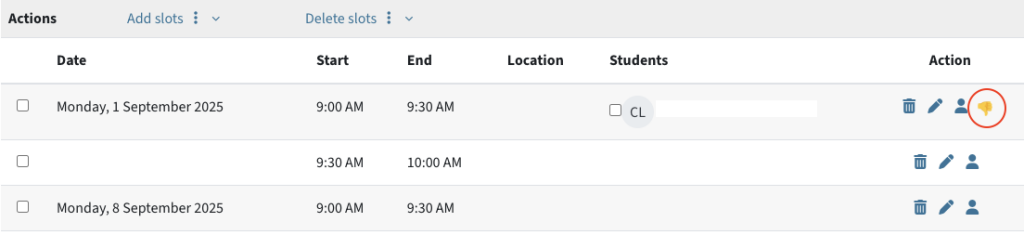
If you want to revoke appointments, click the „thumbs down“ icon on the far right, which is visible to teachers after a time slot has been booked. After revoking, this slot is open again for other students.
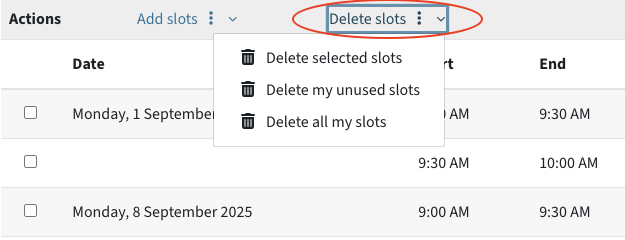
If you want to delete slots, go to Delete slots next to Add slots.
Attention: If you delete or cancel/revoke an appointment for which students were already registered, you can no longer see who had once booked this slot.
Teachers also have the option to mark slots or appointments of students as attended. To do so, tick the box next to the name of the student in the overview of all added slots (mark as Seen).

Using the Scheduler with groups
If you work with groups in your TC course, there are two options: On the one hand, students have the possibility to choose an appointment not for themselves, but for a group. On the other hand, it is possible to restrict the Scheduler to a certain group, so that students book slots individually, but only students of a certain group can do so.
- If you work with groups in your TC course, there are two options: On the one hand, students have the possibility to choose an appointment not for themselves, but for a group. On the other hand, it is possible to restrict the Scheduler to a certain group, so that students book slots individually, but only students of a certain group can do so.
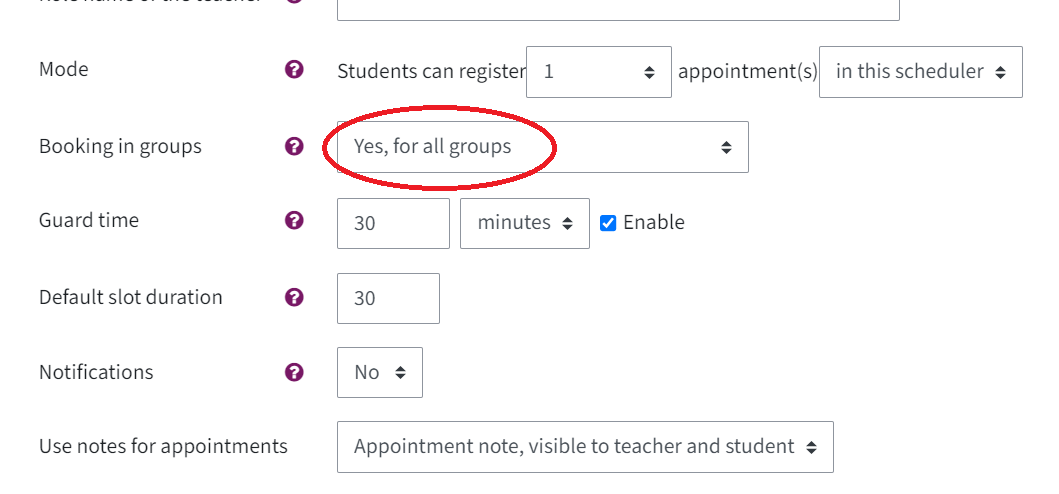
- Click Save and display.
Note: Check whether your time slots allow group bookings (maximum number of students per slot > 1). You can also see this in the overview of slots: A circled person icon means that it is a slot that can be booked by a whole group.
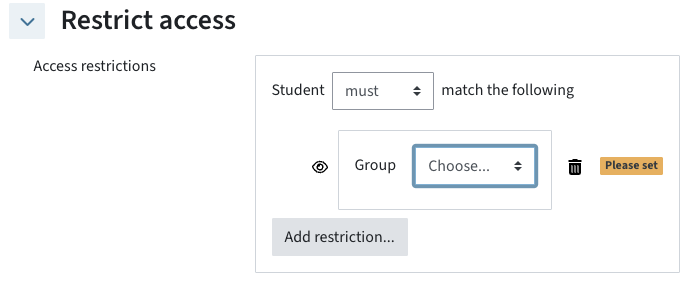
To restrict the activity to a group (i.e. only students in a group can choose a slot, but still book the slots individually), click the tab Settings > Restrict access > Add restriction > Group.
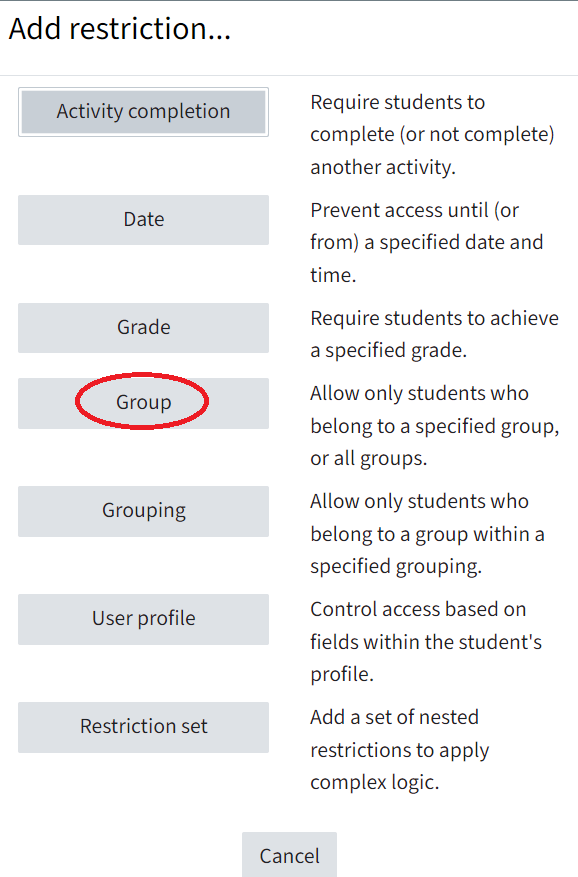
- Choose the appropriate group that is allowed to access the Scheduler.
- Click the eye icon to hide the activity from students of other groups on the course page.
- Click Save and return to course or Save and display, if you need to add time slots first.
Note: If a student has booked a time slot for the whole group, only this student’s name will be displayed, not the names of the other students. This means that only this student can cancel the booking for the whole group.
Adding a group manually
Make sure you have allowed booking in groups (Settings > Booking in groups > Yes, for all groups).
- Make sure you have allowed booking in groups (Settings > Booking in groups > Yes, for all groups).
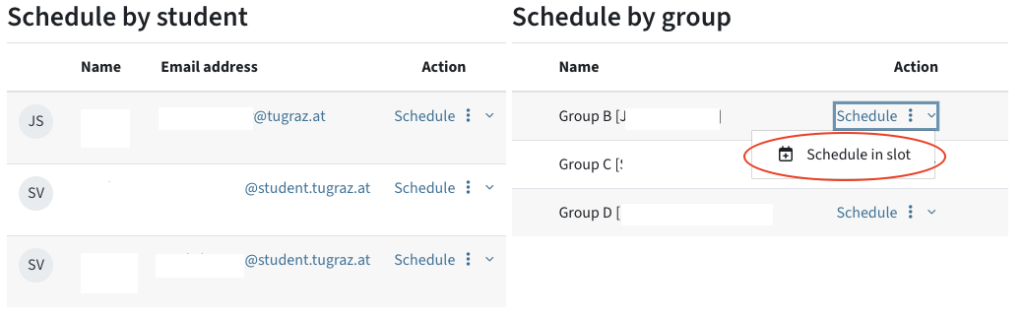
- Under Choose existing you can now choose one of the previously defined time slots and assign it to all students of the group.
- Click Save changes.
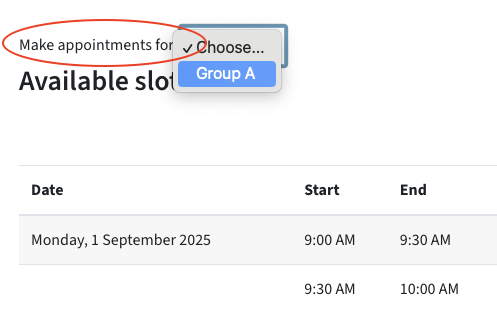
Note: If you have allowed booking slots in groups, students must choose their group in the drop-down menu before they can book a time slot.
How students can book slots
Student guide
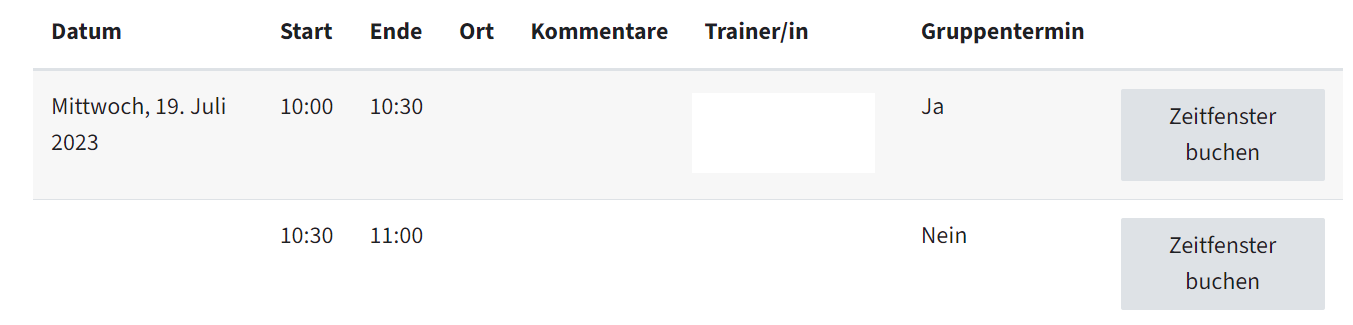
When opening the activity, students see all available time slots:
ATTENTION: If you have allowed appointment selection in groups, students must first choose whether they book the slot for themselves or for their group.
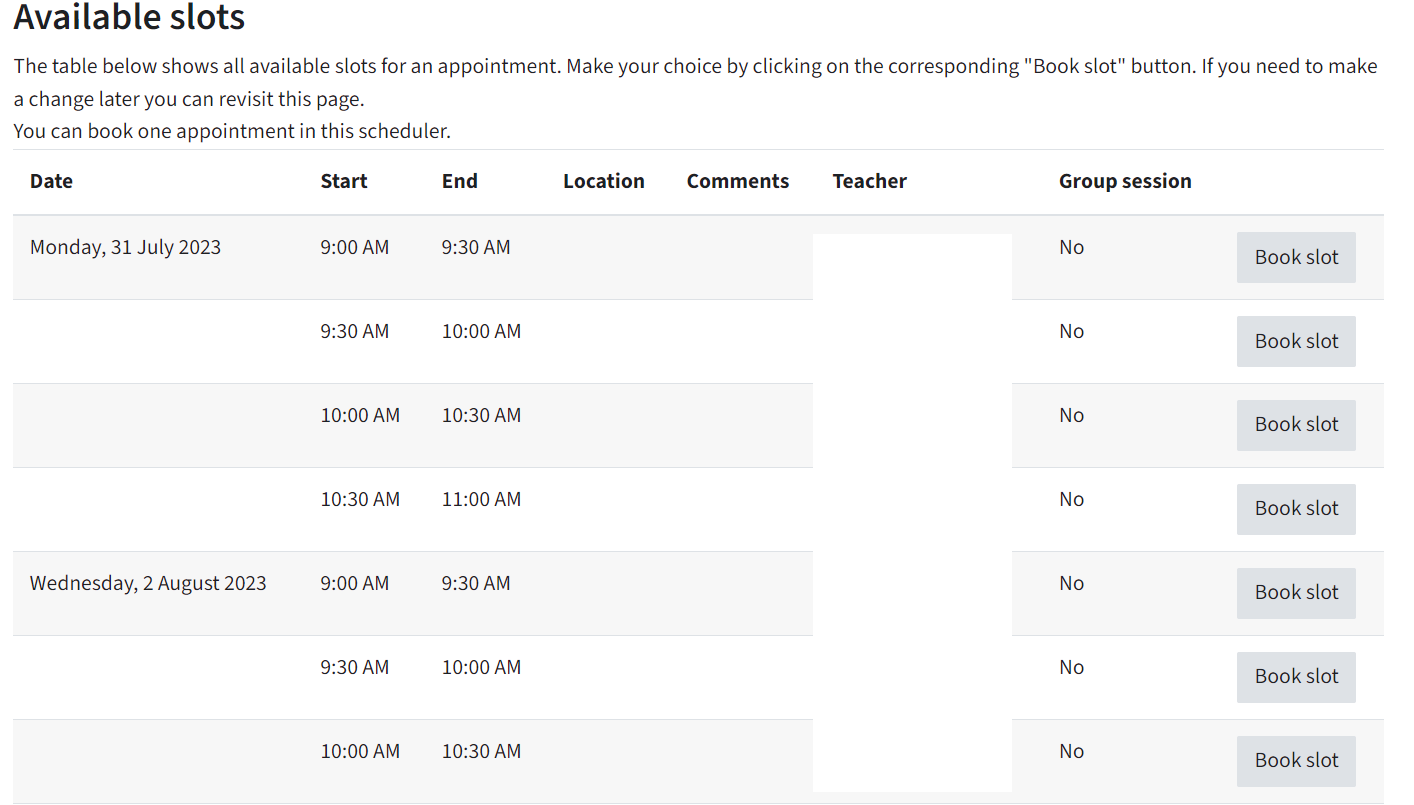
- Clicking on Book slot one (or more, depending on the setting) appointment(s) can be booked. If a booking form has been set up, students are redirected to a second page, where they have to confirm the booking .
Attention: If you have allowed appointment selection in groups, students must first choose whether they book the slot for themselves or for their group.
- By clicking on Book slot, one (or more, depending on the setting) appointment(s) can be booked. If a Booking form has been activated, students will be redirected to a second screen where they have to confirm the booking.

They can then choose one or more new time slots.
Help & contact
If something does not work as described, get in touch – we will look into it.