Taking attendance in the TeachCenter
General description of the Attendance activity
What is the Attendance activity?
The Attendance activity has been designed to enable teachers to record attendance and absence quickly and easily during a course. By default, you can choose between „Anwesend“ = Present, „Verspätet“ = Late, „Unentschuldigt“ = Unexcused or „Entschuldigt“ = Excused. Students earn points according to their status. However, teachers can also configure these status descriptions individually and add further options. For example, you can also enable students to enter their status independently before and during a course.
Students can see at any time how often they have already been absent and therefore get a good overview of their attendance. In addition, the recorded attendance and points can also be automatically calculated into the students‘ grades.
How to add an Attendance activity
Add this activity as any other activity or resource in your TeachCenter course:
- Use the Edit mode slider in the top right-hand corner and slide it to the right.
- Go to the section where you want to add the attendance activity, click the plus icon, then Activity or resource.
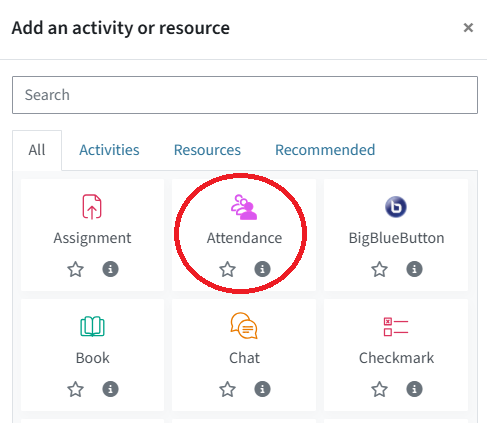
- Select the activity Attendance.
- Adjust necessary settings such as grade or restrict access.
- Click Save and Display at the bottom.
Besides the tabs Attendance, Settings, and More, which will be discussed in more detail in the next subchapter, these are other selection options in the menu:
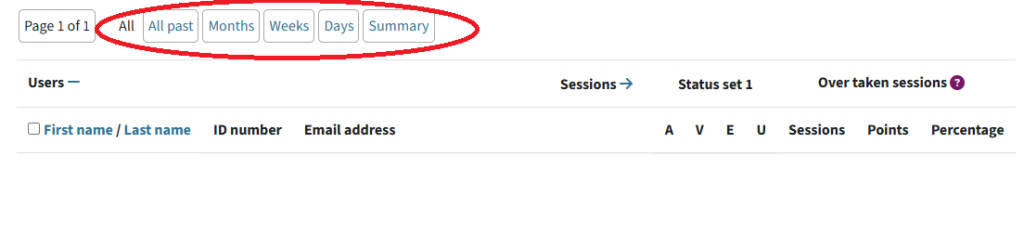
- Report: shows the attendances and absences of all students and can be used with different filters, e.g., all sessions, all past, weeks, summary
You can also display the attendances of specific groups if they exist in your TC course. If you want to contact students individually, tick off their names, scroll down, and click Send message.
- Import: Attendance lists in CSV format can be imported.
- Import: Attendance lists in CSV format can be imported here.
- Export: Here you can export the participants‘ attendance as an Excel file, Open Document or text file.
Adding sessions
Once you have created the Attendance activity, you can add sessions.
- Go to Add Session.
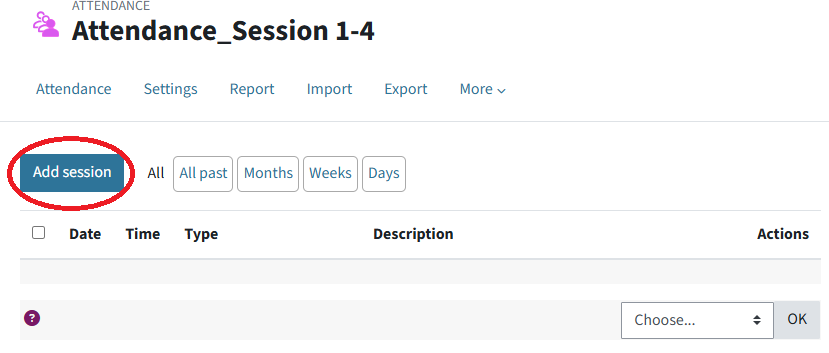
- You can add a single or multiple sessions and add them either for all students or for a group.
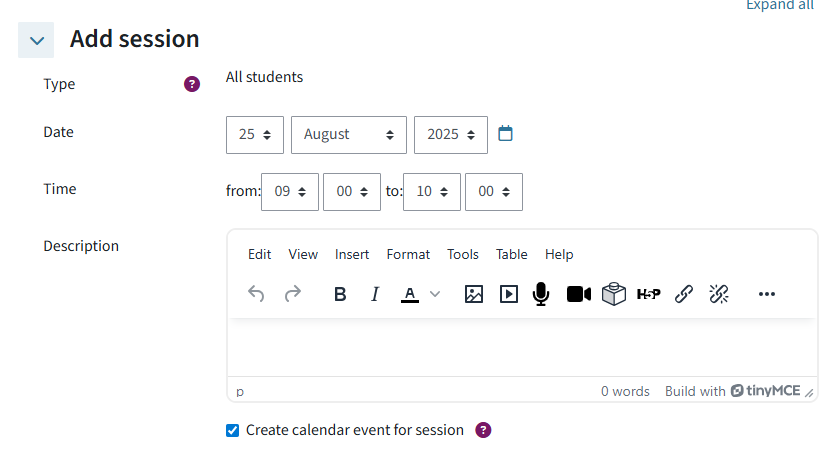
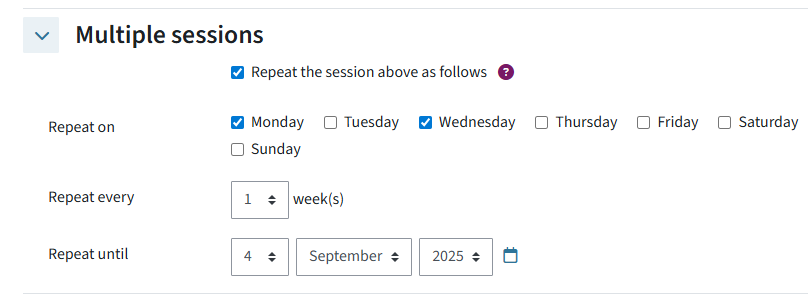
Note: To set up an attendance list for specific groups, groups must exist in the TC course and a group mode must be activated.
- Add a name for the session under Description. If you leave the item for Description empty, the session will automatically be named Regular class session.
- In the subitem Student recording you can allow students to record attendance themselves. More information about this can be found in the section Individual adjustments > Allow students to record attendance independently.
- Click Add. All added sessions are displayed in a list.
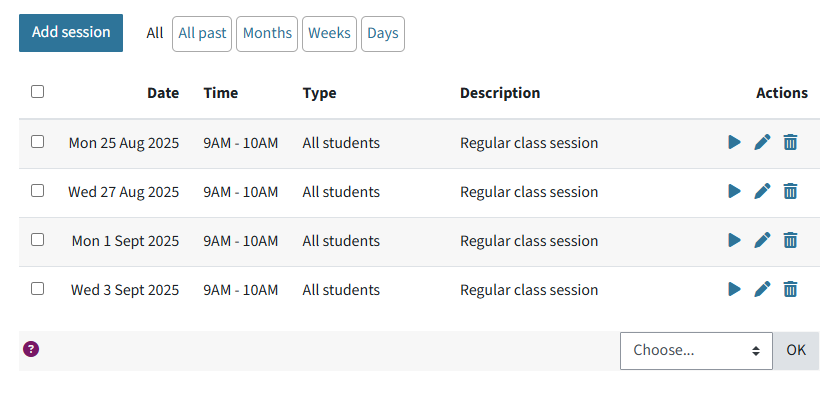
- If you want to adjust the settings for sessions at a later point, click the pen icon next to the session, or the bin icon if you want to delete the session.
Record attendance/absence
Open the Attendance activity in your TeachCenter course. You should now see the list of added sessions.
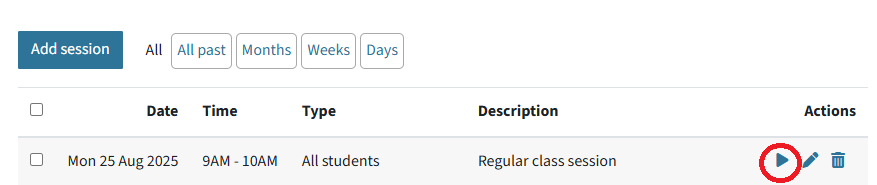
- Click the blue arrow (Take attendance) under Actions to the right of the desired session.
- The list of your students appears now.
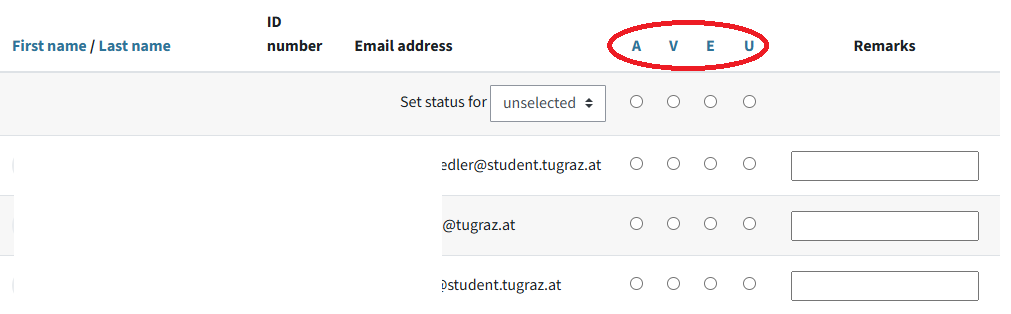
- If you have any additional remarks, you can enter them on the right, next to the Status set.
- Click Save and show next page. Once recorded, you can see a green arrow instead of a blue arrow next to the recorded session.
- If you want to adjust the attendance, click the green arrow to return to the recorded attendances.
- Wenn Sie die Anwesenheiten noch einmal anpassen möchten, gelangen Sie mit Klick auf den grünen Pfeil wieder in die Erfassungsansicht zurück.

Tip: You can also record the attendance of all your students at once: Open a session, set Set status for from „unselected“ to „all“ (above the list of students) and select the appropriate status.

You can still make manual adjustments for individual students afterwards. This is particularly recommended for large groups.
Import and export attendance and time slots
Export of attendances
To export the list of attendances after entering it, go to the Export tab. Select the desired information and format and click Export.

Import of attendances
To import attendances, the corresponding appointment must first be created. Inside of an appointment, the attendances of the participants can be imported from a file.
- To do this, go to Take attendance (triangle symbol) for the appointment you want to import attendances for.
- Click on Upload attendance by CSV.
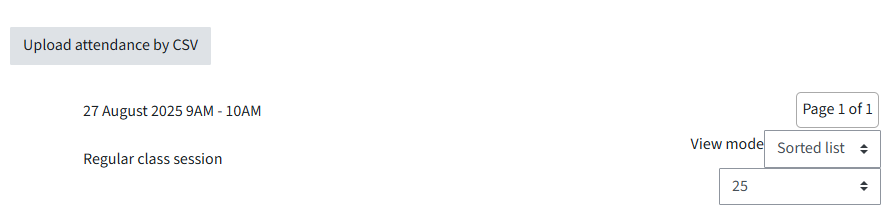
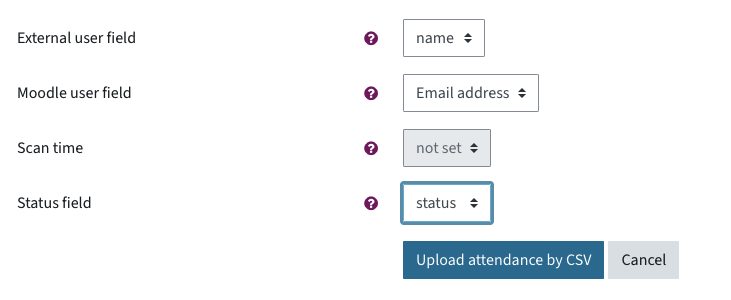
- Upload the prepared CSV file that contains the email address, date and time of the appointment (DD-MM-YYYY hh:mm) and the status abbreviation (A, E, V, U).
- Assign the columns to the correct fields. For user ID, email must be selected.
Importing appointments
Note: The Import tab is only used to import (empty) appointments using a CSV file.

This CSV file may contain:
- Groups: Text, one or more groups with a separator (e.g. comma if the separator of the file is a semicolon)
- Date: date of the lesson, DD-MM-YYYY
- From: time in the format hh:mm
- To: time in the format hh:mm
- Description: text, can be used as the name for the lesson
- RepeatDay: weekday of the repetition, three-letter abbreviation (Mon, Tue, Wed)
- RepeatEvery: number, weekly interval (e.g. 2 for every 2 weeks)
- RepeatUntil: date in DD-MM-YYYY format
Upload the file in the Import tab, selecting the appropriate separator and encoding if necessary. After importing, the columns can be assigned to the correct fields.
Individual adjustments
Configure your own status set
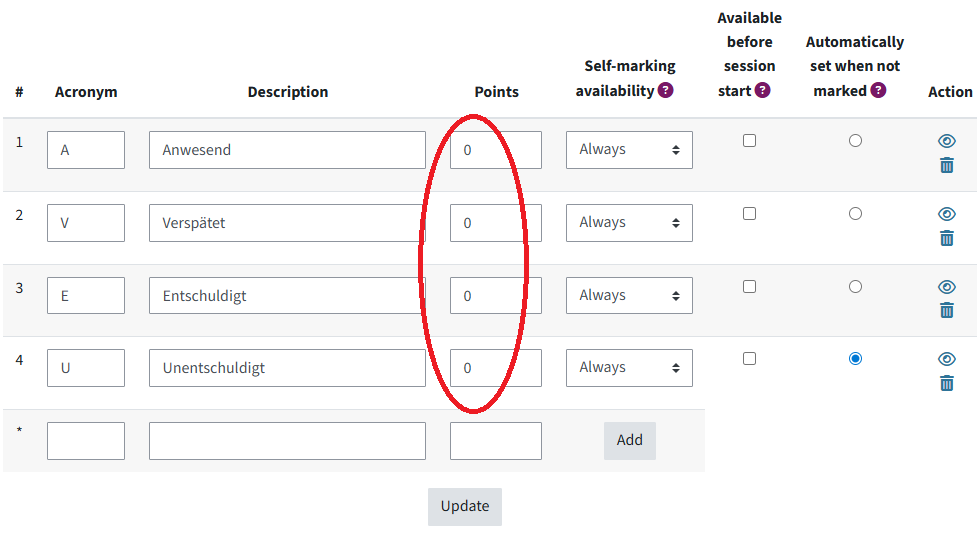
After adding the Attendance activity, click on the tab More and select Status Set from the list. You can see the four by default statuses.
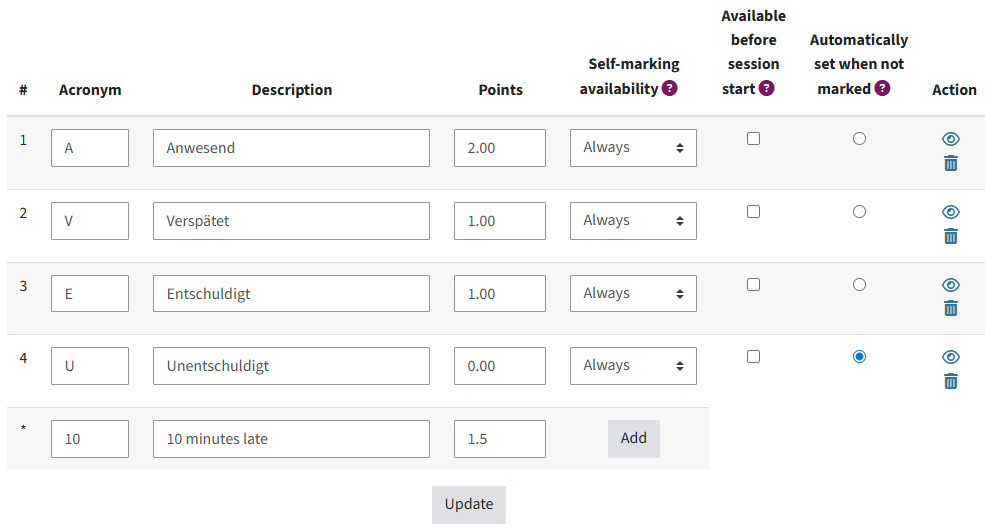
You can rename these status categories, delete them, add more, or change points.
Students automatically receive points for their attendance. By default, the TeachCenter grants 2 points for „Present“, 1 point for „Late“, 1 point for „Excused“ and 0 points for „Unexcused“ . You can also change the number of points. Simply click into the Points input field for the status in question and change the number, which can also be in the minus range.
To add another status, use the empty template at the bottom. Fill in the items Acronym, Description and Points and click Add.
Finally, click Update to save the changes.
(Do not) include attendance in the grade
If you have previously selected Point under Grade in the general settings of the Attendance activity, points will be awarded for attendance which will be added to the overall grade. If you do not want to include your students‘ attendance or absence in the grade, you have two options:
- At the top of the activity, click the tab Settings. Then scroll down to the category Grade. There you can select the grade type: If you select None here, the attendance and absence points are not included in the grade. Nevertheless, points are automatically assigned for each status, but then only provide a better overview within the activity.
- Instead, within the activity, you can also go to the tab Status Set and enter 0 points for each of the different statuses.
Go to the Attendance activity, click the Settings tab and scroll down to the category Grade.
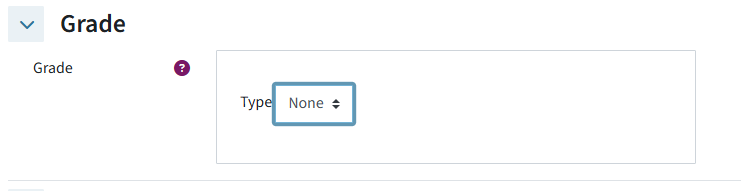
If you choose None, the points are not included in the grade. Nevertheless, points are automatically assigned for each status, but then only provide a better overview within the activity.
Instead, you can also enter 0 points for each of the different statuses within the activity under the Status Set tab.
Allow students to record their own attendance
As mentioned above, you can allow students to record their attendance themselves.
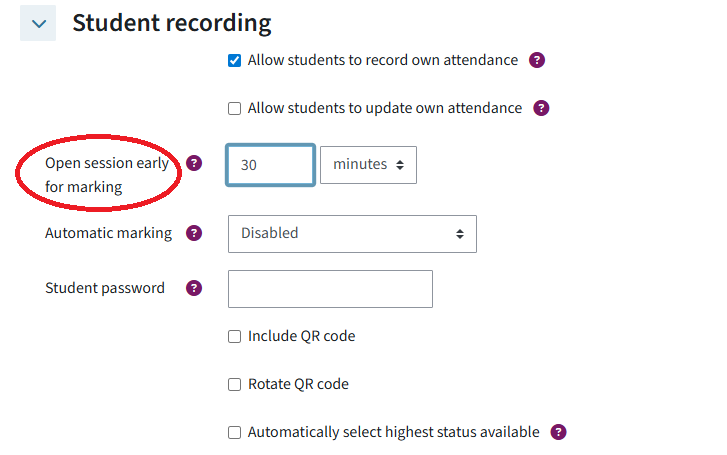
Important: If not adjusted, students can only record their attendance during a session. However, you can open a session early for marking. You can activate this setting for each session under the category Student recording. Put in the number of minutes (seconds, hours, days, weeks) before a session the students are able to self-record their attendance.
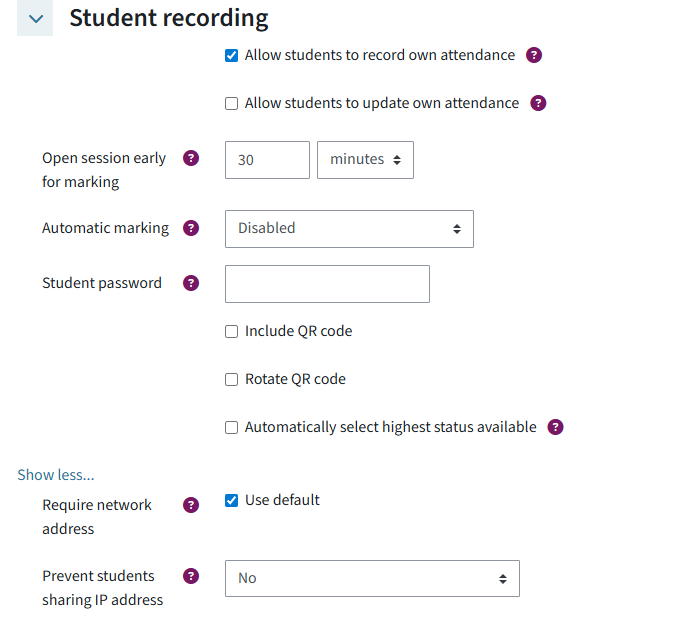
You can also optionally set a password. If a password has been set for the students in advance, there is a key icon on the right of each session, which you can click on to display the password to the students (via projector or shared screen).

The students thus navigate independently to the TeachCenter course, on to the Attendance activity and enter the password.
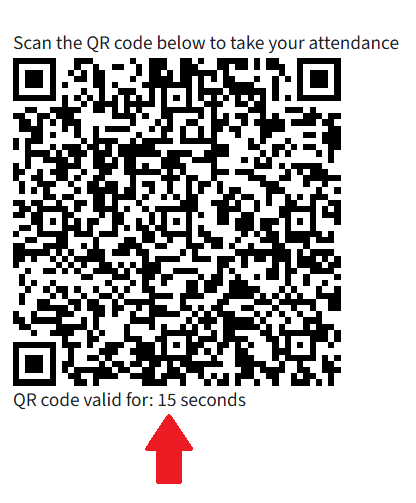
To facilitate this process, you have the option of generating a QR code for each session. Go again to Student recording and tick Include QR code. If activated, there is a QR code icon next to the session in the session list, which you can click on to show the code to the students (using a projector or shared screen).

The students scan the code with a mobile device and thus get right to the session in the Attendance activity.
To make it more difficult to forward the QR code to students who are not present, tick the box next to Rotate QR code. In this case, the QR code is only valid for 15 seconds and is then automatically regenerated.
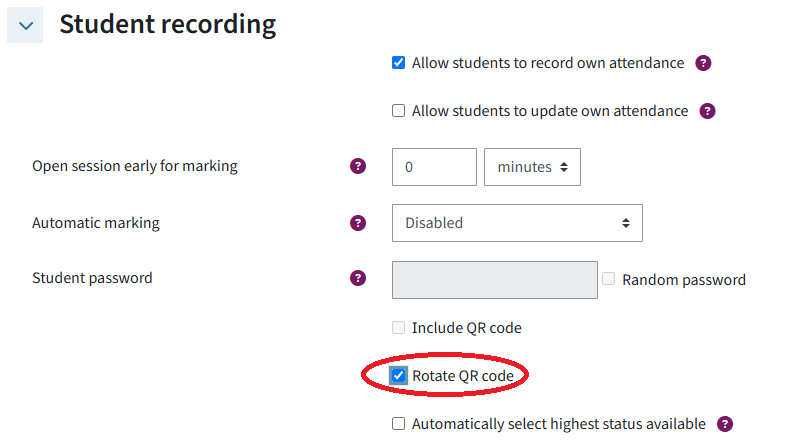
You can also combine a password of your choice or a random password with a QR code. Students can then either enter the password or scan the QR code. Note: In this case, the QR code always remains the same and will not be regenerated.
Regardless of how students navigate to the session, they then click Submit attendance, where all pre-defined statuses are available to them. The students‘ attendance is now recorded as self-recorded. If you want to limit the status options to „Present“ only, you must set this up in advance in the Status set. There, you can also set a time limit for the self-recording. If you want to allow students to change their self-recorded attendance, go to Student recording and tick Allow students to update own attendance.
Help & contact
If something does not work as described, get in touch – we will look into it.