TeachCenter-Plugin for Open Educational Resources (OER)
With the OER collection, you can create an annotated collection of openly licensed materials provided by other university lecturers on OERhub.at (external site) for your students in the TeachCenter.
If you are an OER-certified teacher, you can also use the OER plugin in TeachCenter to manage the open educational resources of your TC courses and publish them to OERhub.at (external site) , where they can then be found by everyone and be included in OER collections.
Providing openly licensed content with the OER collection
What is the OER collection and who can use it?
The OER Collection activity can be added by all teachers in their TeachCenter courses. This activity allows you to use OERhub.at (external site) , the search engine for open educational resources from Austrian higher education institutions, and compile a collection of openly licensed materials for your students. You can also comment on this collection.
Students will then see a list of materials with a preview and your comments and can access the materials directly via OERhub.at or the respective links.
Creating an OER collection in TeachCenter and managing content
- Activate edit mode in your course.
- Click on the plus icon > Activity or Material in the appropriate section and select OER Collection.
- Enter a title and click Save and Display.
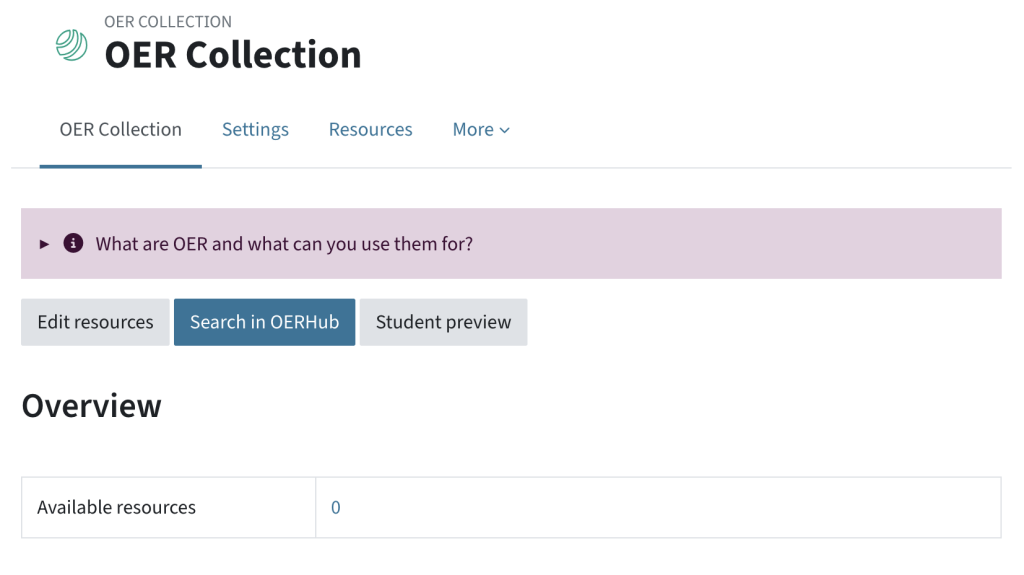
- In the OER Collection tab, you will see the buttons Manage Resources, Search in OERhub and Student preview, as well as an overview of the resources available in the collection, which is of course empty at the beginning.
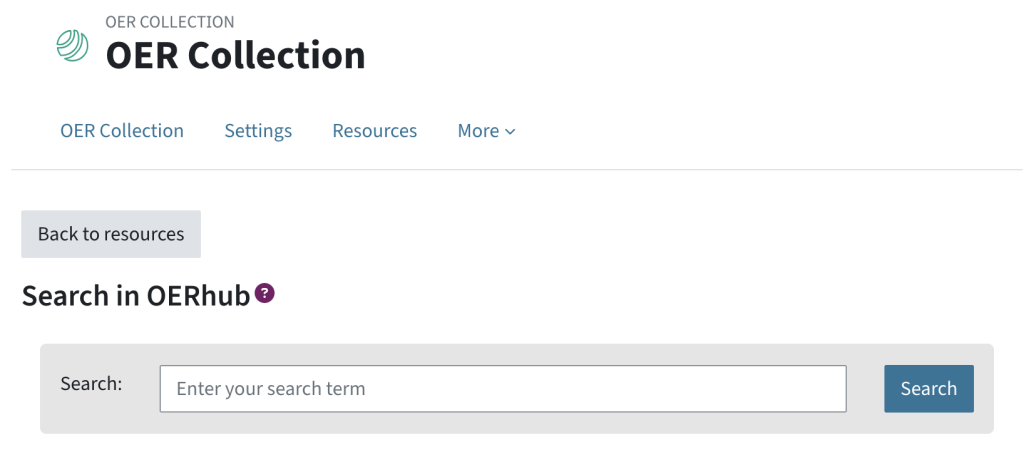
- Click on the button Search in OERhub to start a search. You can first search for a keyword and then narrow down the results with filters, for example, to specific file formats or languages.
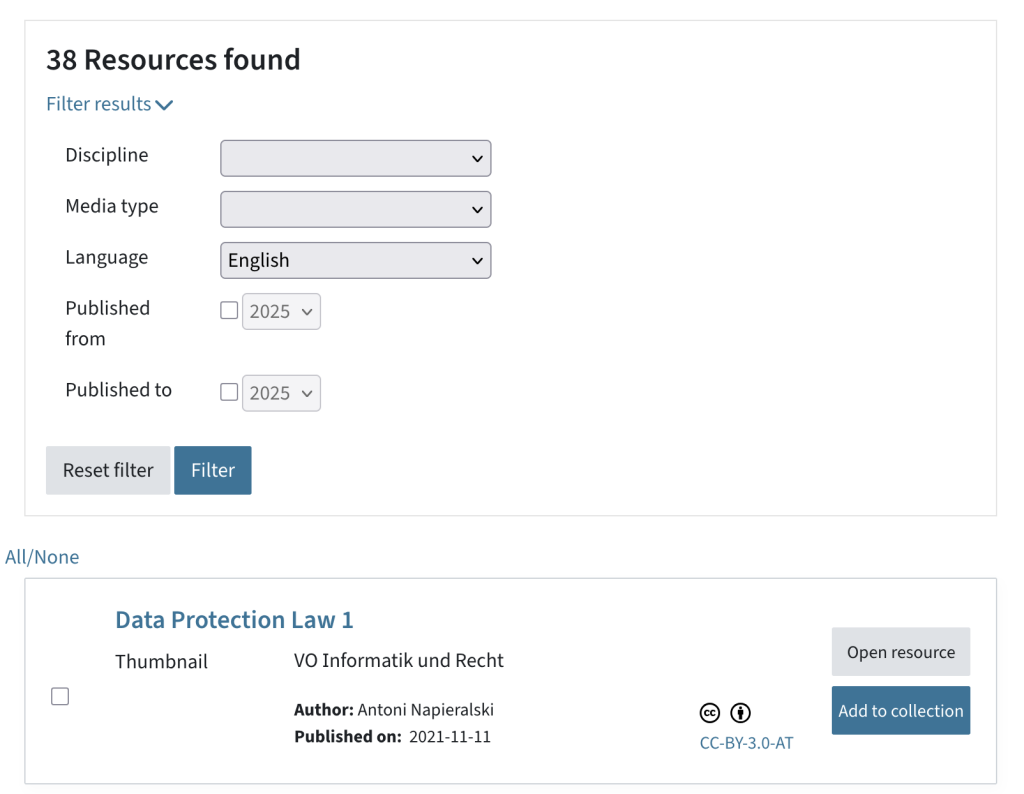
- You can open the resource to view it in more detail or use the corresponding button Add to collection.
- To add multiple resources to your collection at once, use the checkboxes on the left-hand side, then scroll to the bottom and choose With selected > Add to collection > Start from the drop-down menu.

Note: All resources are initially hidden from students.
- Go to the Resources tab to manage and comment on the content you added.
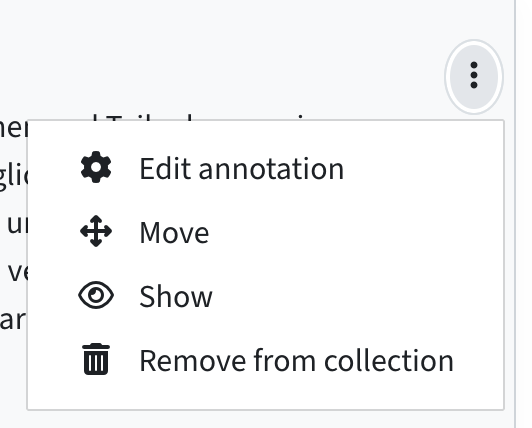
- To make a resource visible to students or hide it, click on the three dots > Show / Hide directly next to the respective content. Alternatively, you can also use the multiple selection option.
- To change the order of the resources, click on the three dots > Move.
- To comment on the resource, click on the three dots > Edit annotation.
- You can also remove resources from the collection by clicking on the three dots > Remove from collection or using the multiple selection function.
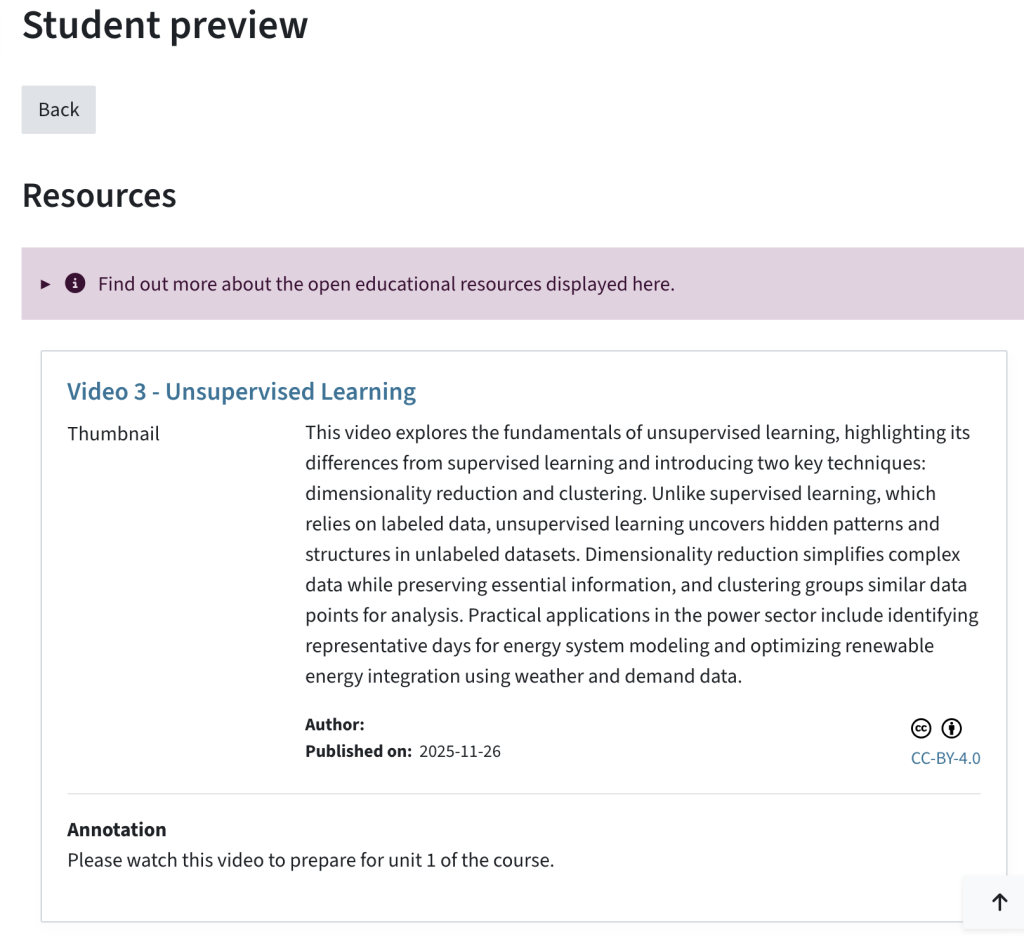
You can view your OER collection from your students‘ perspective. To do this, click on the Student preview button in the OER collection tab.
Managing and publishing your own OER with the TeachCenter OER plugin
What is the TeachCenter OER plugin and who can use it?
The OER plugin in the TeachCenter allows you to manage and publish files with open licences (Open Educational Resources). These files can also be TUbe videos.
The plugin is connected to the OERhub (external site) , which means that the metadata of the uploaded files can be publicly searched via the OERhub and your OER can also be used by others (e.g. with the OER collection). This means that your OER will reach a wider audience.
If you create OER for teaching that are not directly related to a TeachCenter course (presentations etc.), you can use the OER repository by the TU Graz library (external site) to transfer your files to the OERhub.at. It is then not necessary to upload the files to the TeachCenter and release them again via the plugin.
Only OER-certified teachers can receive access to the TeachCenter plugin. You can find all information on OER in-house training at TU Graz on the relevant TU4U page (external site) .
After successfully completing the in-house training, the TeachCenter team will activate the plugin for you in the TeachCenter, which you can then find in the main menu via More – OER.
Uploading files and setting the licence
In the TeachCenter, you can set a Creative Commons licence (external site) for files, either directly when adding a file to the course, after adding a file to the course or later in the settings of the OER plugin.
Adding the licence when adding a file to the course
- Activate the editing mode in your TeachCenter course and add an Activity or Resource in the desired section. Select File.
- Name the file. In the Select Files section, click on the plus icon to open the file picker.
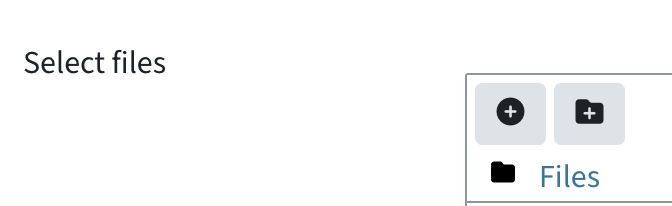
- Choose a file from your computer. Define the author and licence in the upload window.
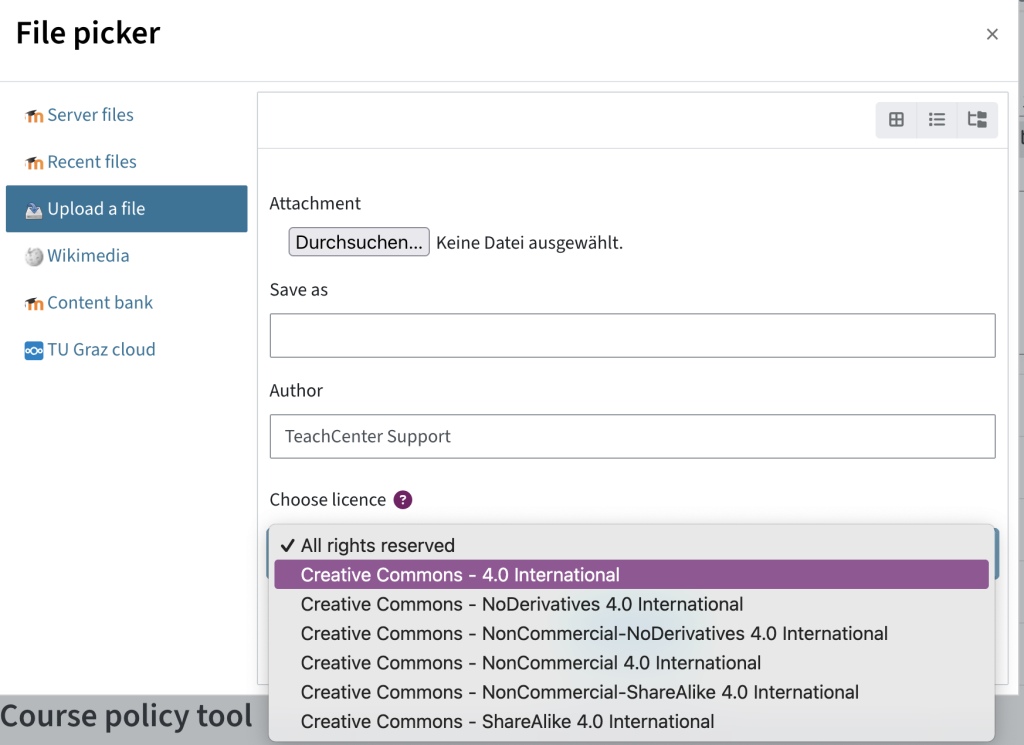
- Click Save and go to the course.
Editing a licence after a file has been added
- Click on the three dots > Edit settings next to the file to open the activity settings.

- In the Select Files section, click on the file. You can change the author and licence in the window that opens.
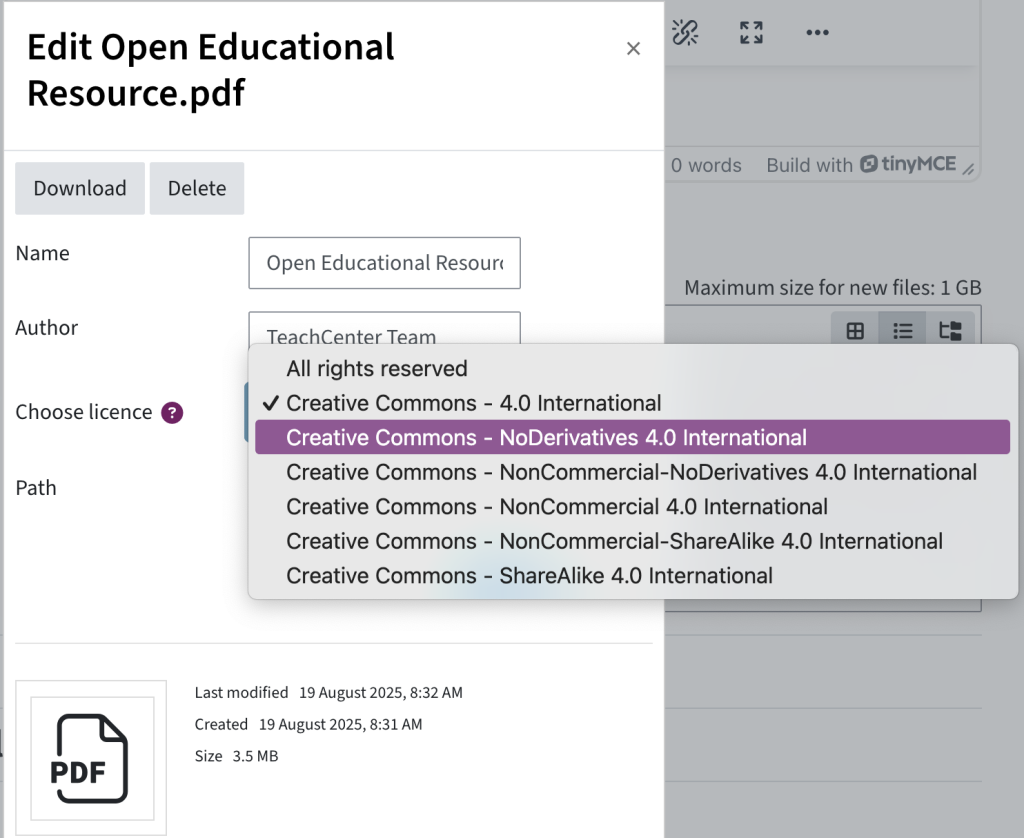
Setting the licence directly in the OER plugin
It is also possible to set the licence directly in the OER plugin shortly before publishing the file.
The licence of TUbe videos also has to be set directly in the OER plugin.
See also Manage file metadata.
Making the licence visible to students
The licence information is not visible to students by default. To inform students about the licences of your documents:
- Insert the licence information directly into the file, e.g. in the footer. Keep in mind the TASL rule (external site) for correct licensing information for OER.
- Add the licence information to the description of the file and have the activity shown on the course page.
Overview of the OER plugin
Once you are registered as an OER-certified teacher, you can use the plugin in TeachCenter via the main menu: More – OER.
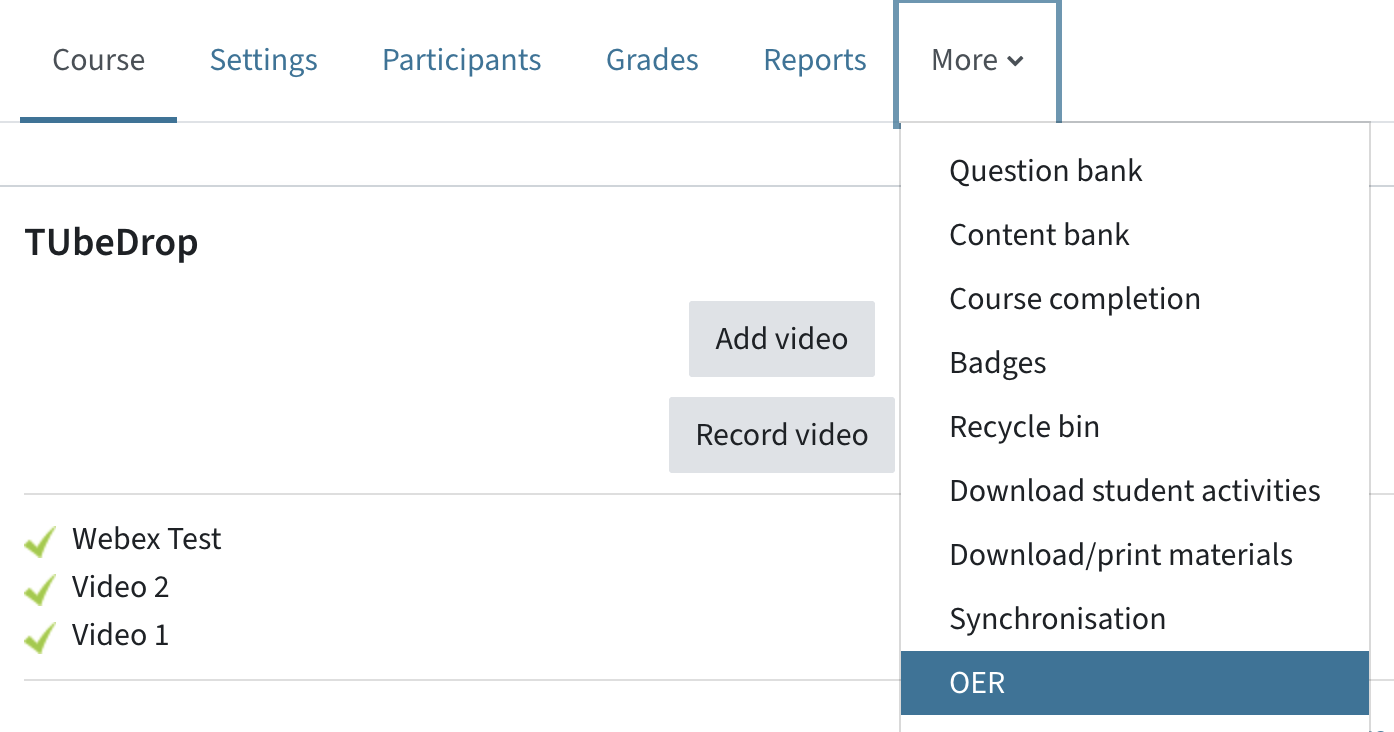
All OERs that are set to „release“ in the TeachCenter will be uploaded to a library repository (OERhub.at) (external site) at regular intervals. The date of the next upload can be seen directly in the plugin. This makes it easier for other teachers to find your OER. You can also search other teachers‘ files on OERhub.at.

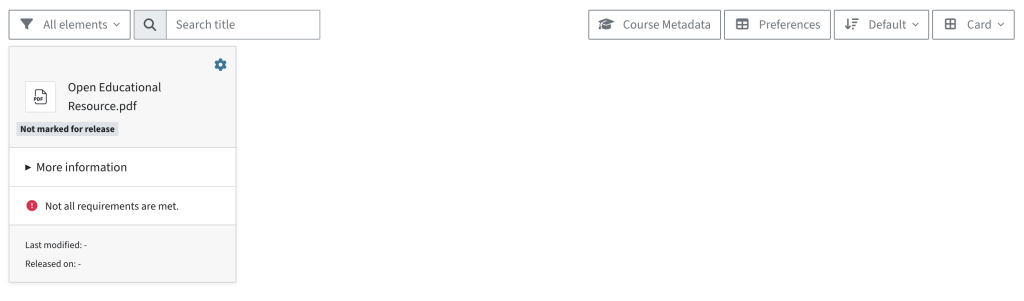
All files and TUbe videos in your TeachCenter course are listed in the plugin as a list or on cards. You can see at a glance whether all the necessary information for release has been added and whether the file has already been flagged for release or has already been published.
Manage file metadata and release files
Some metadata is automatically collected, e.g. file names, course metadata and licences.
If the message Not all requirements for release are met is displayed on the file tile, this means that mandatory metadata is still missing. Click on the gear icon and complete at least the missing mandatory fields (file name, author, licence, context).
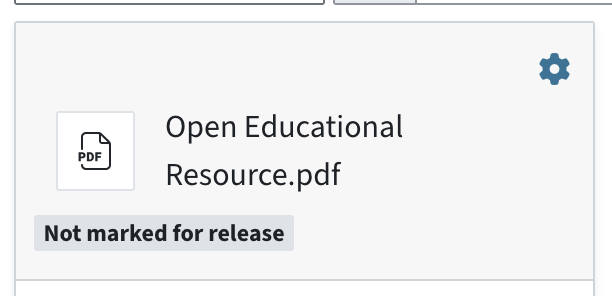
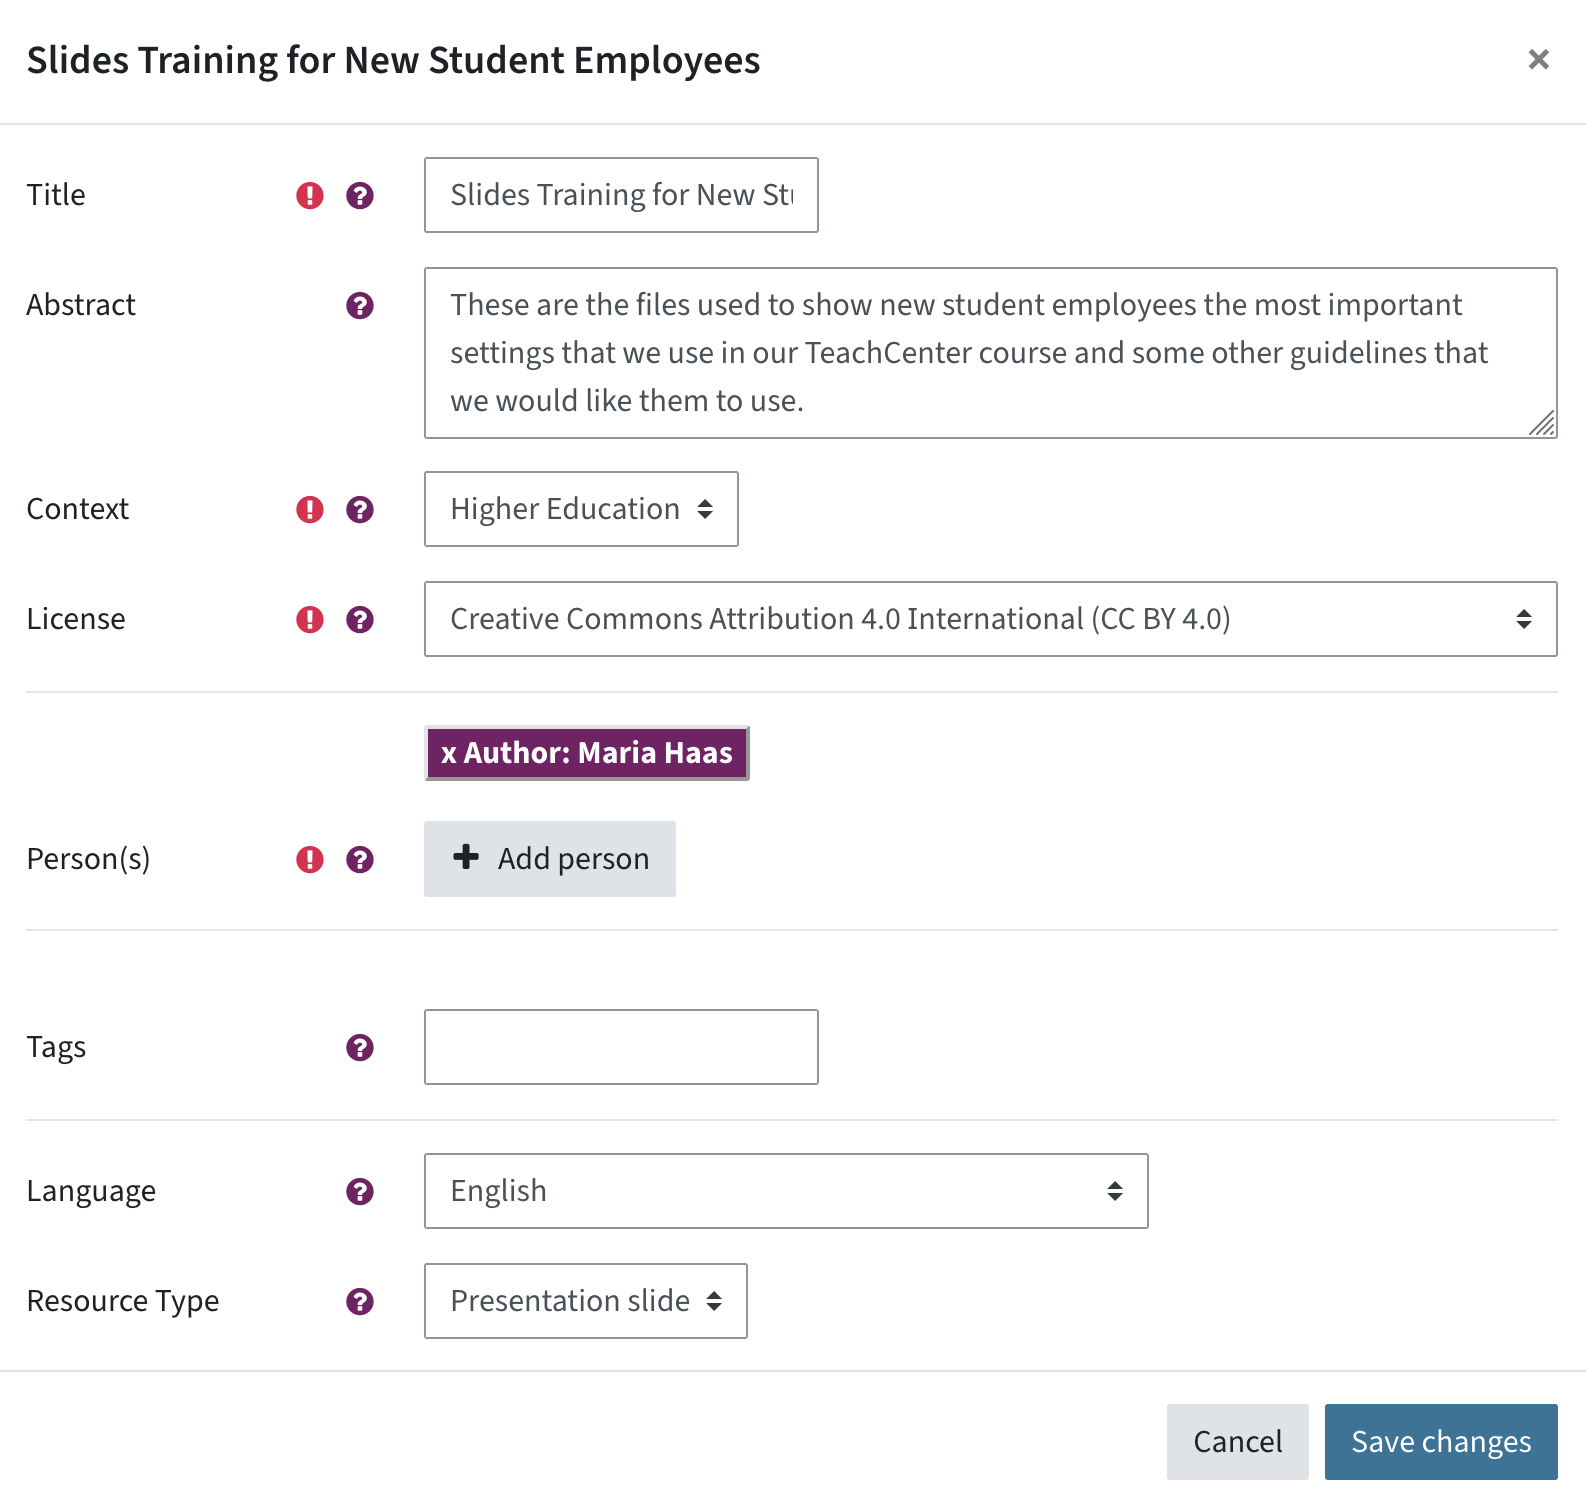
By ticking Marked for release, the file will be added to the library catalogue on the date of the next upload. You can also ignore files if they are not to be published.

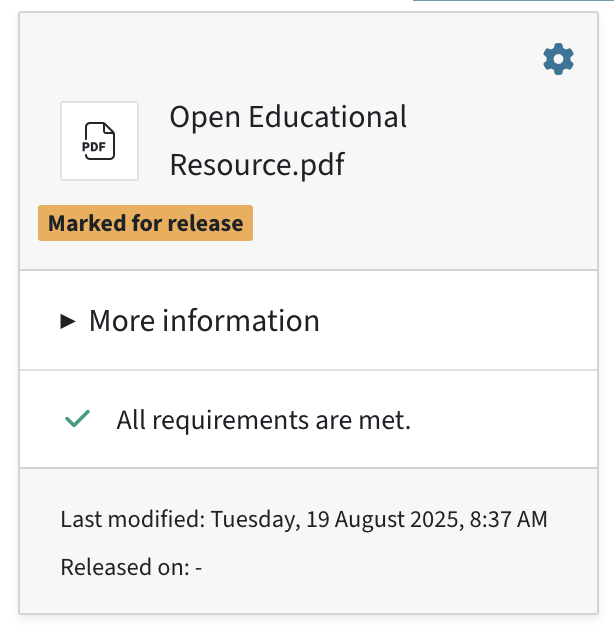
When all requirements for the release are met and the file has been marked for release, you will also see this information on the file tile. The file is then automatically published on the date of the upload.
Settig default values and course metadata
If you often publish OER with similar metadata (e.g. always the same subject or licence), you also have the option of defining a default setting that is automatically applied to all files. To do this, click on Preferences directly in the OER plug-in at the top right.
A menu opens in which you can define default values that are applied to all new files when they are edited for the first time.
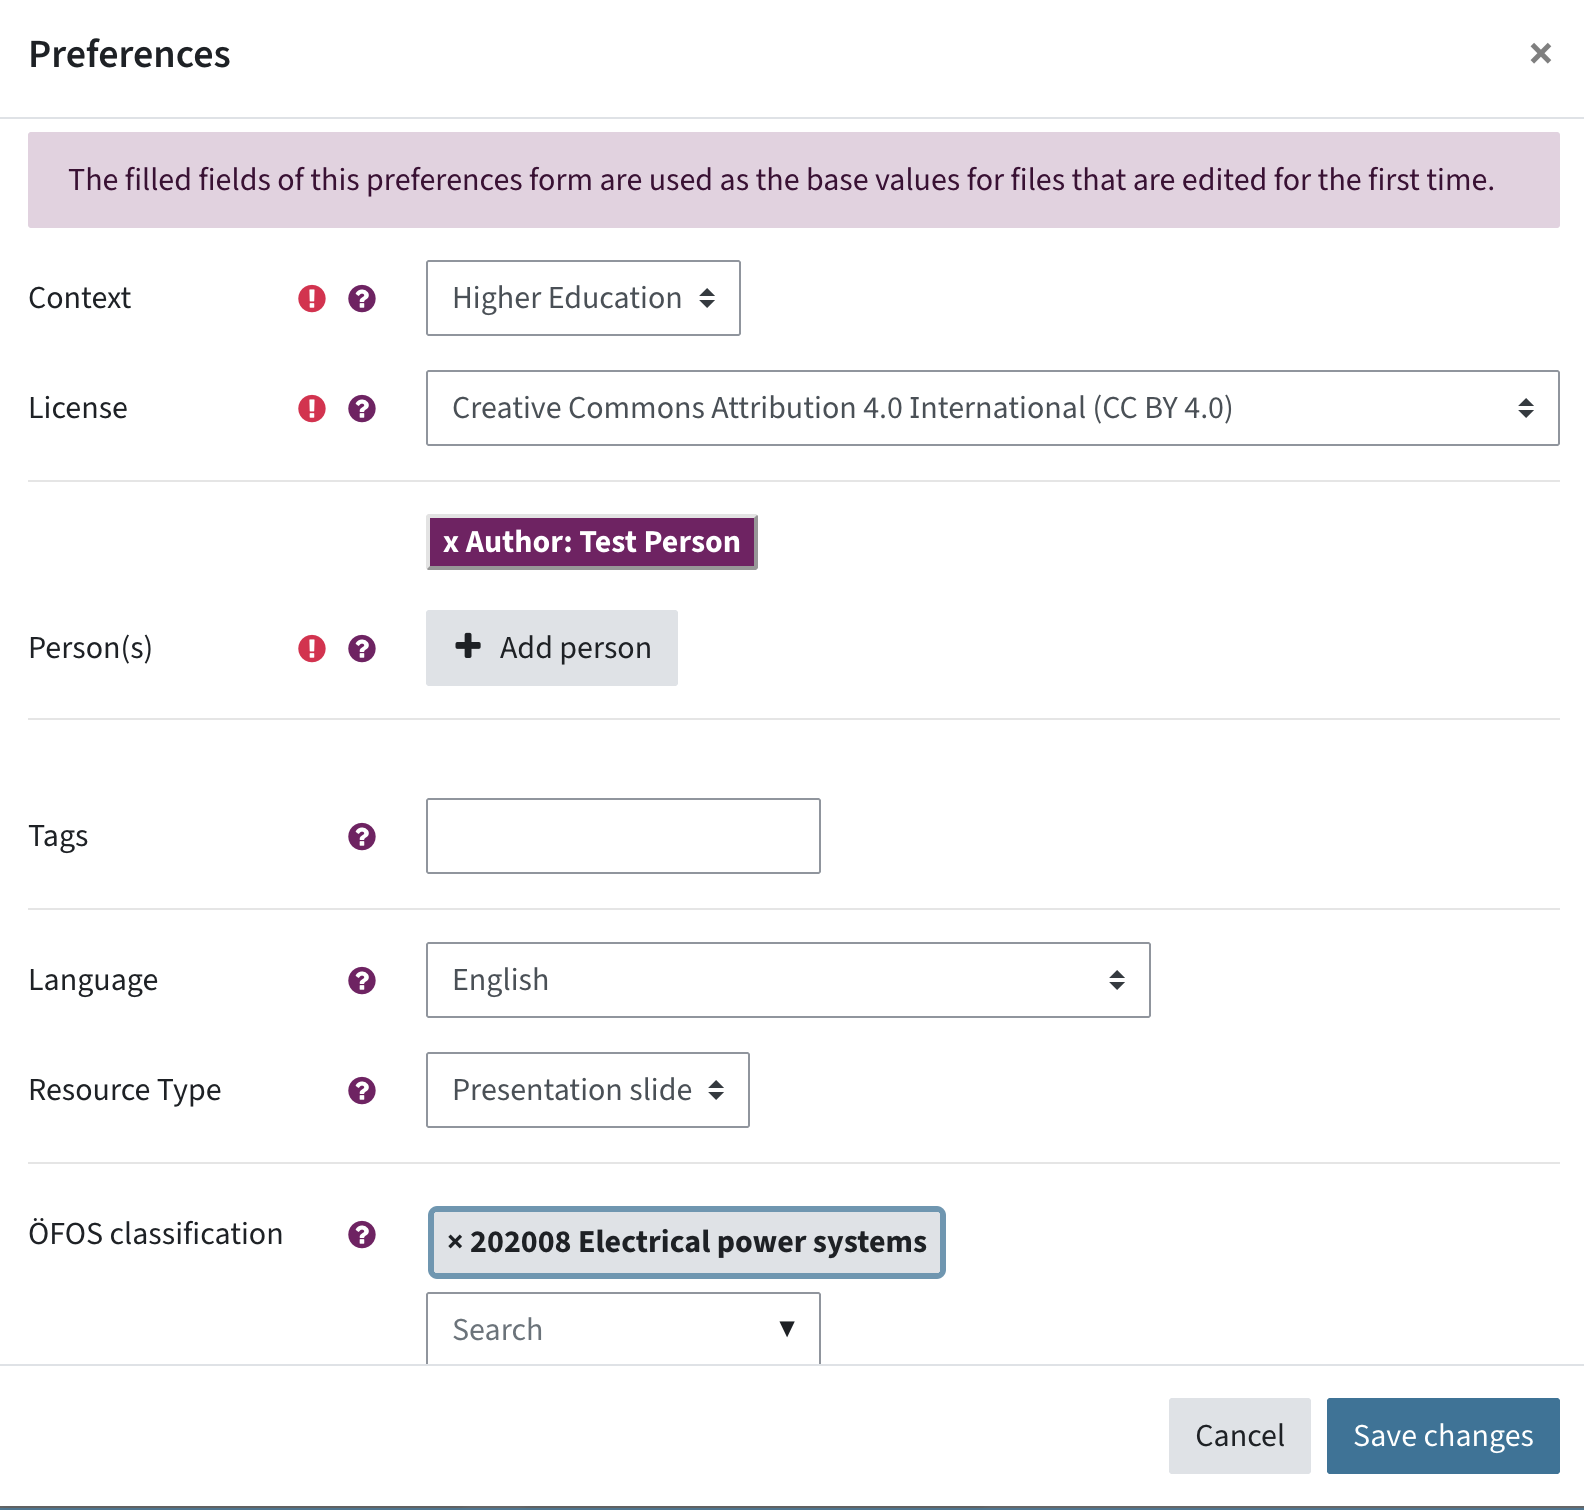
Despite the default settings, you can override the metadata for individual files. If you want to reset a file to its default settings, you can also do this with the Reset button at the bottom.
Each file also has course metadata, i.e. information about the course(s) in which this file is used.
By clicking on the Course Metadata button, you can see in which course(s) the file is used. Some metadata are taken automatically from TUGRAZonline. If you are not satisfied with these, you can also overwrite the course metadata (e.g. add a description of the contents and learning objectives).
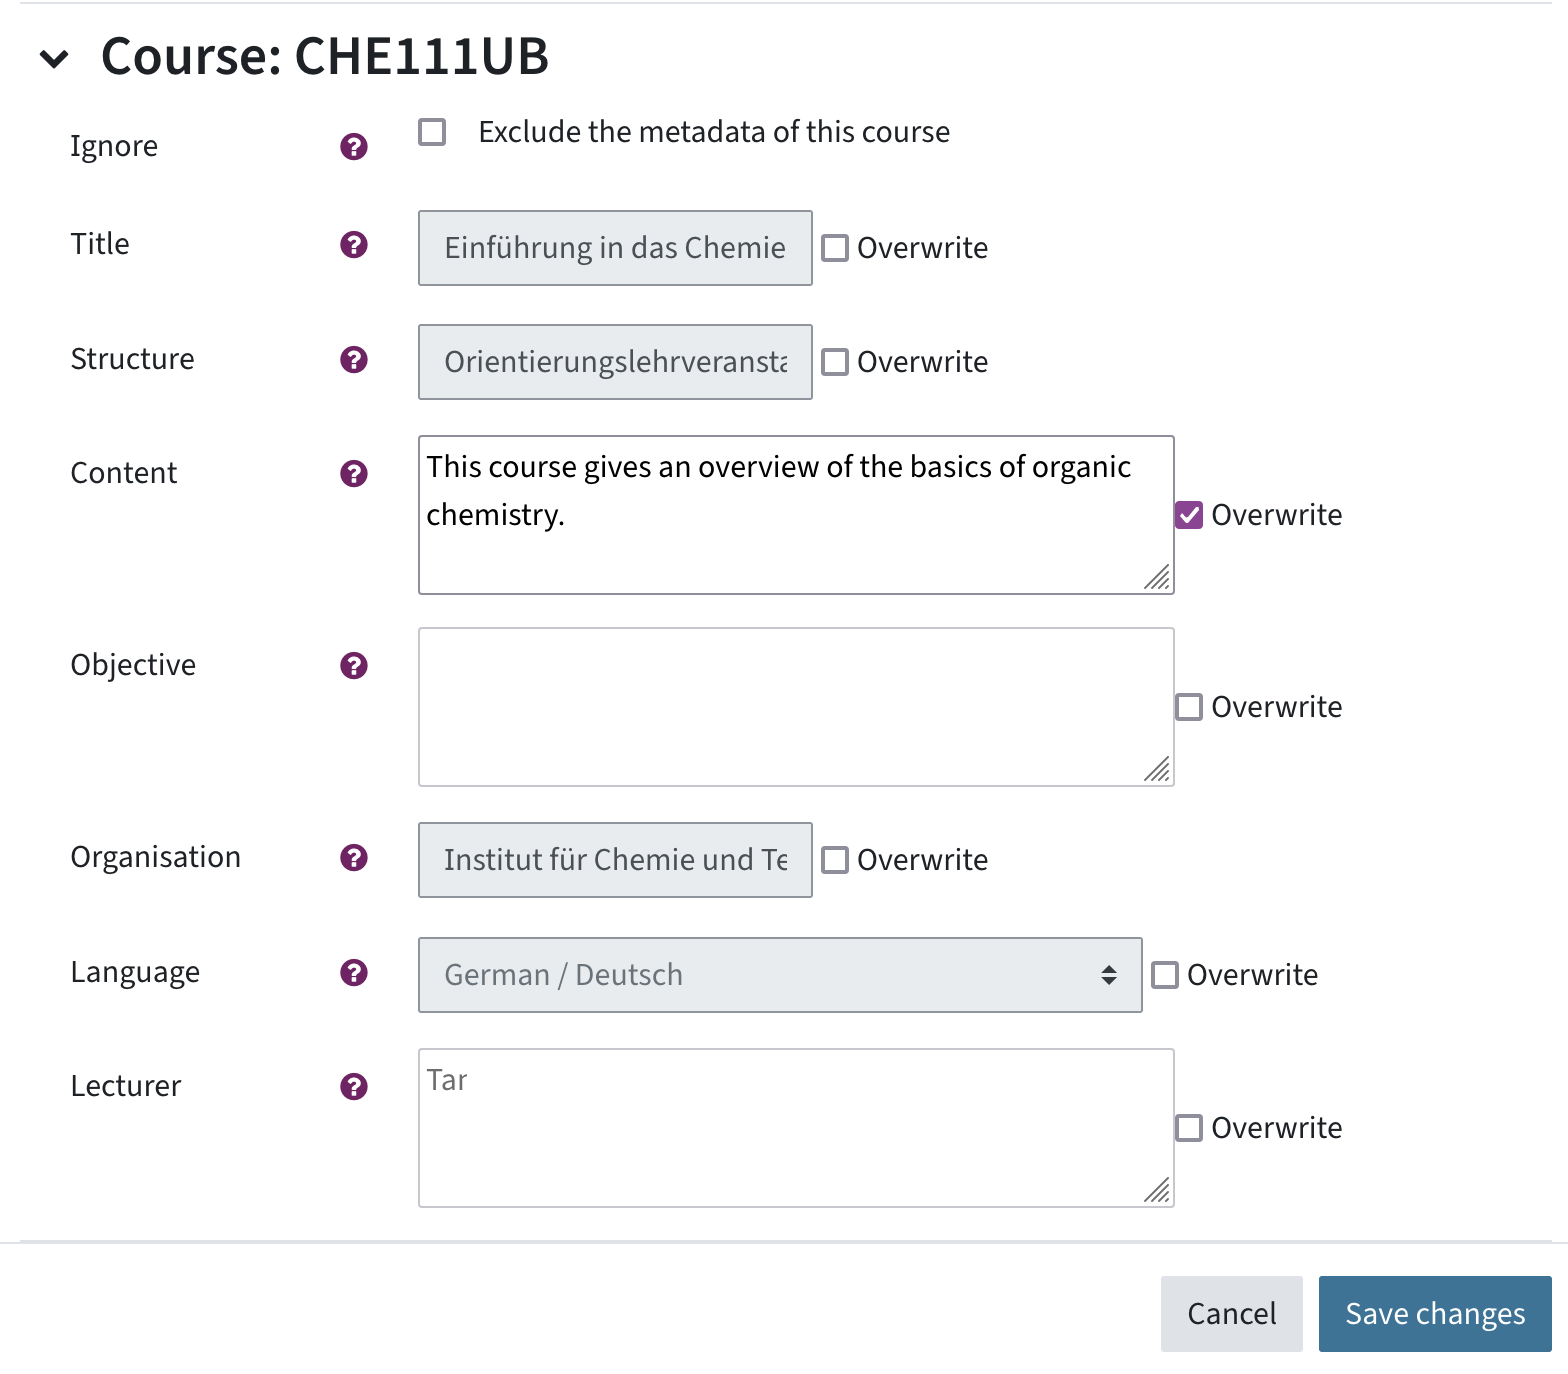
You can also exclude the metadata of a course by ticking the corresponding box. This means that this course information will not be added to the file when uploading.
Help & contact
If something does not work as described, get in touch – we will look into it.