Using a video conferencing system in teaching
Please use the room calendar in TUGRAZonline to book the rooms with a VCS if you want to use them.
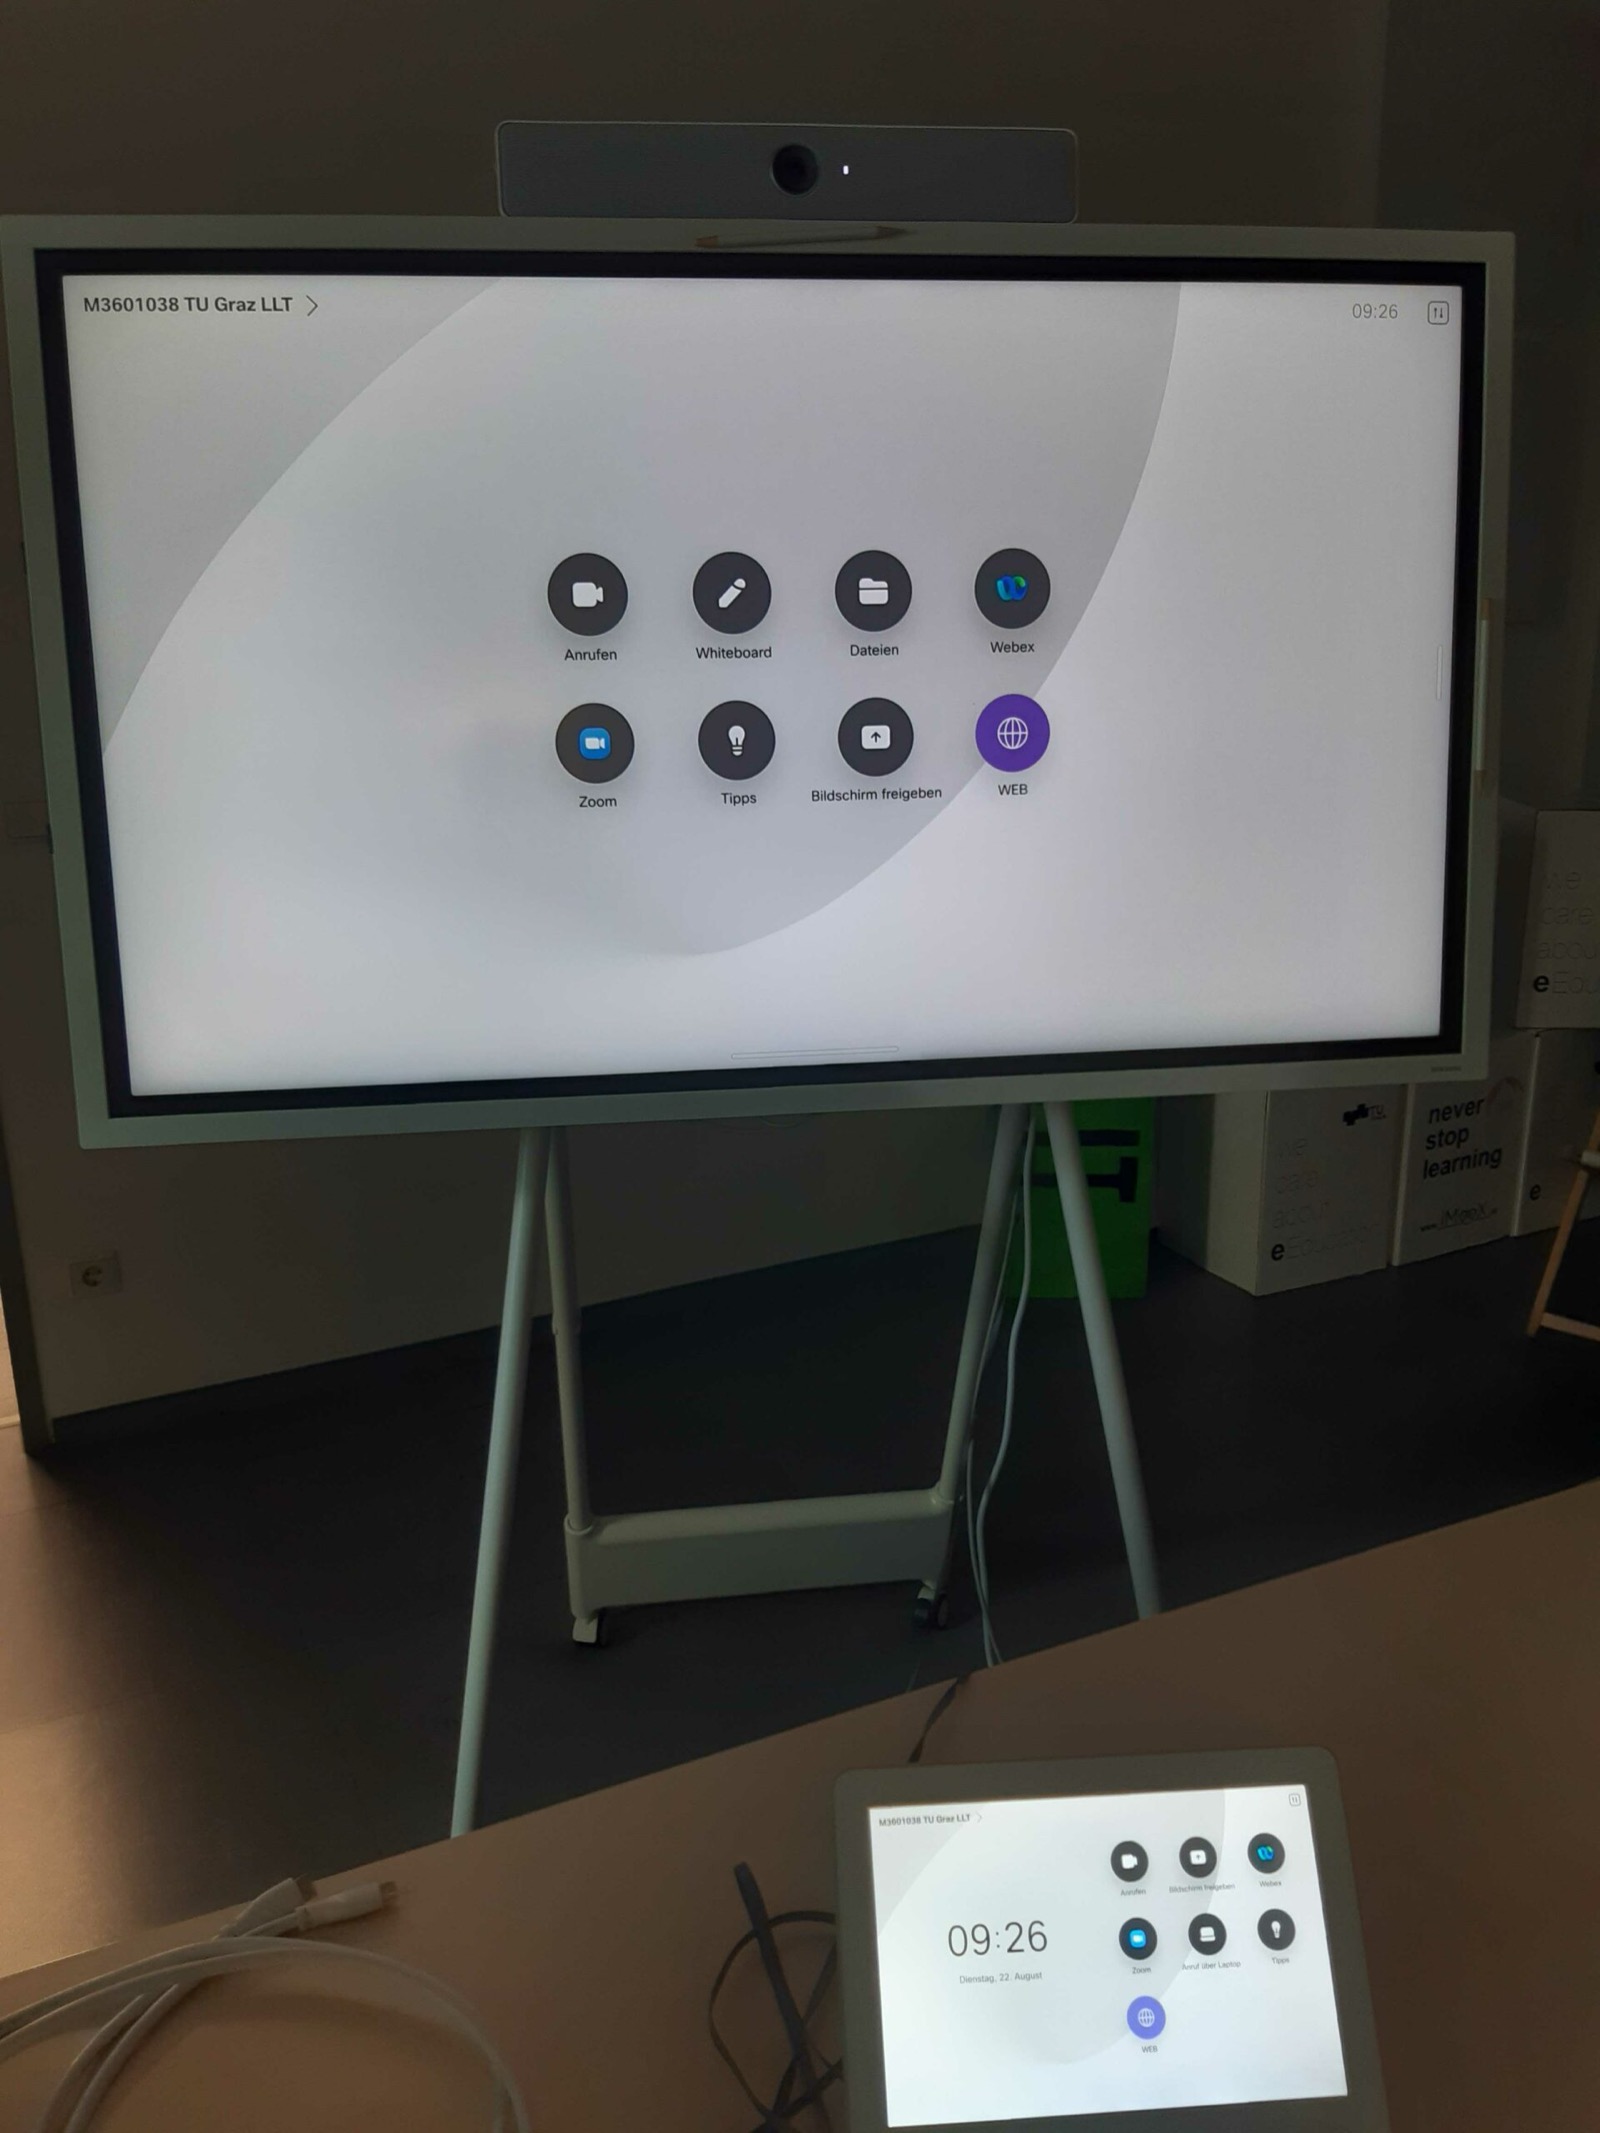
Video conferencing system with large screen and touch panel
Grundfunktionen der VKA
Turning on the VCS
The video conferencing system should be on all the time, but will go into standby mode after about 15 minutes. Touch the Samsung Flip Touch screen or its touch panel to ‚wake up‘ the VCS.
If you have opened the Webex app on your device, the VCS should also automatically detect your device via ultrasound. A personal welcome screen will appear.
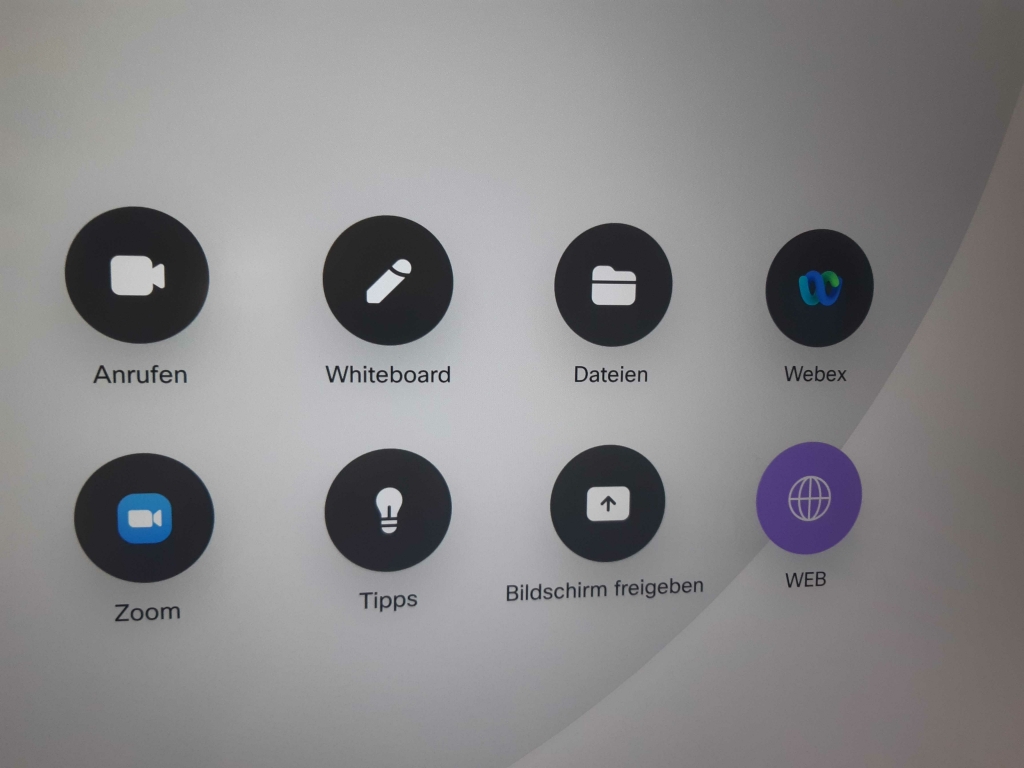
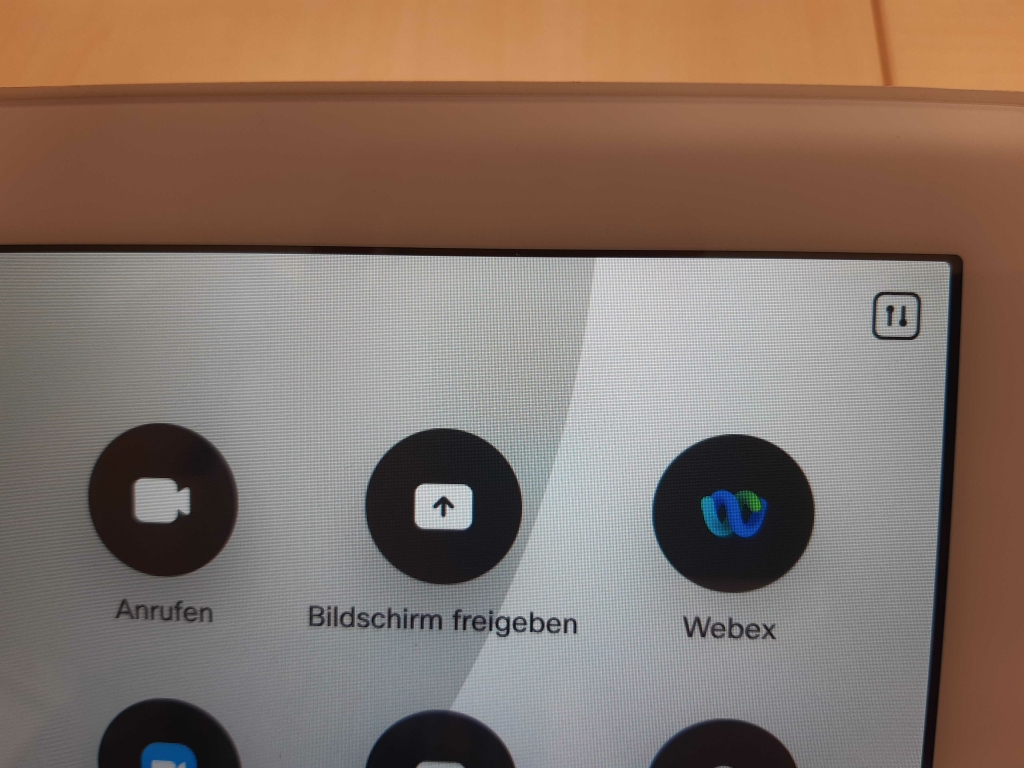
The home screen on the large display looks like this or similar (depending on the software version):
The touch panel looks like this or similar:
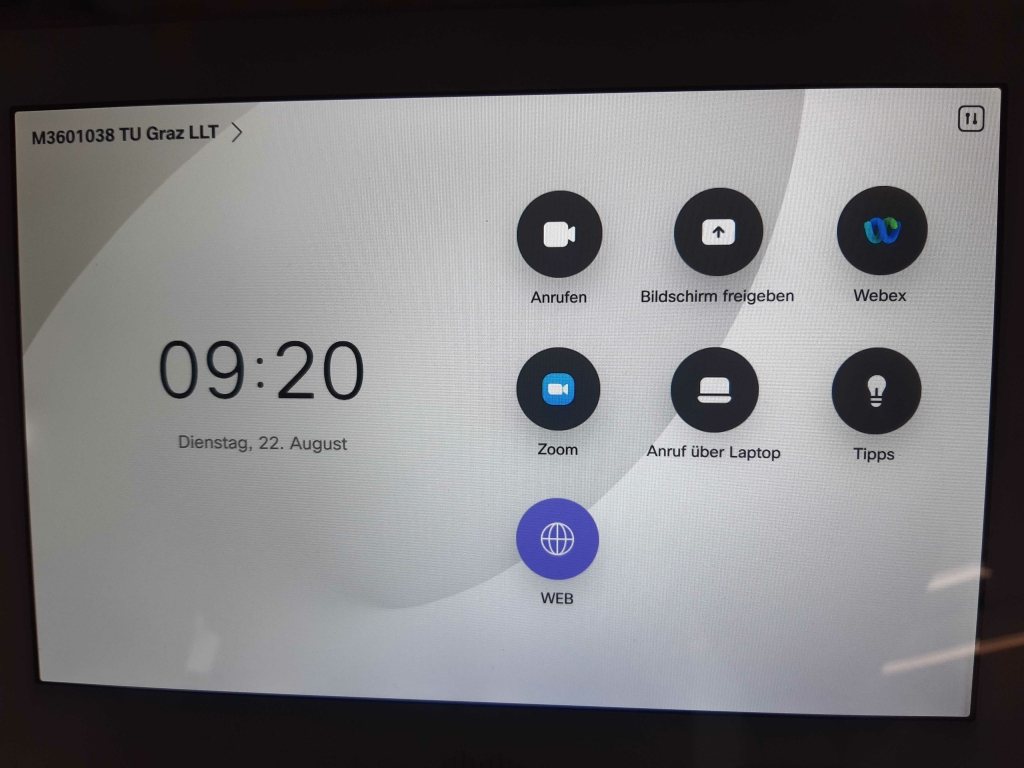
Please note that the language settings might be locked and the VCS software is in German as in these screenshots.
Connecting to the VCS
Option 1: starting or accessing a meeting only via the system, without connecting a computer
You can join an meeting via the VCS or start a meeting directly via the VCS without connecting a computer. If you only join a meeting via the VCS, fewer features are available (e.g. no chat).
- Tap Webex on the touch monitor or touch panel.
- Enter the conference number or search for a person’s personal room (user name).
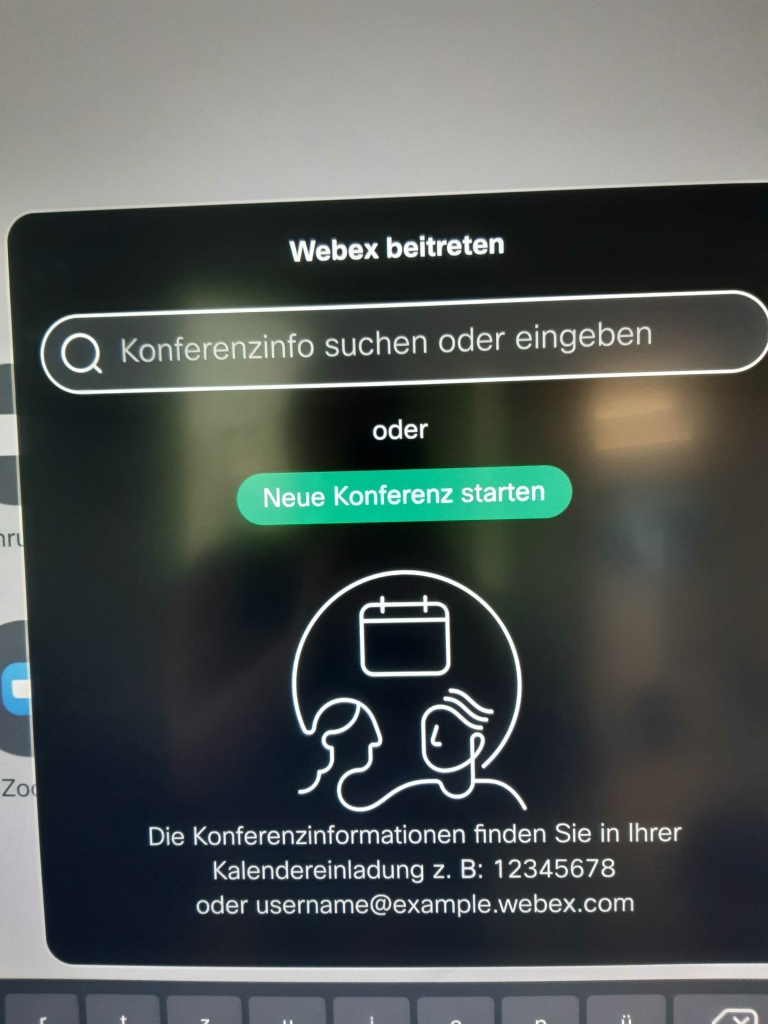
- Click Join.
If you tap on Call and search for a person there, you can also call the person directly via Webex (without a meeting room). This option is not suitable for teaching events.
Option 2: connecting to the VCS via Webex (starting a meeting on your computer)
You can also start a meeting on your computer and then connect to the VCS.
- Start the meeting in Webex as usual.
- In the preview, select Connect to a video conferencing system.

- If you are near the video conferencing system with your laptop, it is already detected and selected automatically.
- If the device is not found automatically, look for the system in the list or search for the device name (usually the room name).
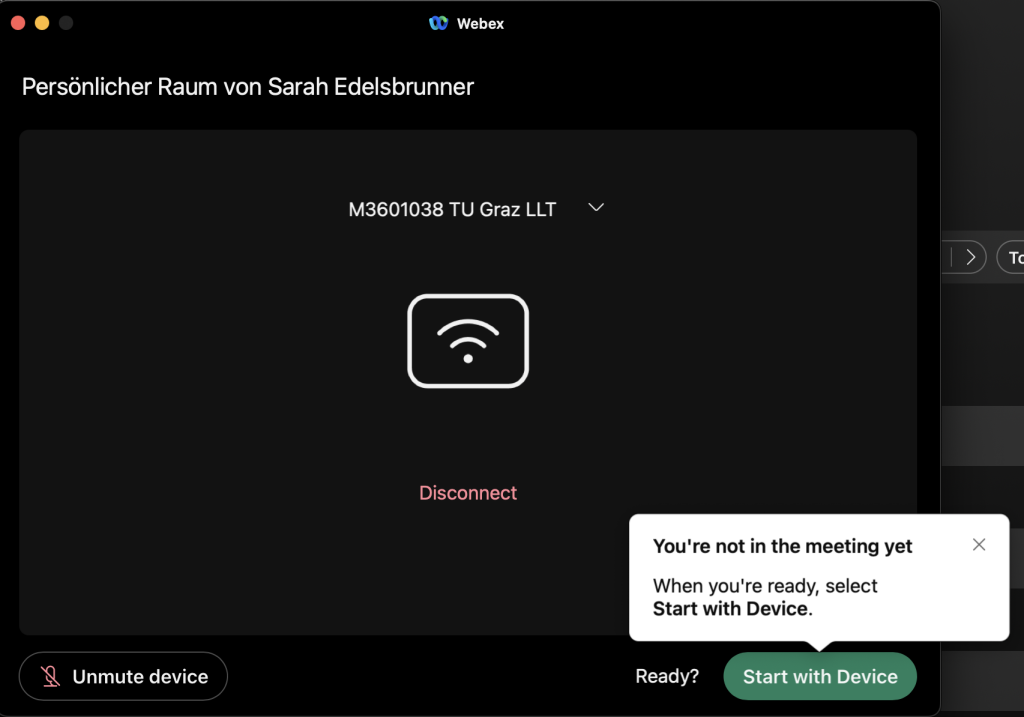
- Click Start with device. The VCS appears like any other participant. You are now using the VCS for a meeting and can use all the features either via your computer or via the touch panel.
Option 3: connecting to the VCS via Webex, only for screensharing (also possible without an ongoing meeting)
This option is suitable for face-to-face classes where you would like to share files or apps from your computer without an online meeting.
- Open Webex.
- At the top right, click Connect to a device. Look for the VCS (usually the room name).
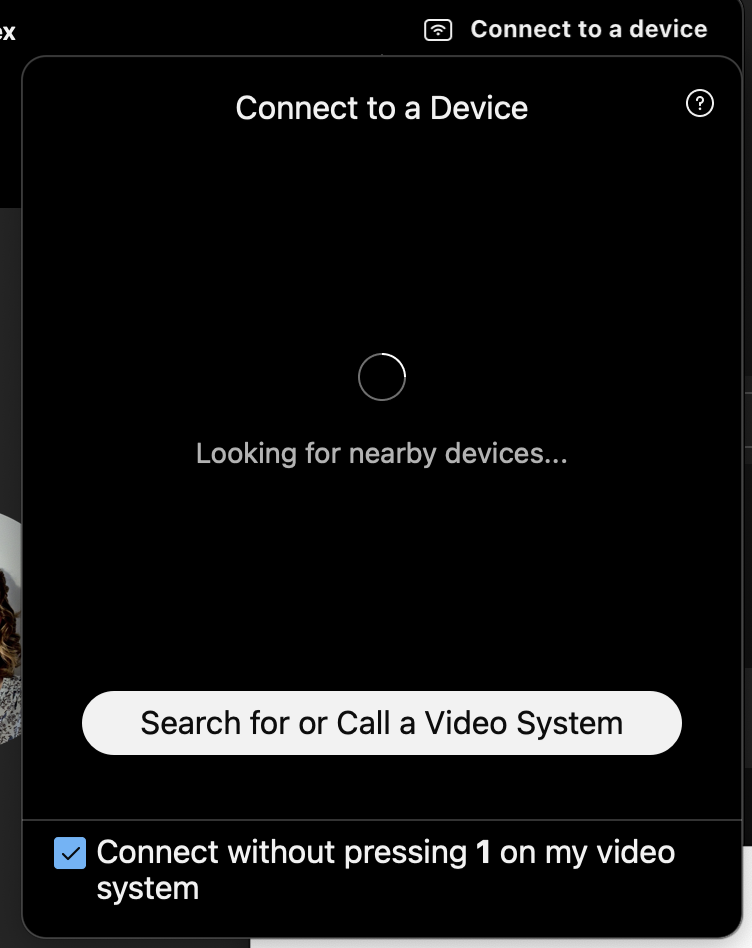
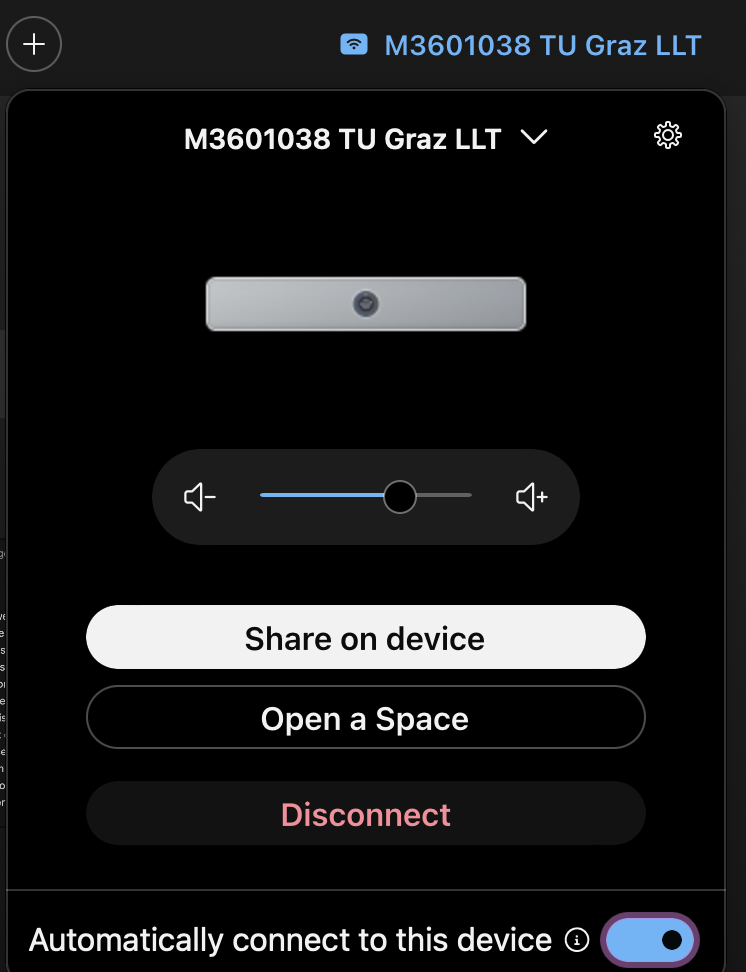
- You might need to confirm that it is you by entering a four-digit code that is shown on the VCS screen.
- Your computer is now connected to the VCS and you can use the same menu to share apps and files and annotate them.
Sharing your screen on the VCS
Option 1: during a Webex meeting
The simplest option is to share your screen during a meeting, when your computer is already connected to the VCS. Just use the Share feature in Webex like during any other online meeting.
Option 2: via Webex, with or without online meeting
This feature can be used during a video conference, but also during a face-to-face class, if you want to show apps or files on a larger screen. Your computer needs to be connected to the VCS as described above.
To share any app or programme (e.g. a presentation):
- When you are connected to the device, click Share on Device in the top right corner.
- Choose the app/programme/window you want to share.
- Your computer screen is now shared live on the big screen.
- To pause the sharing, that is to show a permanent image like a snapshot of the current screen, click pause in the sharing menu.
- To stop sharing, click on Stop Sharing in the same menu bar at the top of your computer.

Please note: Playing videos might not work well with this sharing feature.
To share files directly from a Webex Teams space:
Please note that you can also use the above-mentioned Sharing feature and simply select „Webex“ as the programme to share. There is, however, a second option if you directly want to share files from a Webex space:
- In the upper right corner, click Open a Space.
- Es erscheint am großen Bildschirm ein neuer Punkt Dateien. Drücken Sie darauf und wählen Sie eine Datei aus Ihrem Webex-Teams-Bereich aus.
- Sie können den Stift des Bildschirms benutzen, um Anmerkungen zu machen.
- Die annotierten Dokumente können (nur) im Webex-Teams-Bereich gespeichert werden, nicht exportiert werden.
- On the large screen, choose Files. Select a file from one of your Webex spaces.
- Use the pen to take notes, doodles etc. on the big screen.
- When you click save on the large screen, you will be asked to select the Webex space where to save it. These annotated files can only be saved in a Webex space.
Option 3: via HDMI, app or browser
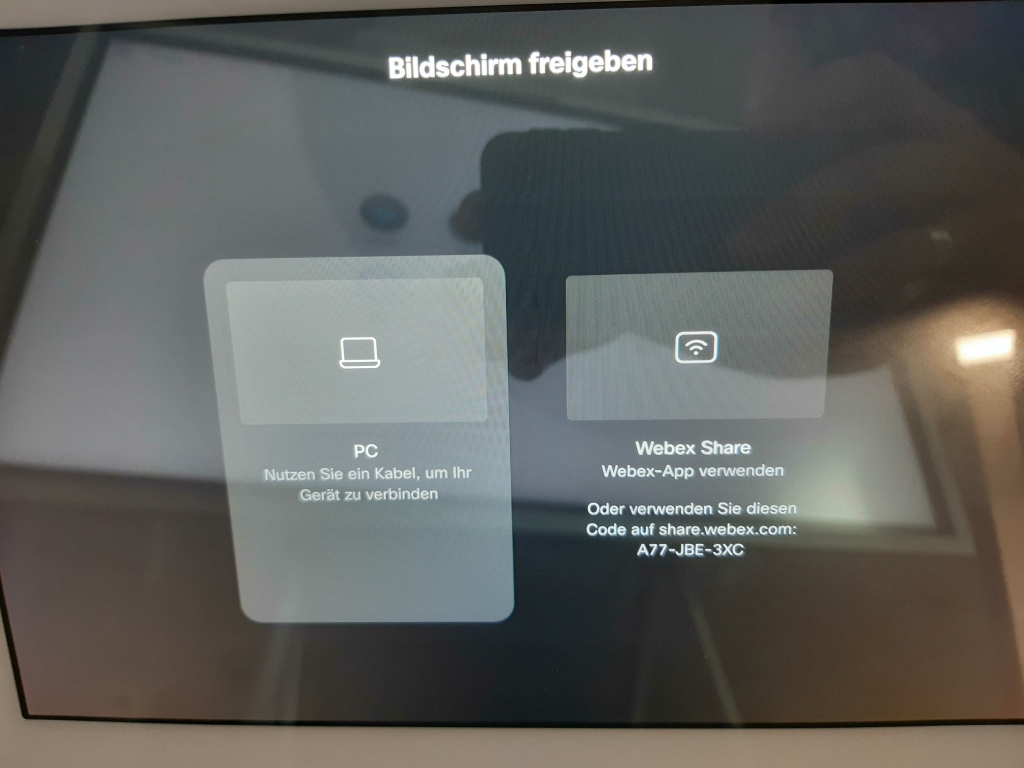
You can also connect a device directly to the VCS via HDMI, the Webex app or by going to devices.webex.com and entering the ID you see on the touch panel.
- Tap Share screen on the Touch Panel.
- Follow the instructions on the panel to share from the Webex app, HDMI or go to the devices.webex.com and enter the code. When you have connected your device, you can share contents.
Using the whiteboard
On the large screen, you can tap on Whiteboard in the menu (if you are not currently in a conference).
If you are connected to a computer and in an online conference, you can click on Share > Whiteboard directly on your computer.
- Use the pen that belongs to the board to write on the whiteboard. You can use different tools.
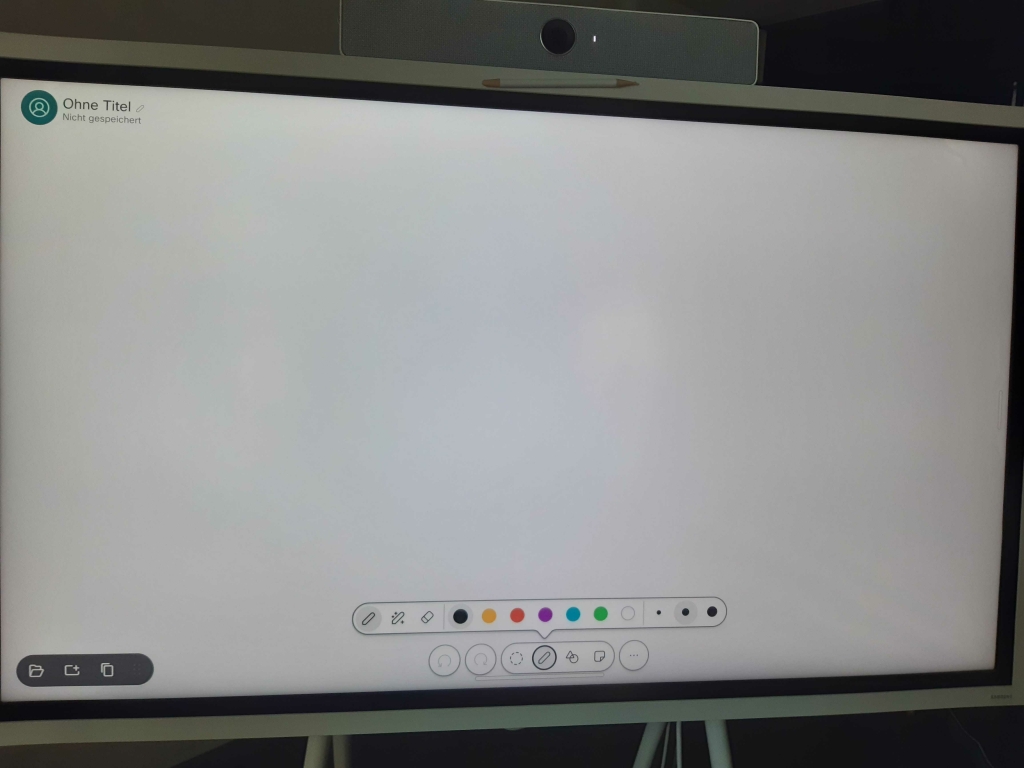
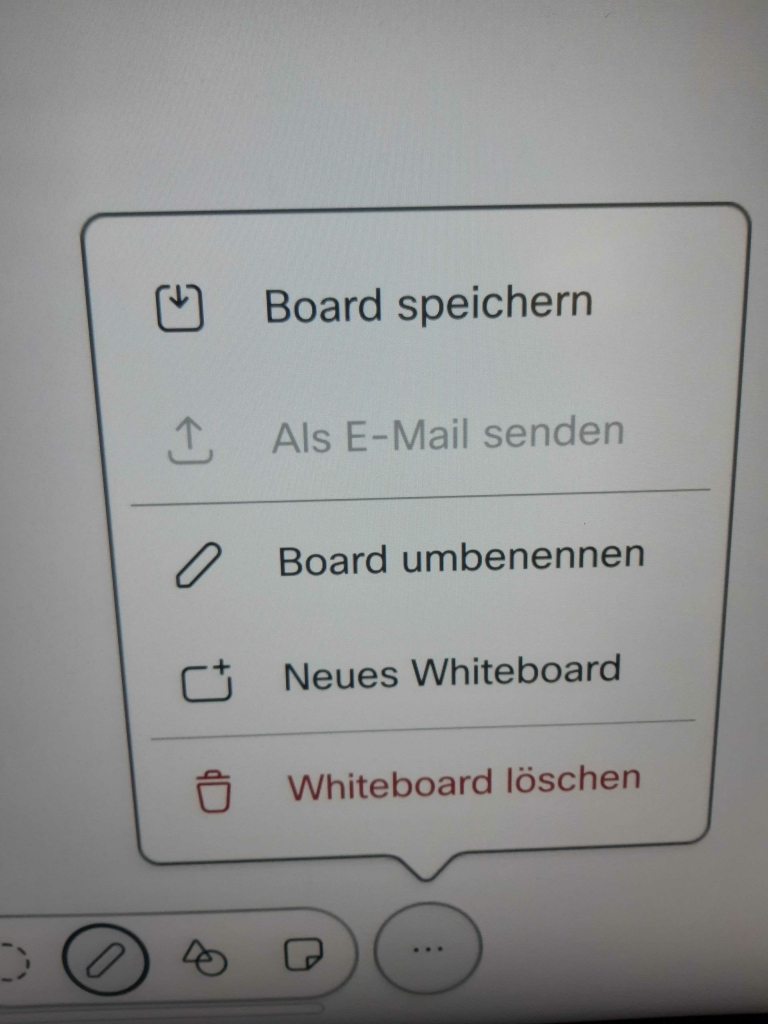
- Whiteboards are saved intermittently on the board but will be deleted after 24 hours if you do not export them.
- Click on the three dots – Save Whiteboard to save it. Please note that whiteboards can only be saved in a Webex space.
Disconnecting from the VCS
If you are using the VCS via a meeting, you can leave the meeting on your computer or by clicking the corresponding button to end the meeting on the large screen or touch panel.
If you are connected to Webex without an online meeting, you have to stop sharing on your device and disconnect from the VCS from the same menu where you started sharing (top-right corner in the Webex app).
During an online meeting
Adjusting the volume
The touch panel has three buttons to turn up/down the volume and to mute the VCS.
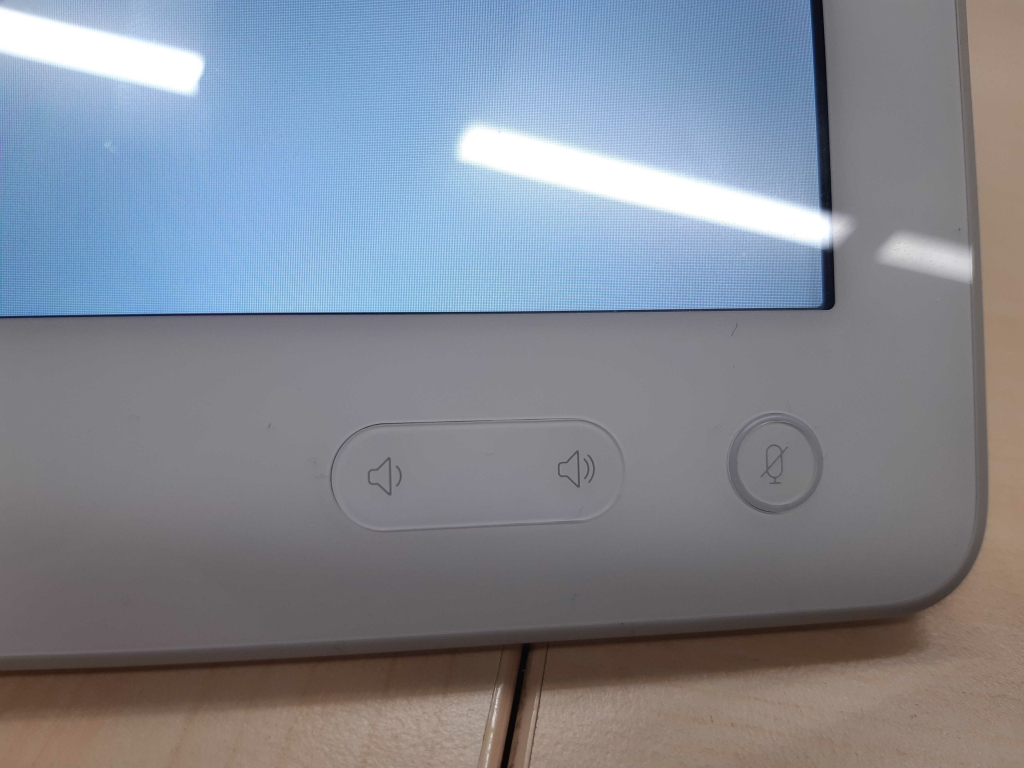
The VCS has a microphone included. If the room does not use external microphones, your own volume will depend on how close you are to the screen.
Adjusting the camera angle
- Before a meeting: Click on the settings icon at the top right of the touch panel. Then go to the Camera Settings. During a meeting: Click on the Camera button in the meeting controls on the touch panel.
- You can choose between different settings. The main ones are: Group, which automatically changes the angle of the camera to include the whole group, or a manual setting, which lets you adjust the camera and then keeps the same focus during the meeting.
- If you click on Self view in the meeting controls, you can drag your own camera picture to a different place on the screen or disable it, e.g. if it covers important contents.
- If you click on Layout in the meeting controls on the touch panel, you can choose the layout of participants (e.g. that the focus is always on the speaker or that all participants are equally sized on the screen)
Seeing the list of participants
During a meeting, you will see all the meeting controls on the touch panel (and also on your computer, if you have started the meeting with your computer and are connected to the device).
To see the participants, click on the Participants button on the touch panel. If you are connected with a computer, you can also see the participant list on your computer.
Recording the meeting
You can start the recording by clicking the Record button on the touch panel, or if you are connected with a computer, you can also start the recording on your computer.
Once you have connected your computer to the video conferencing system, you can start the recording from your computer as usual.
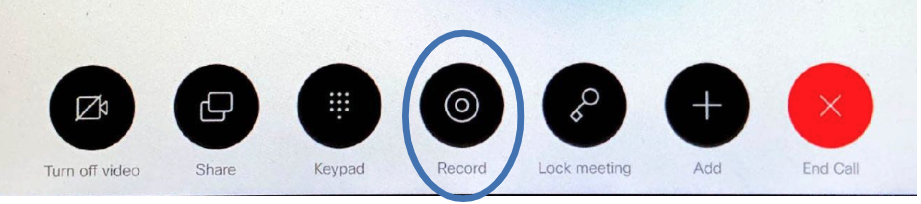
If you are also recording a shared screen with important information, please note that Webex automatically adjusts the image quality to the current connection and the screen might not be perfectly readable.
Using the chat
The chat is not visible on the VCS.
You can only use the chat on your computer, if you are connected to the VCS with a computer.
Further information
Accessing other pages via the VCS
You can also use BigBlueButton on the VCS (although using Webex is recommended), or access pages such as the TU Graz Cloud, TU Graz TeachCenter and TU Graz TUbe directly via the VCS. To do this, press WEB on the touch panel.
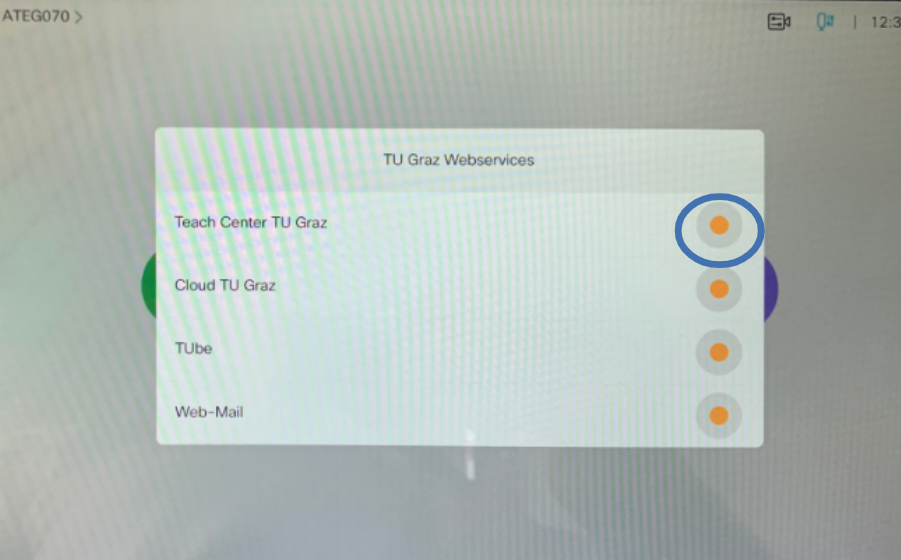
Log in using your TU Graz credentials.
Help & contact
If something does not work as described, get in touch – we will look into it.